
How to Install a Wren Kitchen Like a Pro
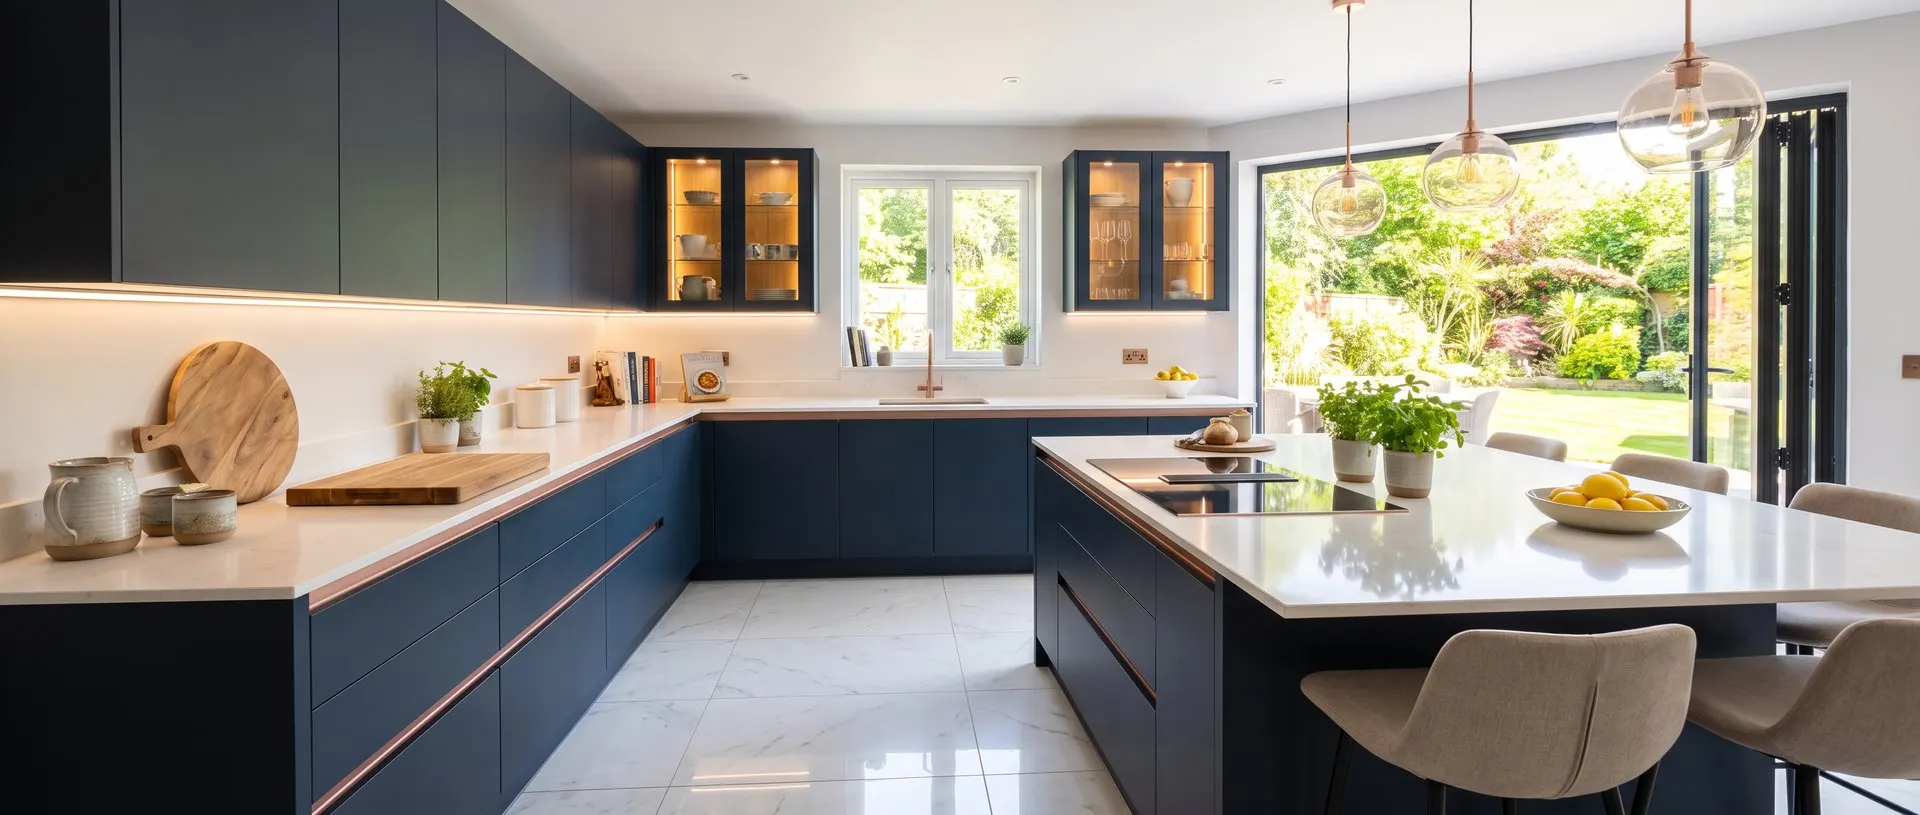
Most “kitchen installation” guides online only show you the bit that photographs well — cabinets going up, a finished shot at the end. That's maybe a third of the actual job. This is the full sequence for a real U-shaped Wren kitchen with an island: reading the plan, checking the delivery, marking out, first fix, plastering, tiling, carcasses, the island build, appliances, worktops, the handleless rail, lighting, and the finishing snag list — including the parts every other guide skips.
Wondering what a kitchen like this actually costs to install?
Answer a few quick questions and get an instant estimate — no obligation.
Tools You'll Need Before You Start
Before any of this makes sense, here's what's actually in a fitter's van for a job like this — not a generic hardware-store list, but the kit used at every stage below. If you don't already own most of it, that's worth factoring into whether this is a DIY job or a professional one.
- Cordless combi drill
- Cordless impact driver
- SDS drill
- Chop saw
- Track saw
- 6ft spirit level
- 2ft spirit level
- Laser level (for setting out initial levels)
- F-clamps / cabinet clamps
- Jigsaw with downcutting blades
- Holesaw set
- Flat bits
- Scribing kit
- Silicone gun
- Multitool
- Phillips PH2 screwdriver
- Long-shaft screwdriver (for wall cabinet hanging brackets)
- 2x foldable saw horses
- Stanley knife
- Adjustable square
- Fixed square
- Mitre adhesive (for joining cornice)
Screws & Fixings Reference
- 30mm x4Joining cabinets together
- 80mm x5Hanging plates (wall cabinet brackets)
- 16mm x4Hinges to the back of doors
- 100mm x5Fixing into drylined (plasterboard) walls
- 7mm brown wall plugsPaired with the above for masonry fixings
Checking Your Tools Before You Trust Them
Before any of the measurements in this guide mean anything, check that the tools taking them are actually accurate — a laser or spirit level that's drifted out of calibration will happily give you a perfectly confident, perfectly wrong datum line, and every cabinet in the room will inherit that error.
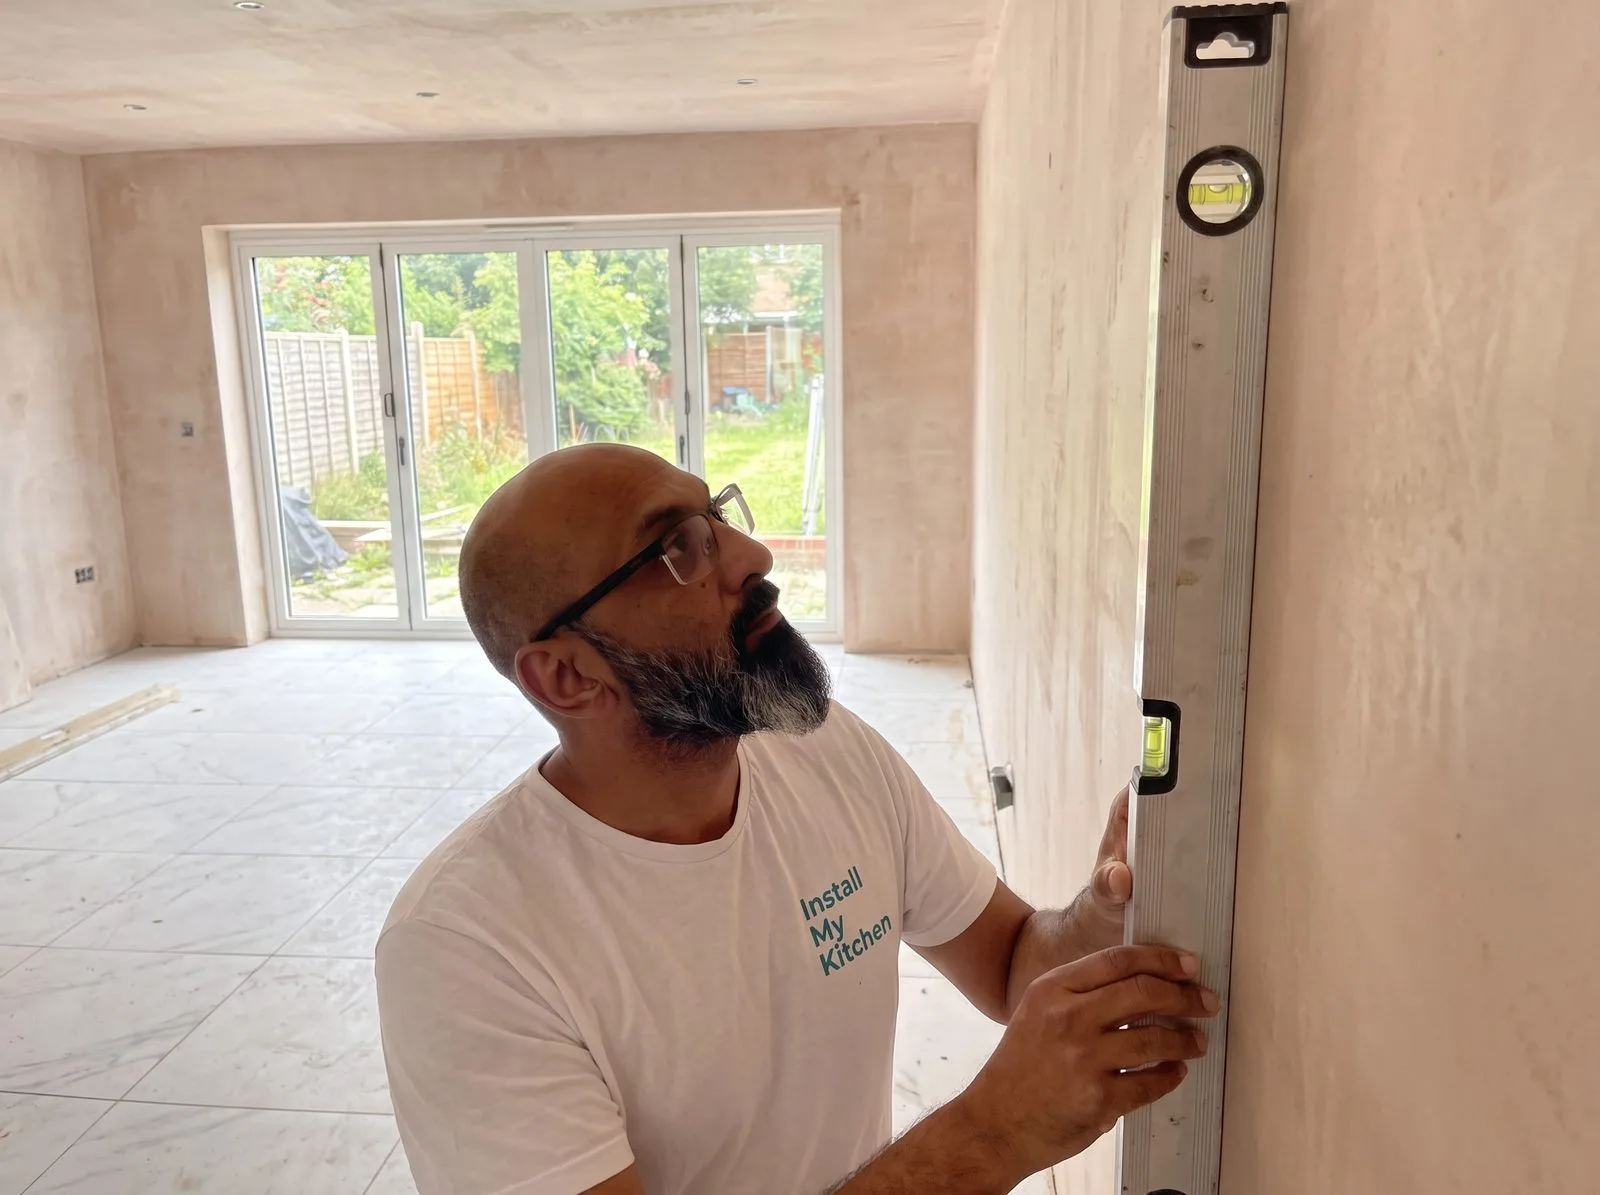
- Spirit level: place it on a flat surface and note exactly where the bubble sits. Flip the level end-for-end on the same spot. The bubble must settle in the identical position — if it doesn't, the level is out and needs replacing, not trusting.
- Laser level: set it up and project a line onto a wall several metres away, and mark it. Rotate the laser 180° and project back onto the same wall. The two lines should coincide; if they've visibly drifted apart, recalibrate or replace the unit before using it for a datum line.
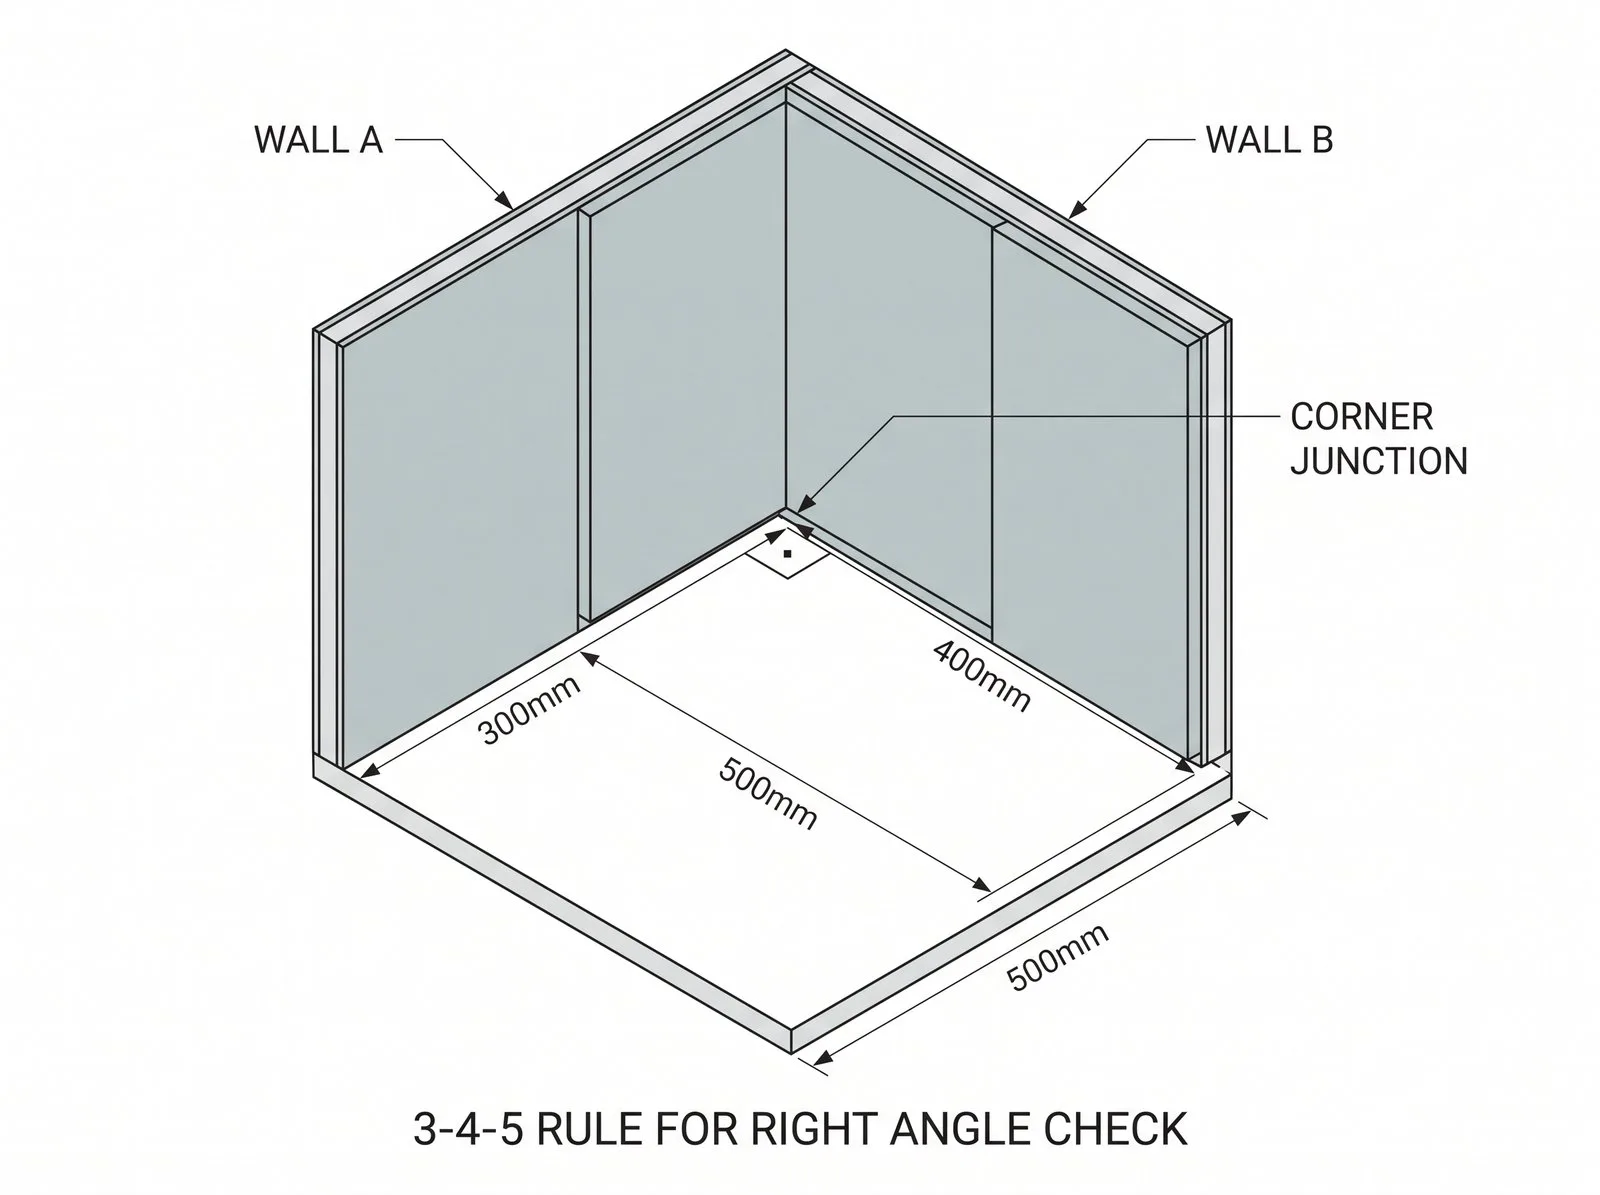
- Squares (fixed or adjustable): check for true 90° using the 3-4-5 method — mark 300mm along one edge and 400mm along the perpendicular edge, and the diagonal between those two points must measure exactly 500mm. Any square that doesn't hold this isn't reliable for corner or carcass work.
This takes ten minutes and costs nothing. Skipping it and discovering a levels problem three cabinets into a run costs considerably more.
Reading Your Kitchen Plan Properly
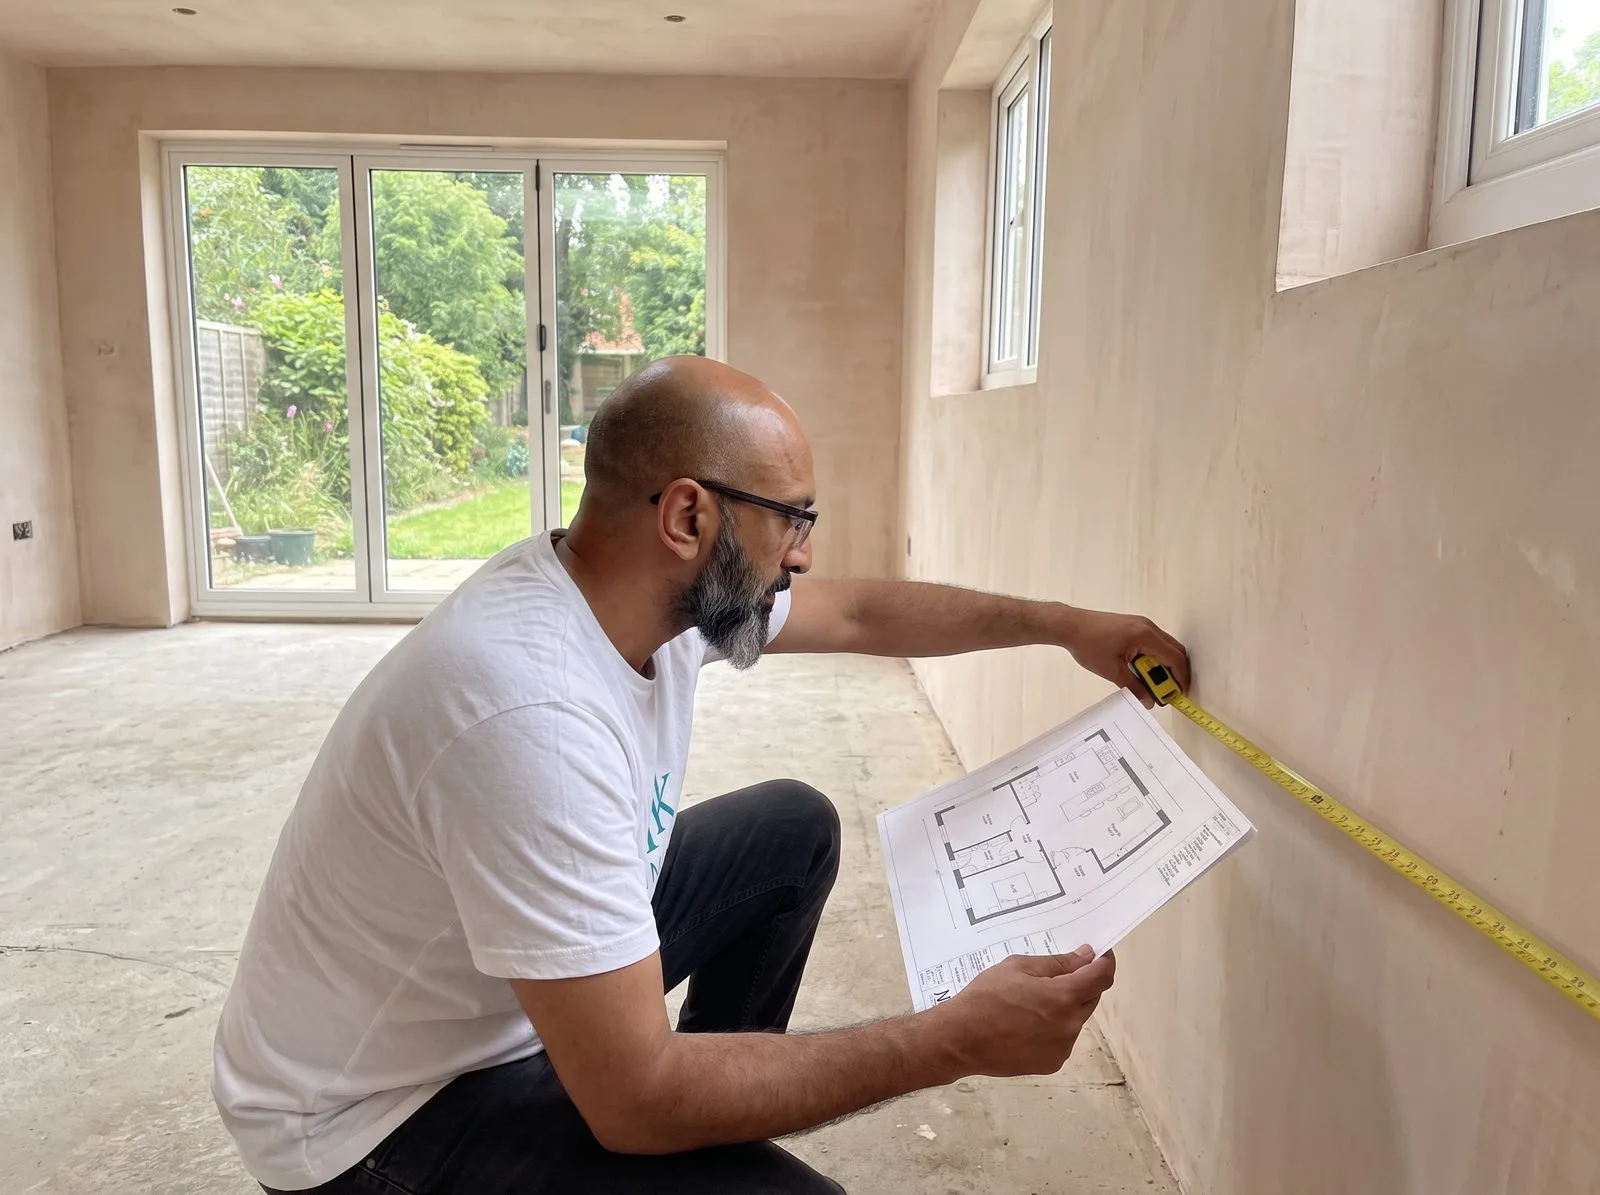
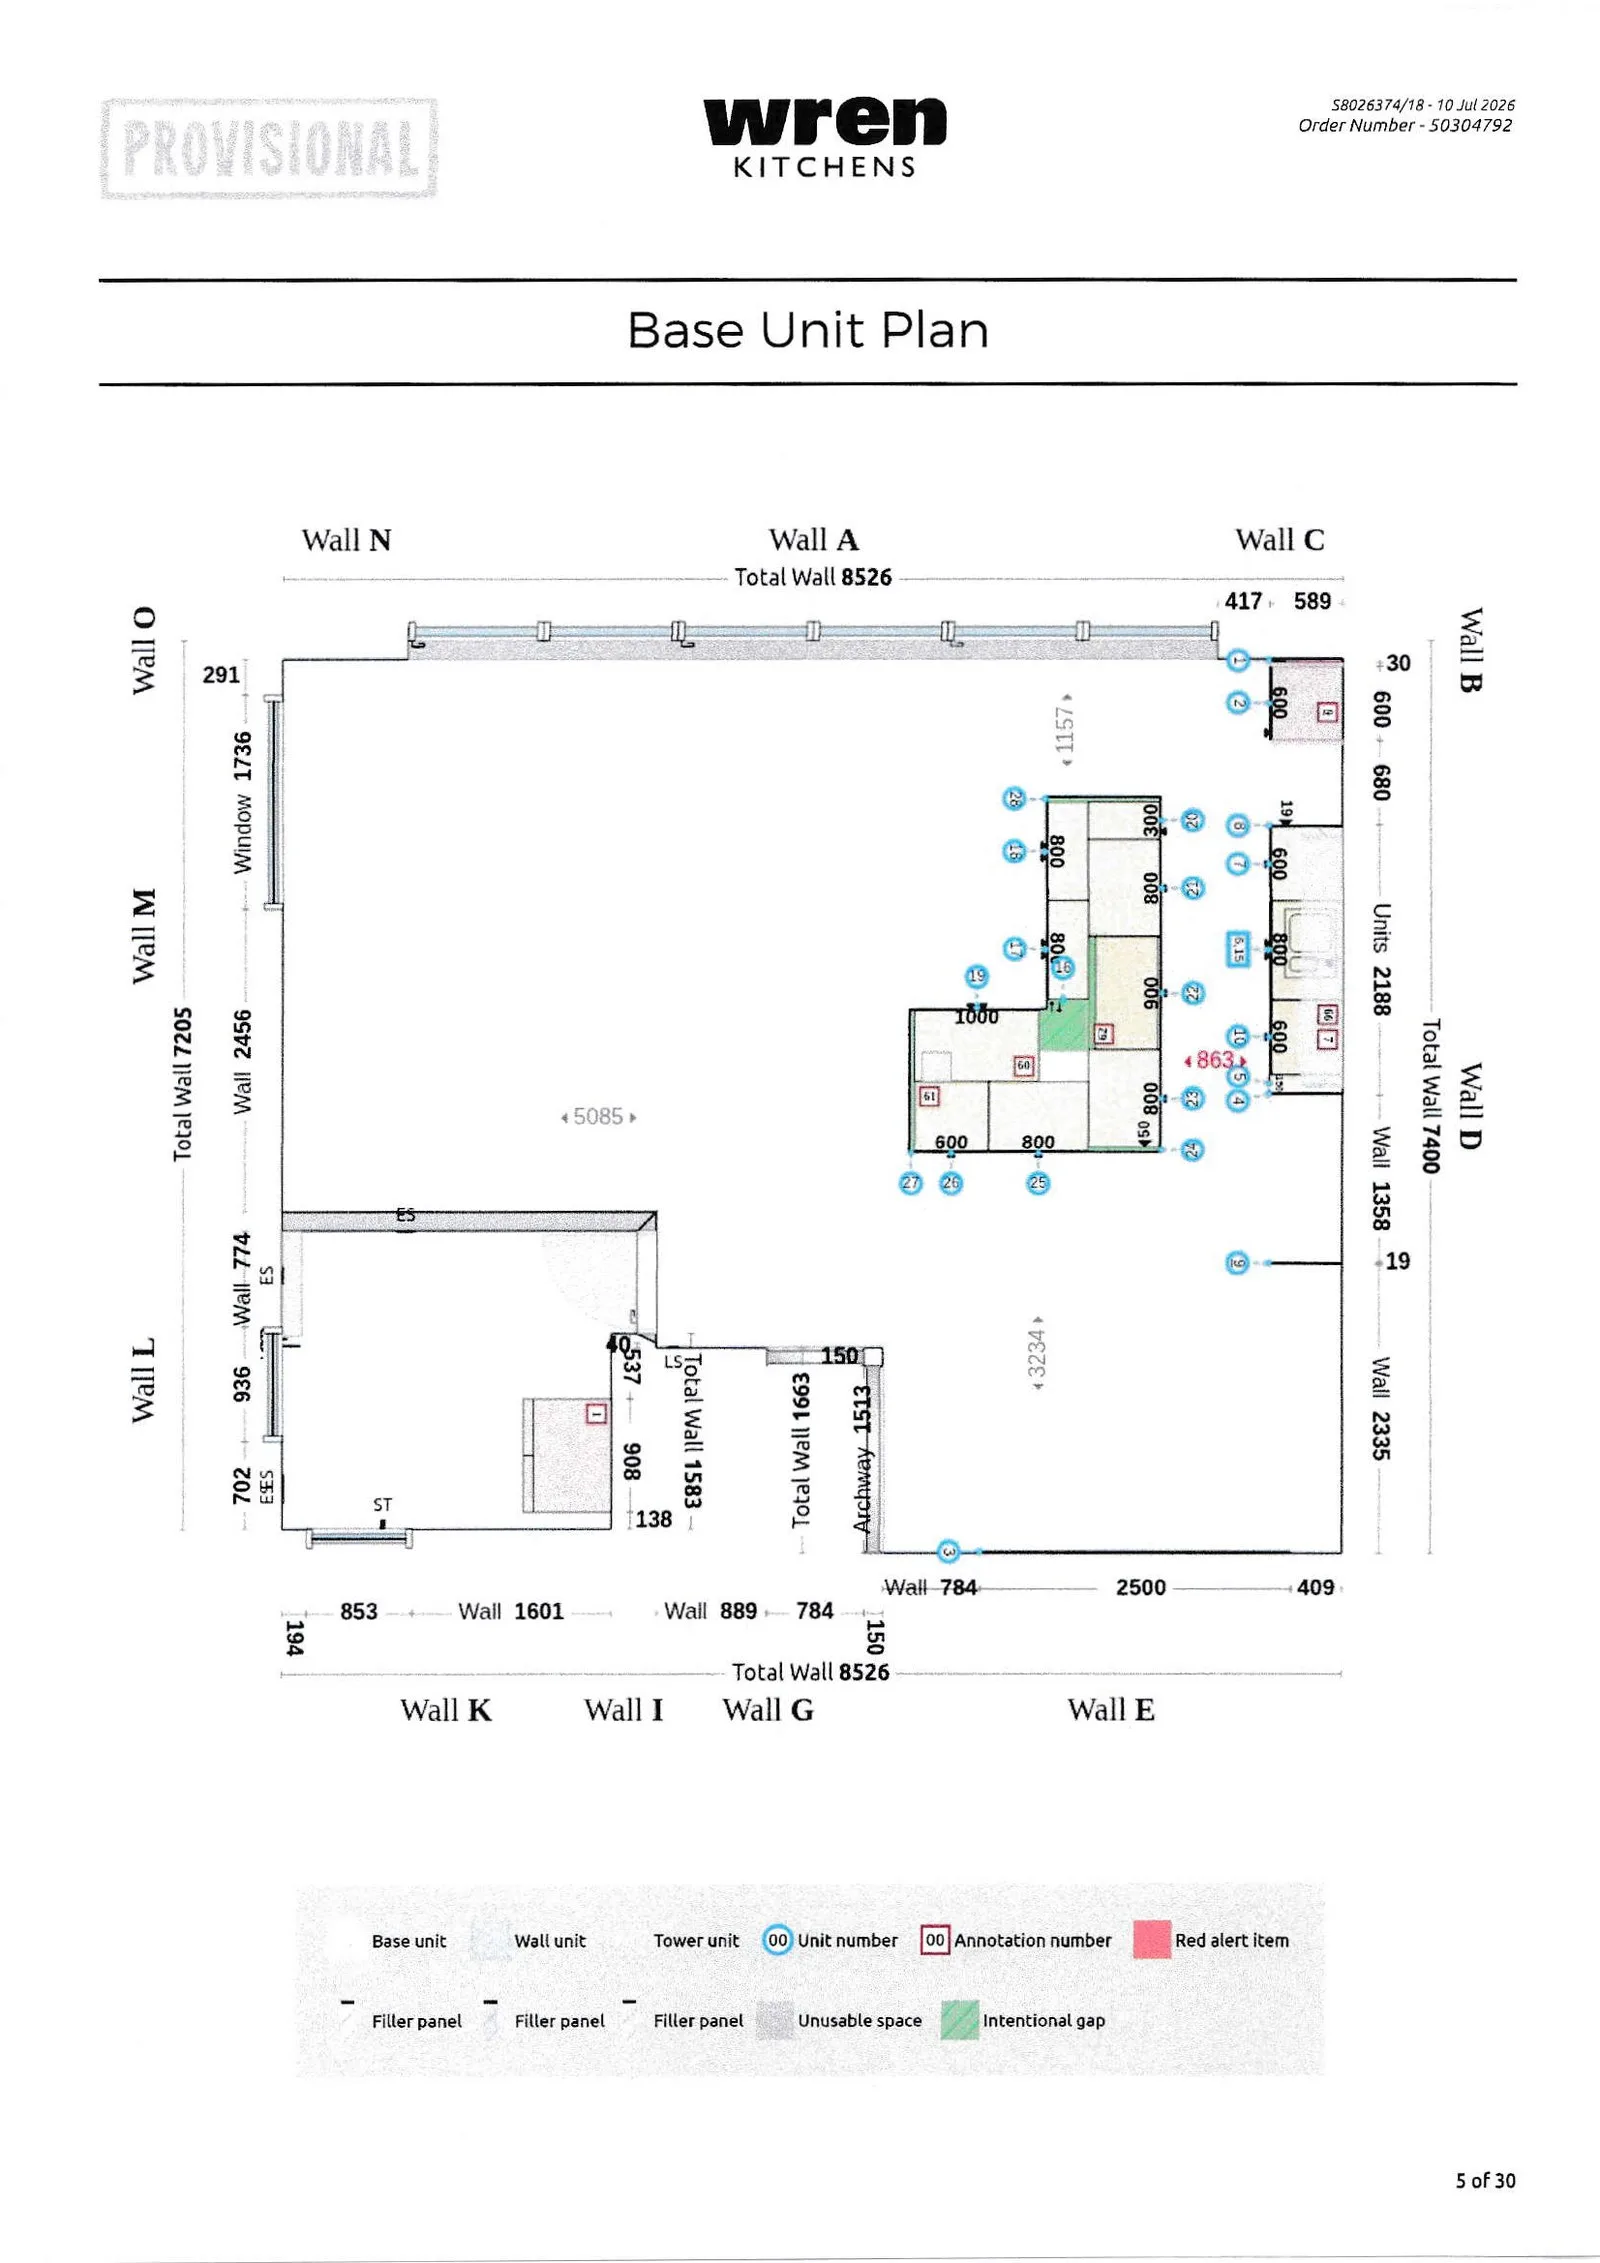
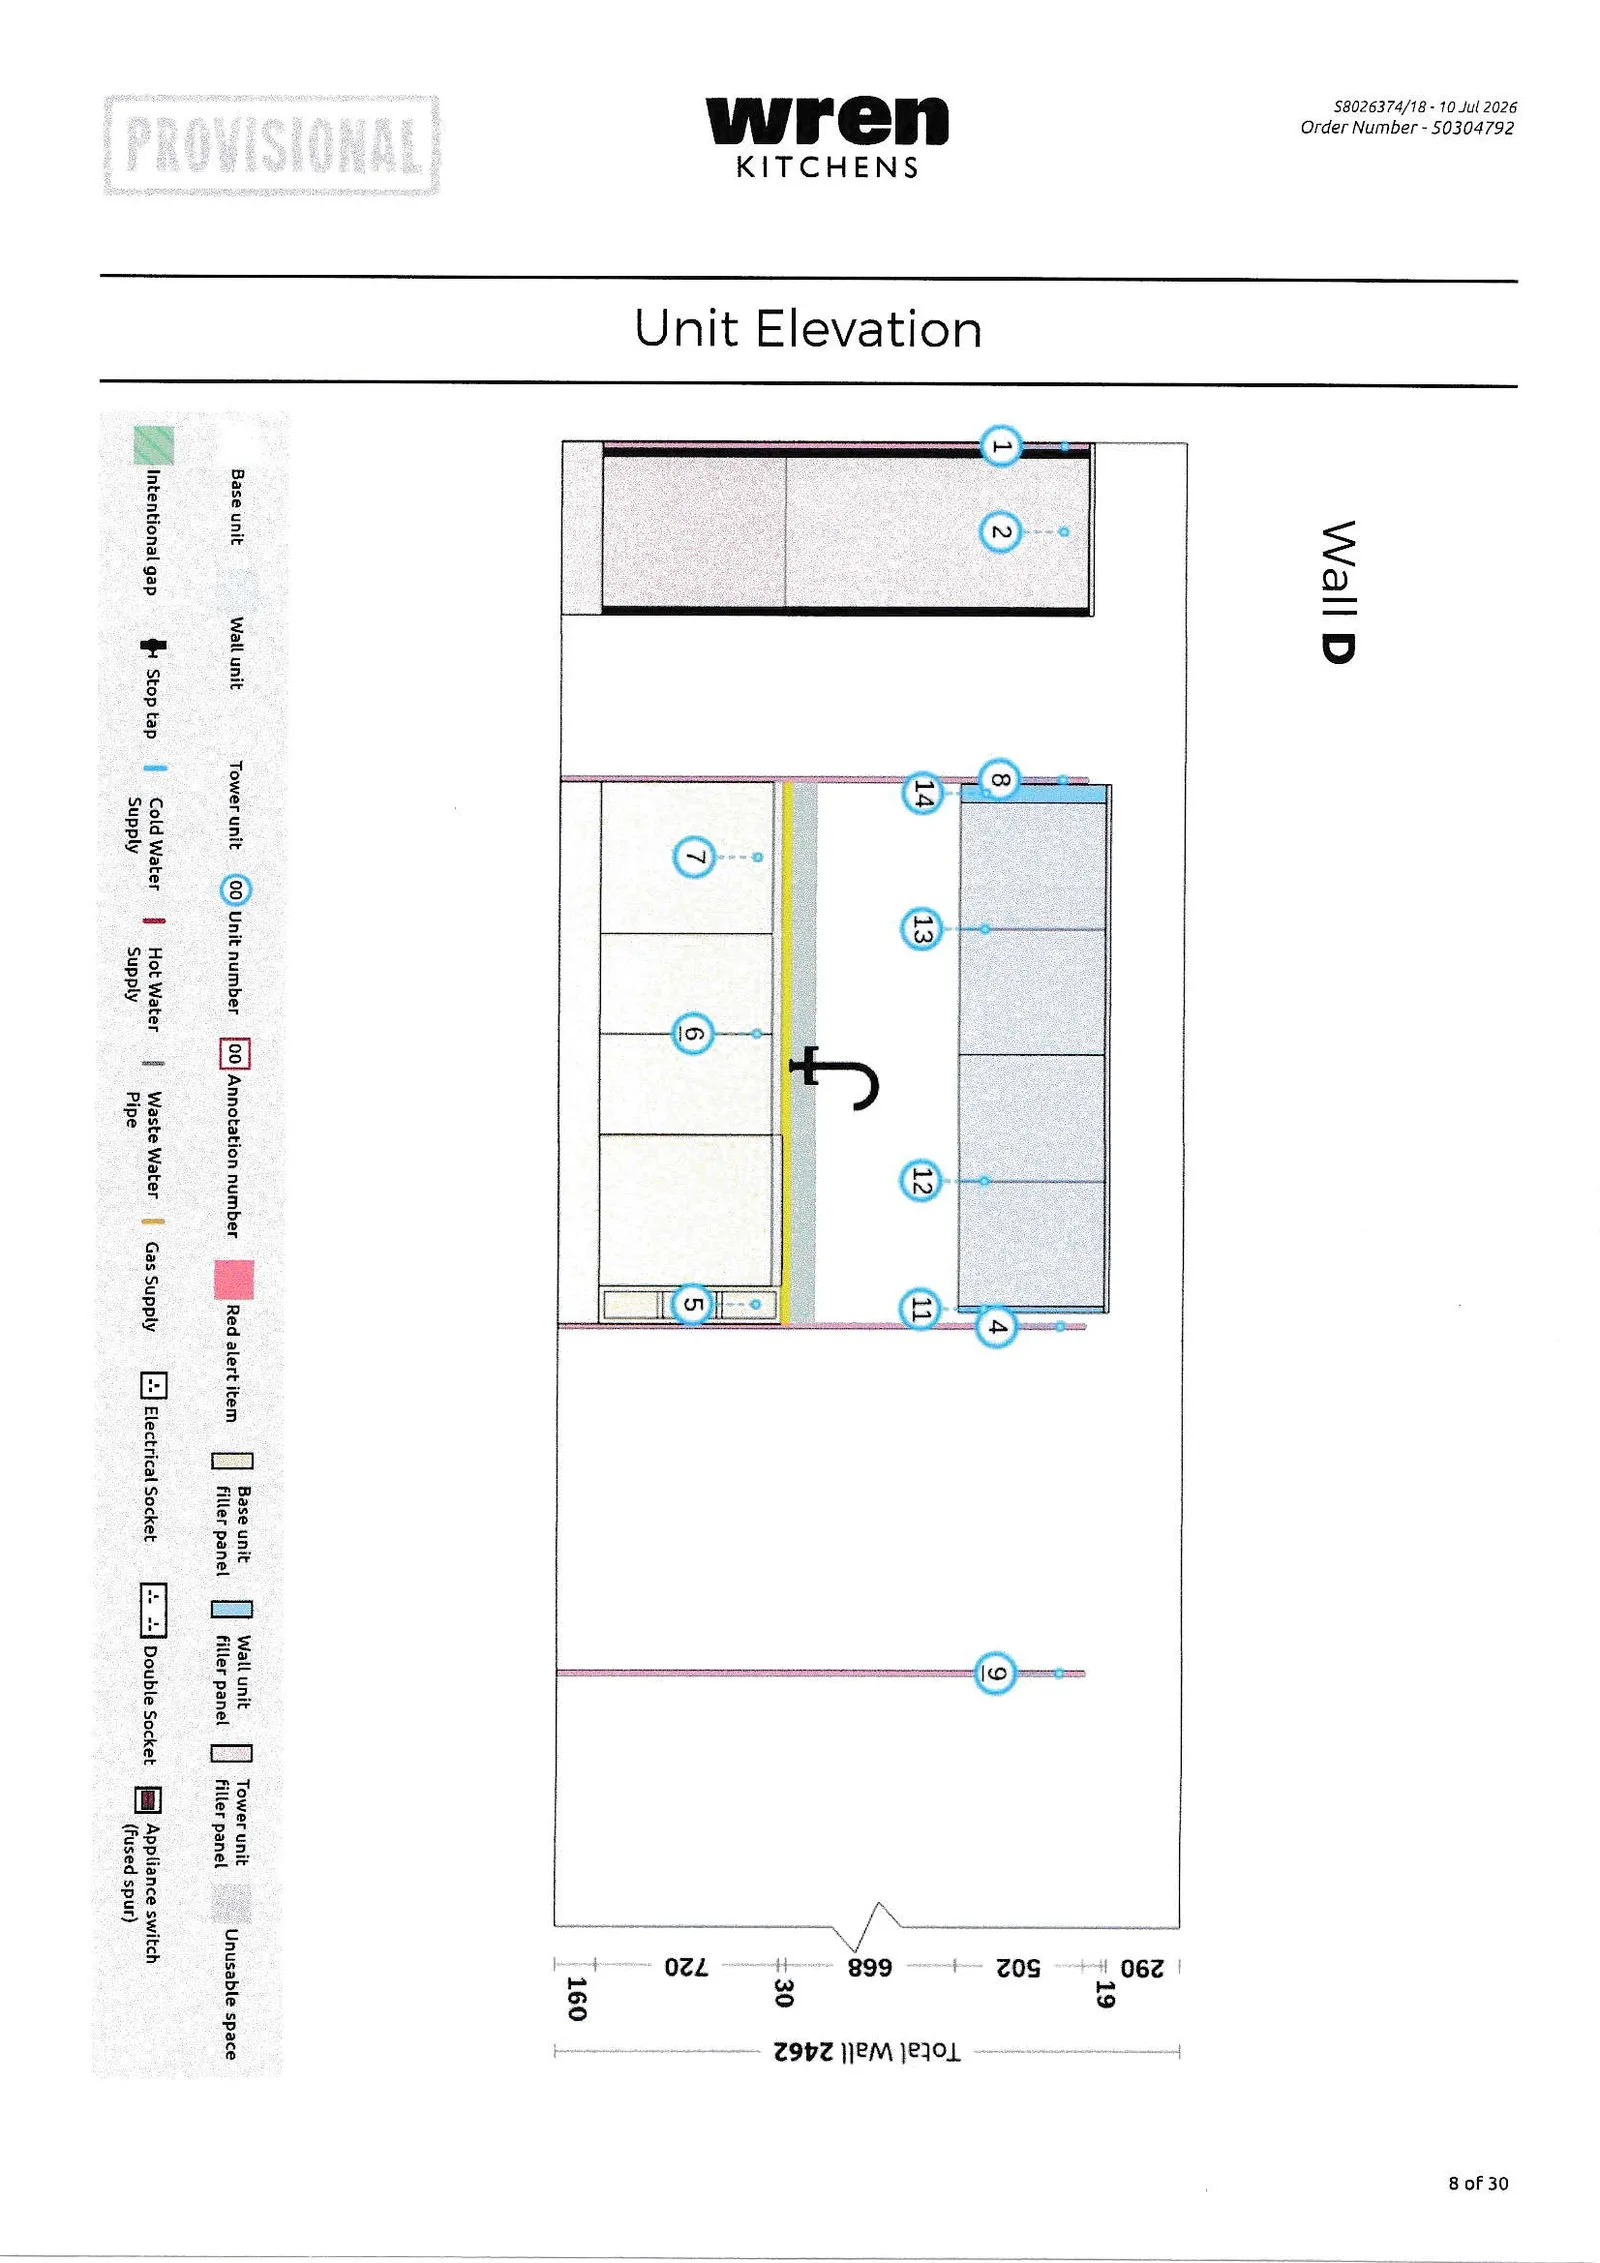
Before anything else happens, sit down with the full plan set — not just the pretty 3D render, but the elevations and the technical drawing with the cabinet codes on it. Every major retailer, Wren included, numbers or codes every cabinet on the plan, and that code maps to a specific width, height and internal configuration in the order. Get this wrong at the reading stage and you'll spend the whole job fighting a layout that doesn't match what's in the boxes.
Start with the floor plan, which shows the layout from above — where every cabinet sits relative to the walls, the island, and each other. Then move to the elevations — the flat, front-on view of each wall — which show you height information the floor plan can't: where the wall cabinets sit relative to the worktop, where the extractor sits above the hob, where the window interrupts a run of wall units. A plan without elevations is only telling you half the story.
Every plan has a key or legend, usually in a corner of the drawing, explaining what each symbol and abbreviation means. Built-in appliances are typically marked with a dotted outline or an “X” to show they're integrated behind a door rather than a standalone item. A centreline mark through a sink or hob symbol shows you the exact midpoint the plumber or electrician needs to work to — this is the single most useful mark on the whole plan when it comes to first fix, because it tells your trades exactly where the supply needs to land, not just roughly where.
Verify the Room Itself, Not Just the Plan
A plan is only as good as the room it was drawn against, and rooms move over the months between survey and installation. Before you commit to anything:
- Check each corner for true square using the same 3-4-5 method as your tools: measure 3m along one wall from the corner and 4m along the other, and the diagonal between those two points should measure 5m. Short of 5m means the corner is acute (pinched in); long means it's obtuse (opened out) — either way, note it now, because it affects how corner units and end panels will need to be scribed later.
- Measure the ceiling height in all four corners of the room and in the centre. A few millimetres of variance is normal; more than that affects where your tall units and any wall cabinet top line will actually finish relative to the ceiling.
- Mark every architectural interruption — window cills, door architraves, radiator pipes, any boiler flue — directly onto the wall or plan, in pencil, before you plan cabinet widths around them.
Cross-reference every cabinet code on the plan against your delivery note before you start. On a kitchen like this one — U-shaped with a bank of larder units on one wall, base and wall units either side of a window on another, and a centre island with a lower seating section — it's easy for a corner unit code or a specific appliance housing width to get missed in the picking process. Catching a mismatch on the plan, before the delivery even arrives, costs you nothing. Catching it once the wall units are already up costs you a day.
Finally, if anything on site genuinely doesn't match the plan — a wall in a different place, a service that isn't where it's drawn — raise it with your retailer or designer as a formal query before you improvise a fix yourself. A plan discrepancy is their error to resolve or confirm; guessing at it on site is how avoidable mistakes become expensive ones.
Checking Your Delivery Properly
Under the Consumer Rights Act 2015, your contract is with the retailer, not the delivery courier, and the retailer is responsible for the goods until they're safely and correctly in your hands. That matters, because it means the responsibility for a damaged or incorrect delivery sits with them — but only if you report it properly and within the window they give you. Most major retailers, Wren included, give you 48 hours from delivery to report any damage or shortfall. Miss that window and you may be stuck covering the cost of a replacement yourself.
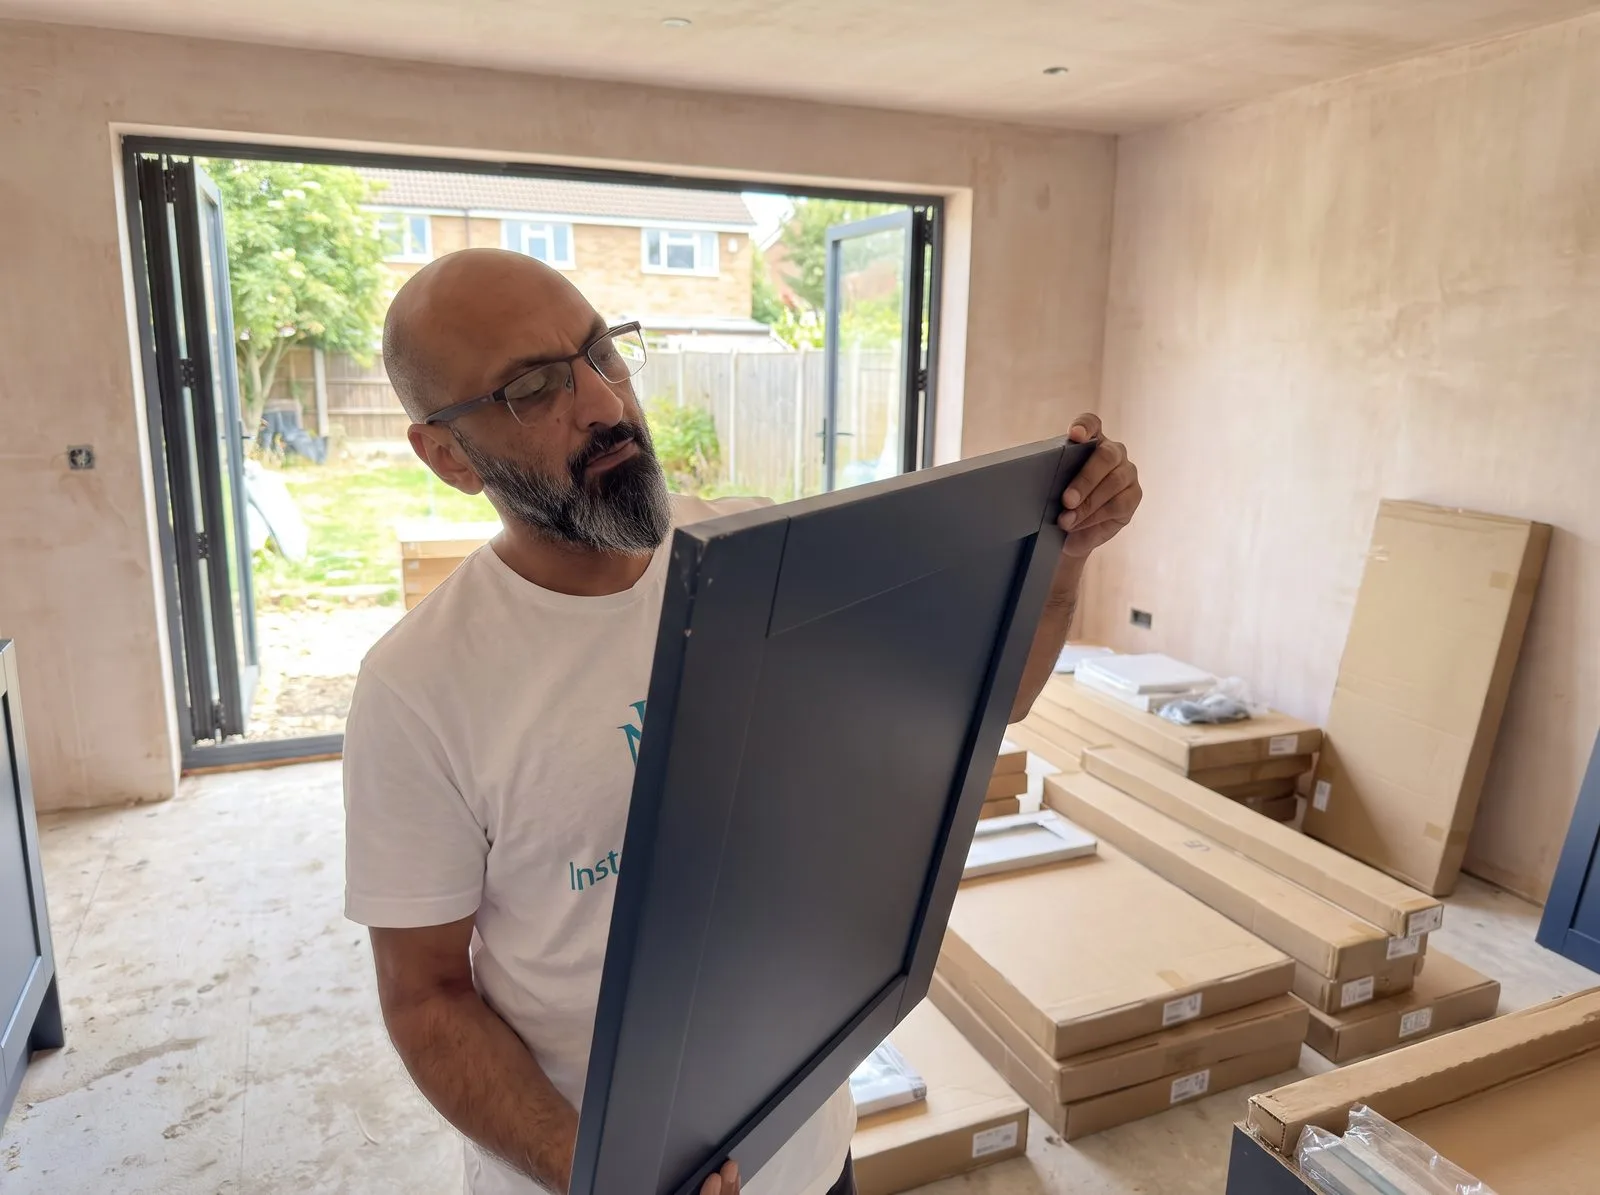
Before you sign for anything, you're entitled to inspect it. Don't let a driver rush you into signing a delivery note you haven't actually checked — politely but firmly take the few minutes you need. Look over the packaging first: tears, punctures, crushed corners and water staining are all signs the item inside may be damaged, even if the box looks intact from a distance.
Once the delivery is inside, work through it methodically rather than just glancing over boxes:
- Group everything by category before you open a single box: base cabinets, wall cabinets, tower and larder units, appliances, worktop, sink and taps, and accessories (hinges, legs, handles or — on a handleless kitchen like this one — rail sections and end caps).
- Open each box under good light and check the door or panel face for chips, scratches or delamination at the corners and edges, where transit damage shows up first.
- Lay any full-height panel flat on a level surface and sight along it, or slide a straightedge across it — a panel that's bowed will show a visible gap underneath the straightedge rather than sitting flush.
- If this is a handleless kitchen with a recessed rail system, count every component against the order: straight rail lengths, internal and external corner joiners, and end caps. A rail sold as one continuous run is only as good as its weakest joining section, and a missing joiner is much easier to solve now than mid-installation.
- Check the appliance boxes' own paperwork — the spec sheet physically inside the box — against the cut-out dimensions on your plan, not just the plan's assumed figures. Retail CAD data occasionally lags behind a manufacturer's actual current spec.
- Leave the packaging on until you actually need each item; it protects the piece from the inevitable bumps and scrapes of a busy site, and it's far easier to spot a damaged item while it's still boxed and labelled than once everything is stacked in a pile.
Store anything you're not fitting immediately off a cold concrete floor, on level bearers, in a dry, reasonably stable-temperature space — sudden damp or temperature swings before installation can affect both timber-based panels and worktops.
If you find damage or a shortfall, photograph it immediately, before you move or unpack anything further, and report it the same day with your order number, the delivery date and a precise description of what's wrong. Don't wait for it to become a problem on installation day — a missing base unit found three weeks out is a manageable inconvenience; the same unit missing on the morning you were due to fit it is a real delay.
Site Protection & Setup
Before a single tool touches the old kitchen, protect the route between the front door and the room, and contain the mess to the space you're actually working in. This is a five-minute job that saves hours of cleanup and avoids damaging floors that have nothing to do with the kitchen.
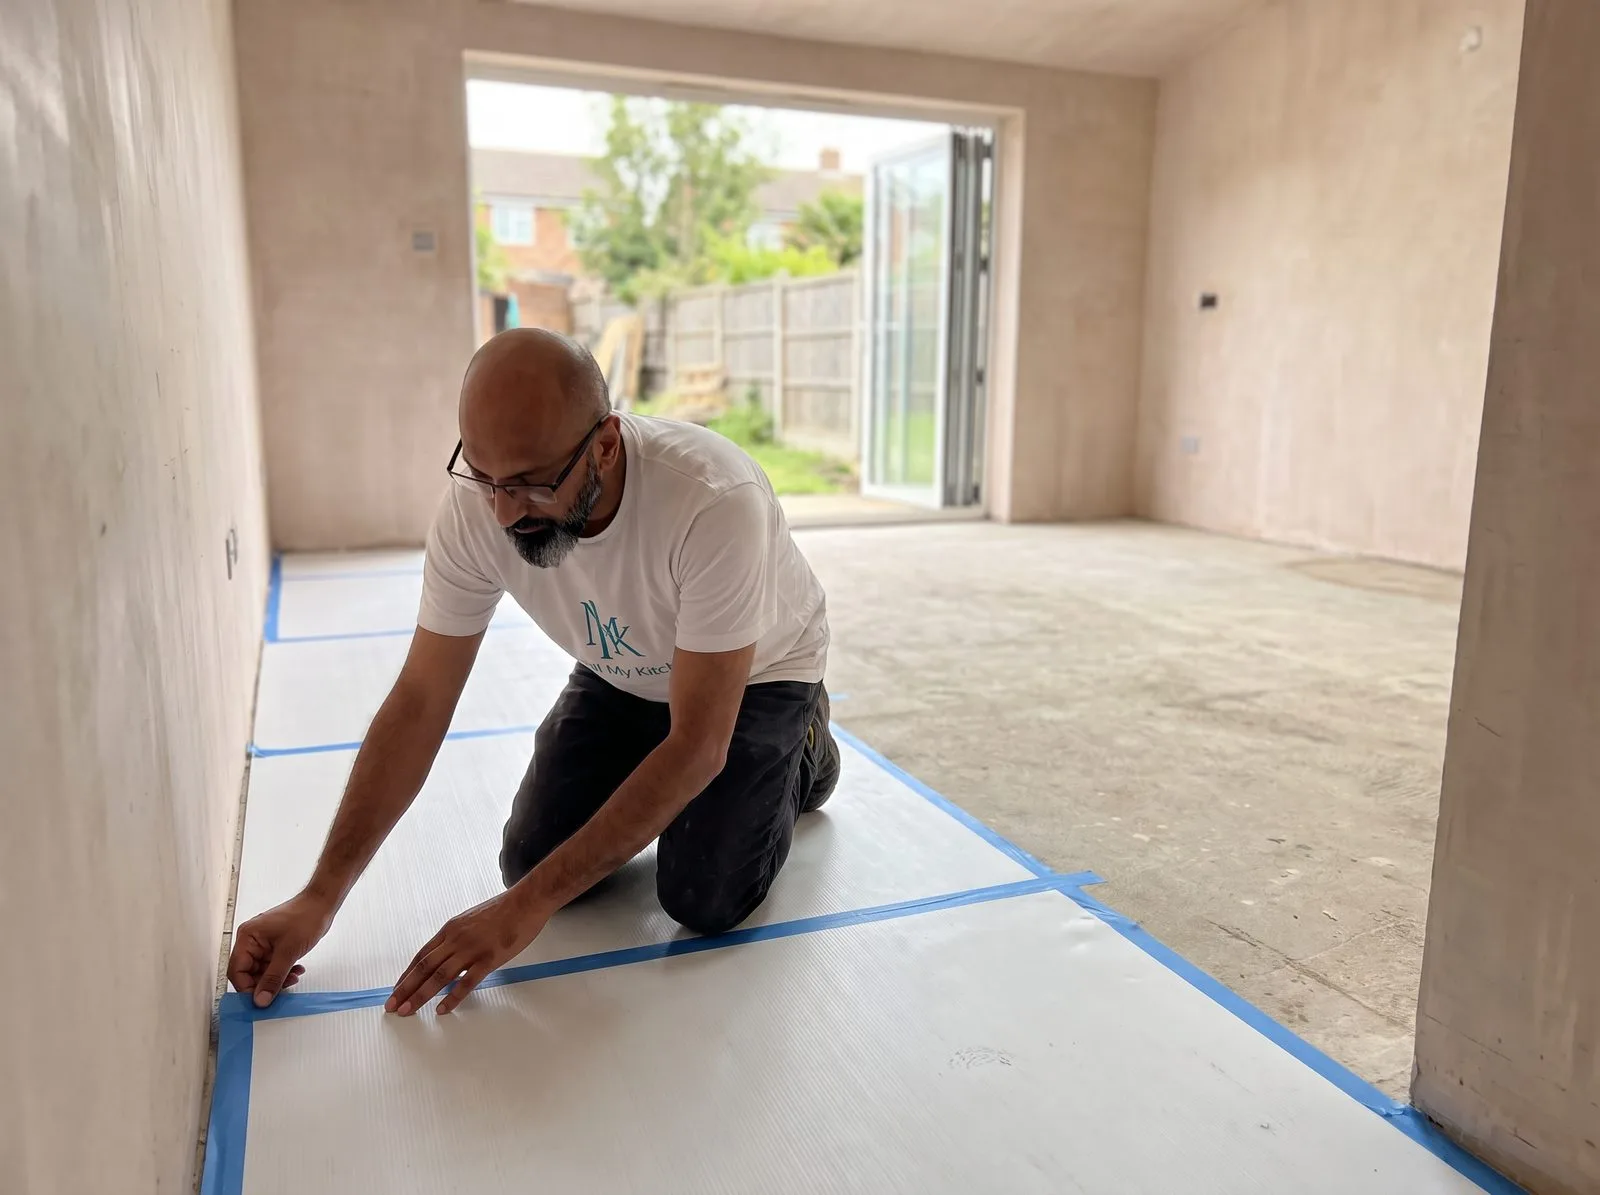
- Lay floor protection sheet along every access route the job will use — hallways, stairs, the route materials and old units will be carried out through. Tape seams down with cloth tape, but use a low-tack painter's tape as a barrier layer directly on any finished or lacquered floor first, since some heavy-duty tapes can lift a finish if stuck straight onto it.
- Screen the kitchen off from the rest of the house with plastic sheeting across the doorway, ideally with a zip-style door built into it, so people and pets aren't walking dust through the rest of the home every time someone goes in or out.
- Set up proper task lighting — the room will be without its normal ceiling light or under-cabinet lighting for most of the job, and working accurately in poor light is how avoidable mistakes happen.
- Put your cutting station (chop saw, track saw) somewhere other than the kitchen itself if at all possible — a garage, or outside under cover — so dust isn't being generated in the same space you're trying to keep clean for tiling and finishing.
Strip-Out & Prep
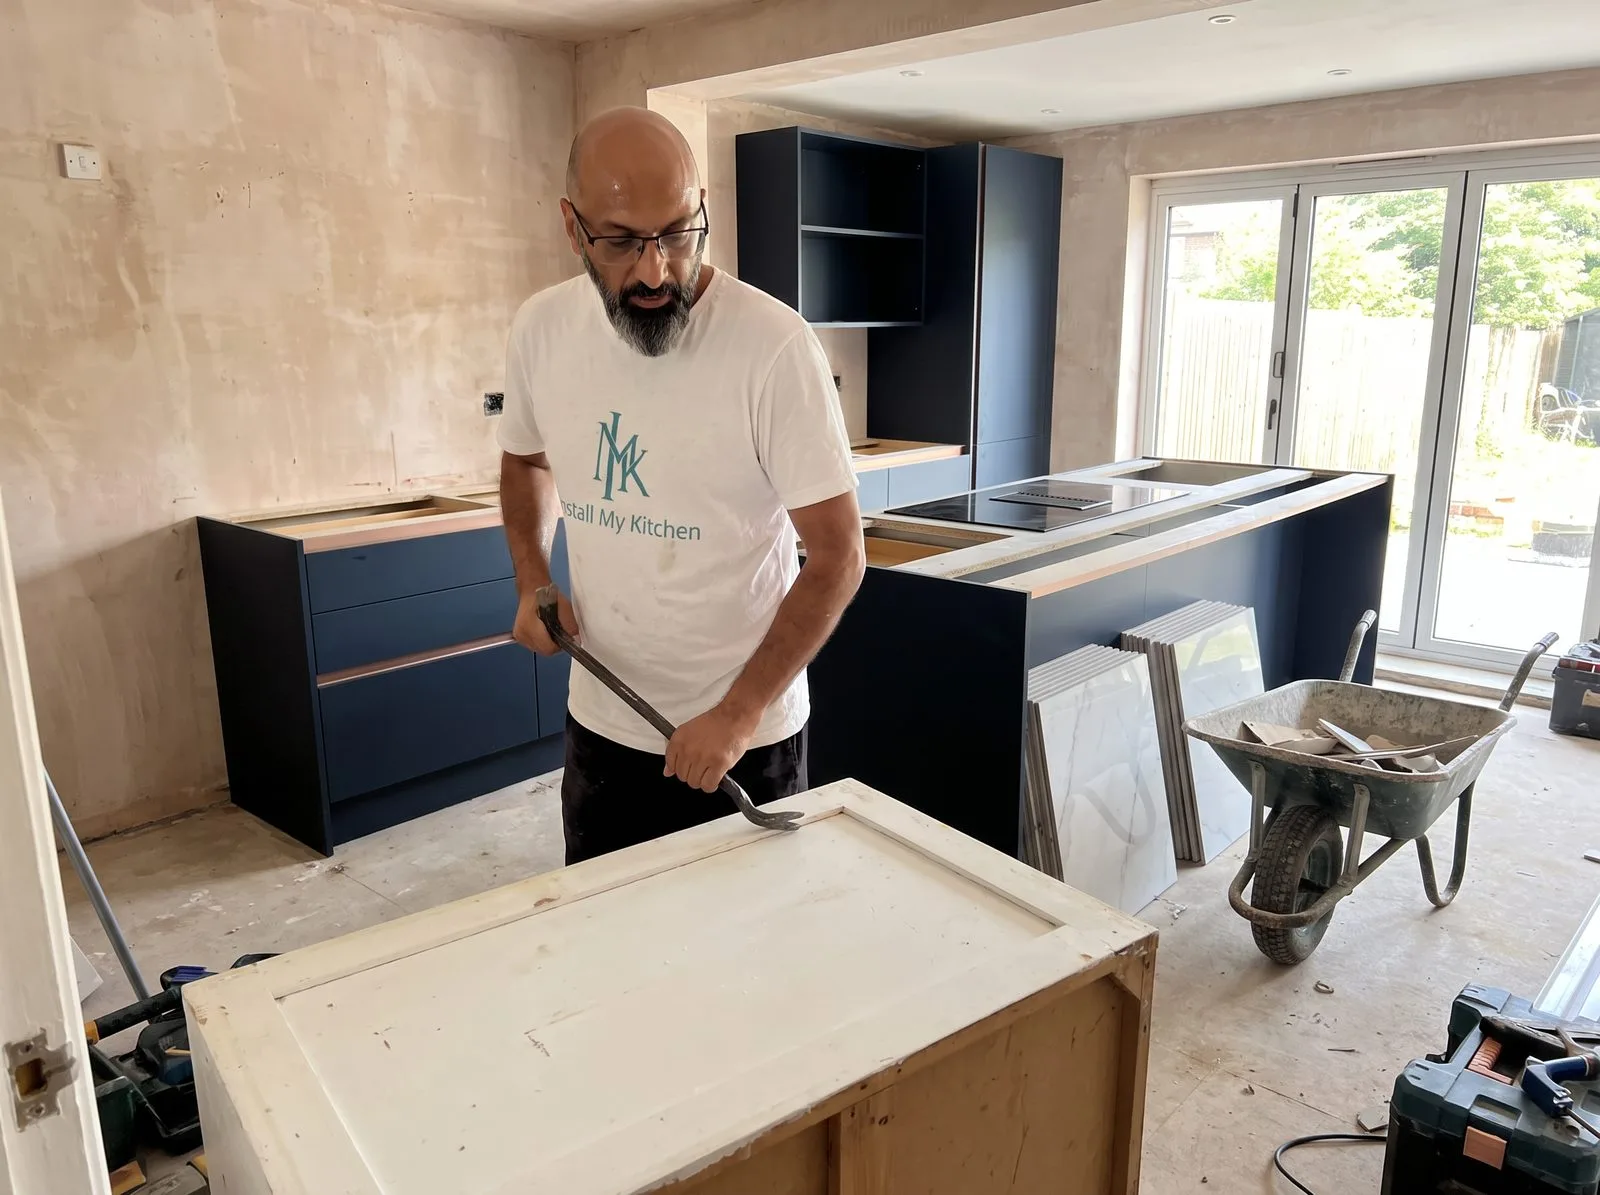
With the delivery checked, grouped and safely out of the way, and the room protected, the old kitchen comes out — units, worktop, appliances, sink, the lot — back to bare walls and subfloor.
- Isolate the water supply at the stopcock and the relevant circuits at the consumer unit before disconnecting anything. Don't rely on a switch being off — physically isolate the supply.
- Prove every circuit you're about to work on is actually dead using an approved voltage tester, checking live-to-neutral, live-to-earth and neutral-to-earth, before cutting or disconnecting any cable. This takes thirty seconds and is the single most important step in this entire section.
- Disconnect the sink and cap off the live hot and cold tails with proper compression or push-fit stop-ends rather than leaving them open — use two spanners when tightening a compression cap so you're not twisting the pipe itself.
- Strip out wall cabinets first, top-down: remove doors and shelves, back off the hanging bracket tension, then lift each carcass clear of its wall plate.
- Take out base units and clear the subfloor back to bare slab or boards, scraping away old adhesive or tile backing as you go rather than leaving it for later.
- Clear debris continuously rather than letting it pile up — a cluttered strip-out site is where trip hazards and damaged materials happen.
If the property was built or last kitchen-fitted before 2000, treat old artex ceilings, aged thermoplastic floor tiles and boiler flue pipe collars with caution — these can contain asbestos, and disturbing them without testing first is a genuine health hazard covered under the Control of Asbestos Regulations. If in doubt, get it tested before you drill, cut or tear anything out.
This is also your last real chance to sense-check the survey against reality: confirm the services (existing supply pipework, any visible cabling, the position of the soil stack if it's relevant to a new sink location) are genuinely where the plan assumes they are, before you commit to setting out the new layout around them. By the end of this stage you should have a genuinely empty shell: bare walls, bare subfloor, and a clear view of every existing service position, ready for first fix.
First Fix — Electrics & Plumbing
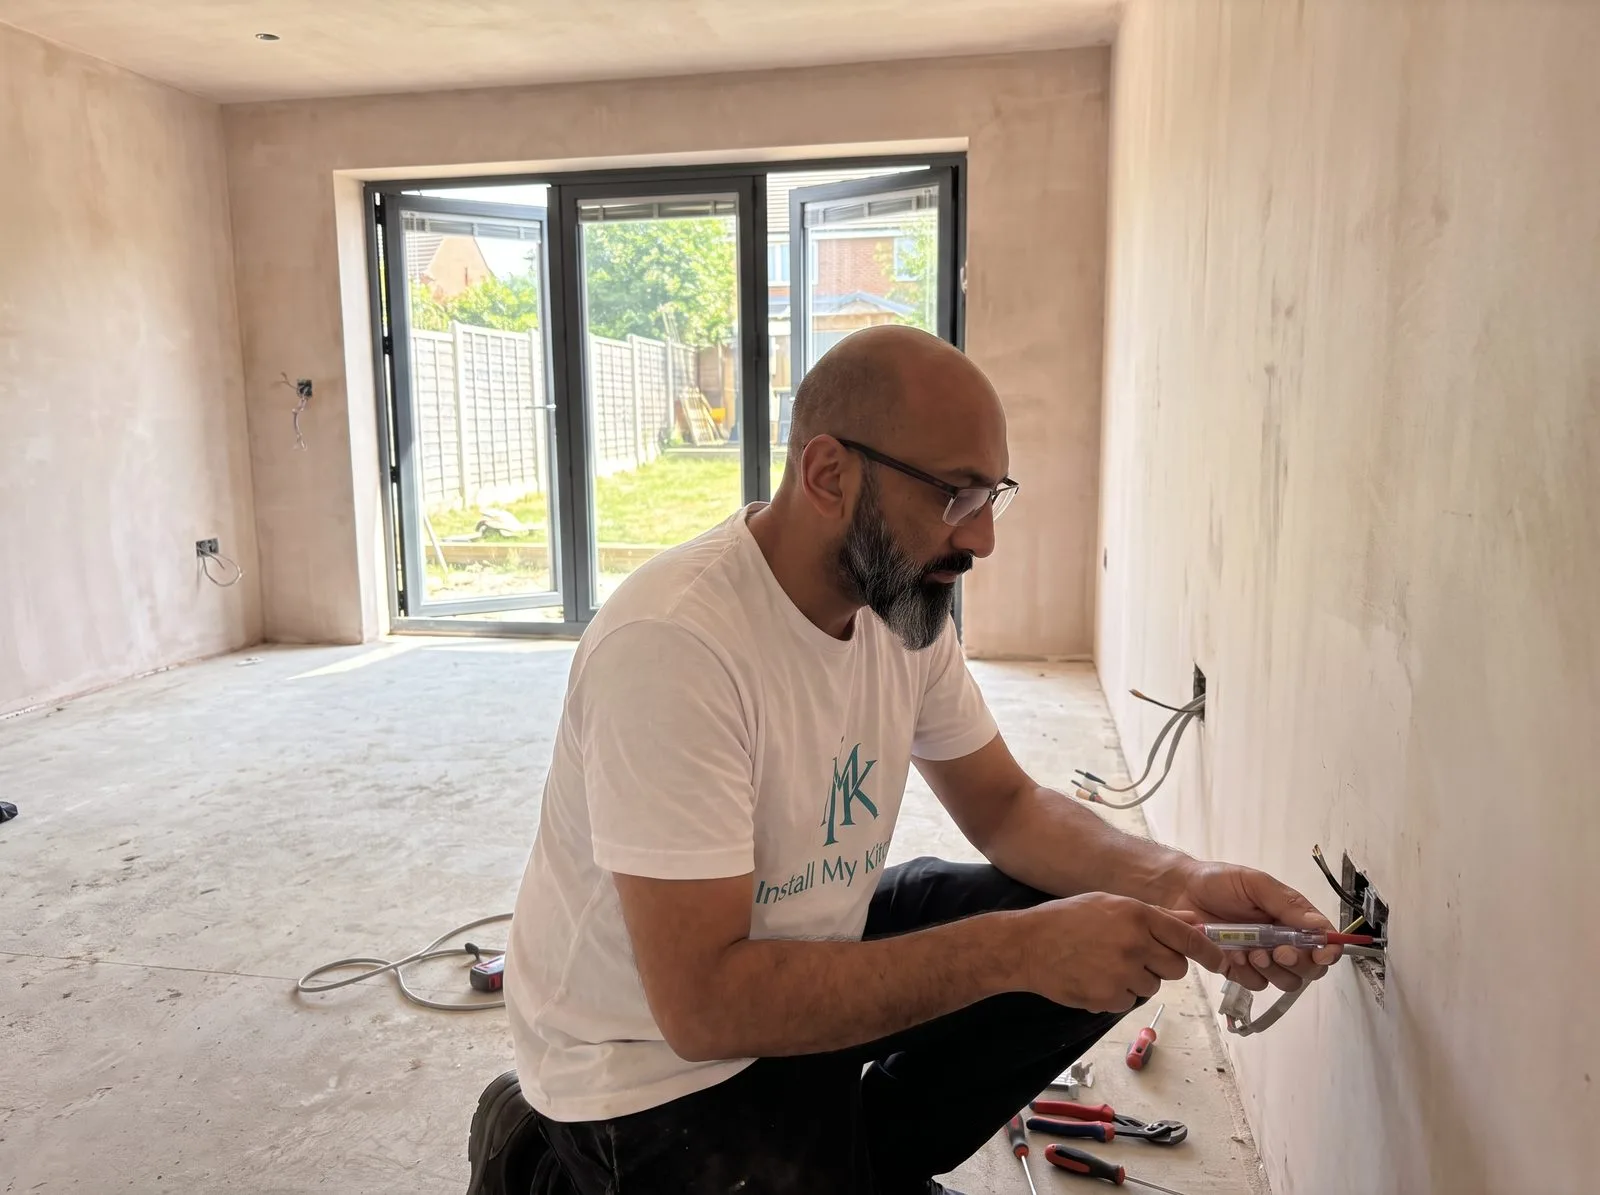
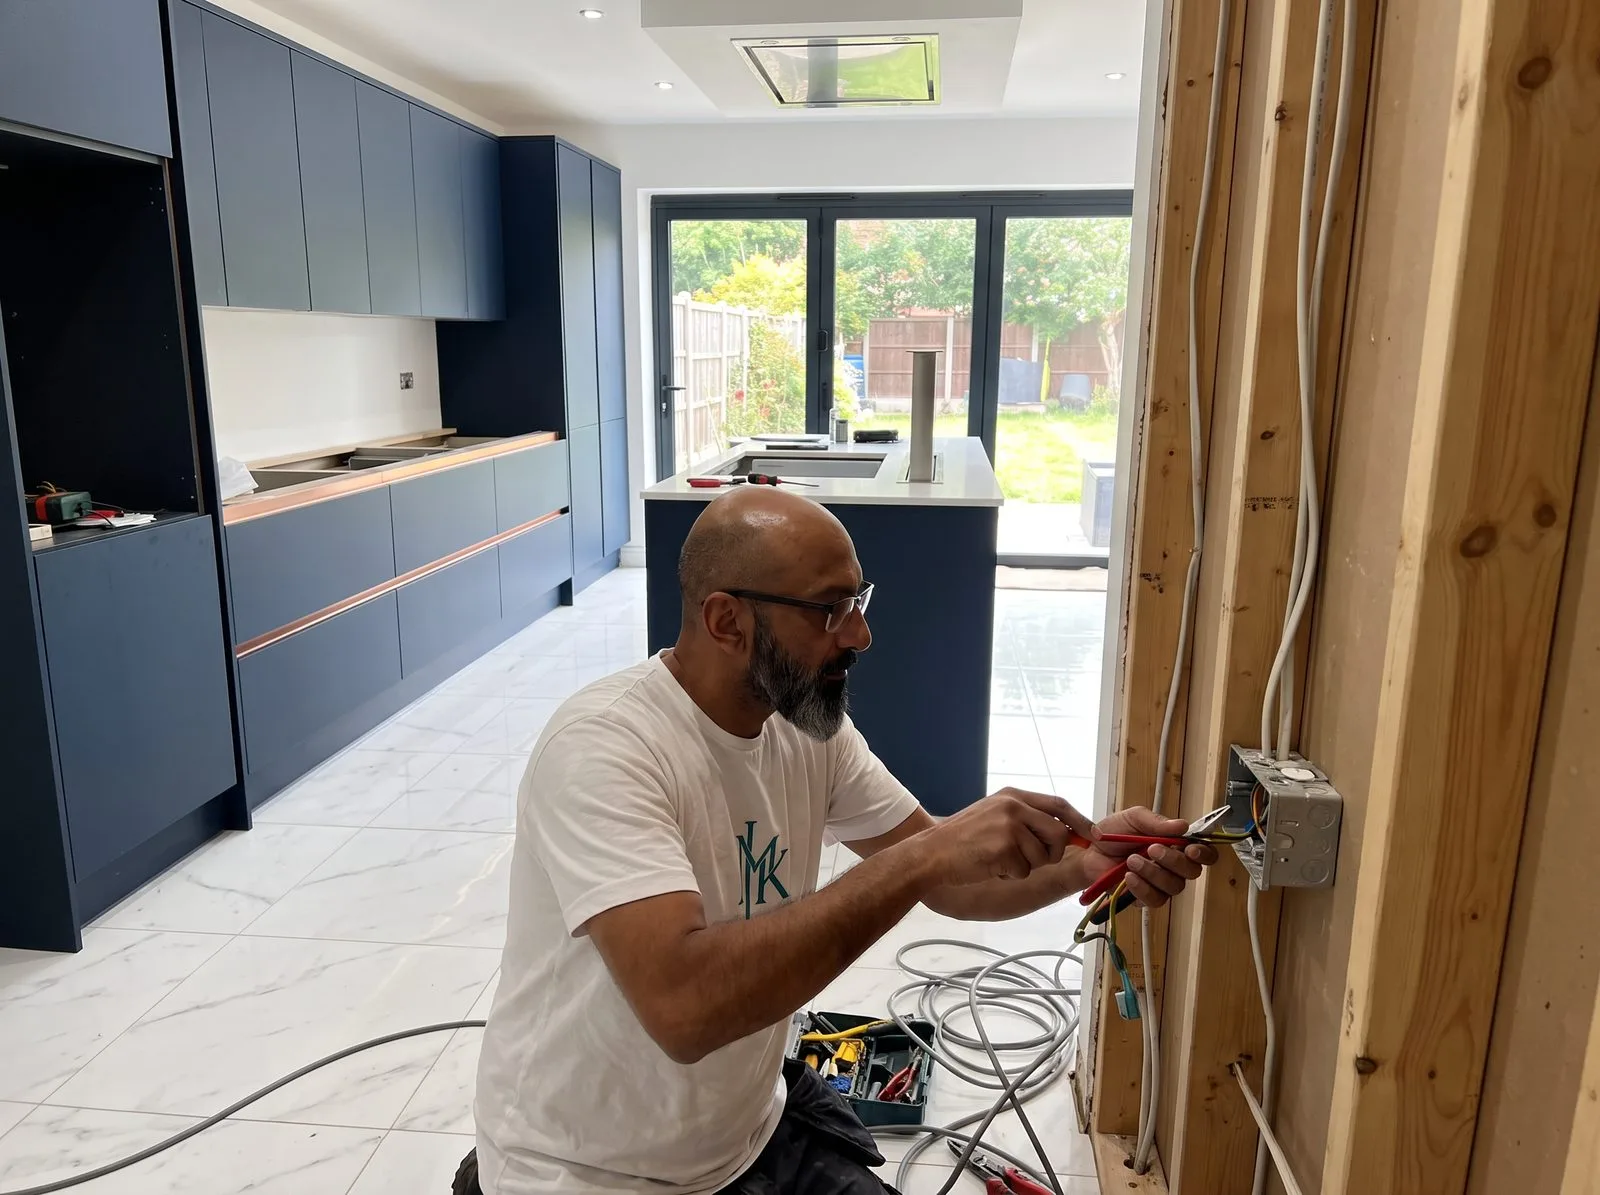
First fix happens before any plastering, because every cable run and pipe route needs to be chased into a wall or run through a stud void while it's still open and accessible. On this kitchen, first fix has one job the average kitchen doesn't: the island carries an induction hob and a downdraft extractor, both of which need power and — for the extractor — ducting run in the floor before a single cabinet sits down on top of it. Get the floor duct position wrong at this stage and you're either lifting tiles later or living with an extractor that isn't where the plan says it should be.
The electrician's first-fix scope on a kitchen like this covers: a dedicated high-amperage circuit for the induction hob (the exact rating — typically 32A or 45A — depends entirely on the specific hob's rated load, so confirm the figure against the manufacturer's spec sheet rather than assuming), a circuit for the downdraft extractor, back boxes for every socket and switch, cabling for spotlights that will be cut in during the painting stage, and containment for anything running under the island floor. The plumber's first-fix scope covers supply and waste runs to the sink and any plumbed appliances (dishwasher, washing machine), positioned to the centreline marks you identified on the plan.
Never position a mains stopcock or waterworks — drainage pipes, isolation valves — directly behind an integrated appliance housing such as a dishwasher, washing machine or tumble dryer. Two separate problems follow if you do: first, the appliance itself may not fit its housing properly with a pipe run in the way; second, and more seriously, nobody can get to that stopcock or valve in an emergency once a plumbed-in appliance is sitting in front of it. Route these services to land in an adjacent cabinet instead, where they stay genuinely accessible. The same logic applies to electrical points for these appliances — the socket or isolator should be reachable from an adjacent cabinet, not sealed in behind the appliance itself.
All electrical work here — the hob circuit, the extractor circuit, the socket and spotlight wiring — is Part P notifiable work and must be carried out and certified by a registered electrician, not the kitchen fitter. This isn't a formality: Part P covers exactly this kind of kitchen electrical work, and a job that isn't properly certified can cause real problems later, from insurance issues to problems at the point of sale.
Once first fix is signed off, get pressure and continuity tested before you move on. A leak or a fault found now, with the walls still open, is an afternoon's work. The same fault found after plastering, tiling and cabinets are in is a very different job.
Plastering & Patch Repairs
Every chase cut for a cable or a pipe run needs to be made good before it disappears behind a cabinet for the next fifteen years.
- Dampen the edges of the chase or cut-out slightly before filling — plaster and backing render bond better to a damp surface than a bone-dry one, which otherwise pulls the moisture out of the mix too fast.
- Fill and float the chase back close to flush using backing plaster or browning, keyed slightly below the final surface level to leave room for a finishing skim.
- Apply a finishing skim coat across the repaired area (and the full wall, if you're skimming right through) in a thin first pass, then a second closer pass once the first has taken up enough to firm — trowel and polish the surface with a clean, slightly damp trowel as it goes off, working out trowel marks before it's too firm to move.
- Let it dry fully before sanding or painting. Drying time depends heavily on the room's ventilation and the weather — a warm, well-ventilated room dries faster than a cold, damp one — so judge by how the wall actually looks and feels (an even, pale, fully-dry colour with no cool or damp patches to the touch) rather than a fixed number of hours. Don't force-dry a fresh skim with a heater; drying it too fast from the surface causes cracking.
A lumpy, unskimmed patch behind a wall cabinet won't be visible once the units are up, but an improperly dried patch traps moisture that has nowhere to go once it's sealed in behind a cabinet back — this is the single most common stage to see rushed on a tight timeline, and rushing it creates problems (cracking, shadowing through paint, damp patches) that only show up weeks later when the kitchen's already finished.

Painting & Spotlights
With the room still empty and every wall fully accessible, this is the easiest point in the whole job to paint properly.
- Apply a mist coat first on any new plaster — standard emulsion diluted with roughly 10% water, brushed or rolled on to seal the fresh surface, which otherwise draws the moisture out of a full-strength top coat too quickly and causes patchy drying.
- Let the mist coat dry fully (check the tin, but allow it to dry overnight if you're not sure) before applying the first full-strength top coat.
- Apply at least two full top coats, allowing the manufacturer's stated recoat time between them — cutting this short is a common cause of an uneven, patchy-looking finish once the paint has fully cured.
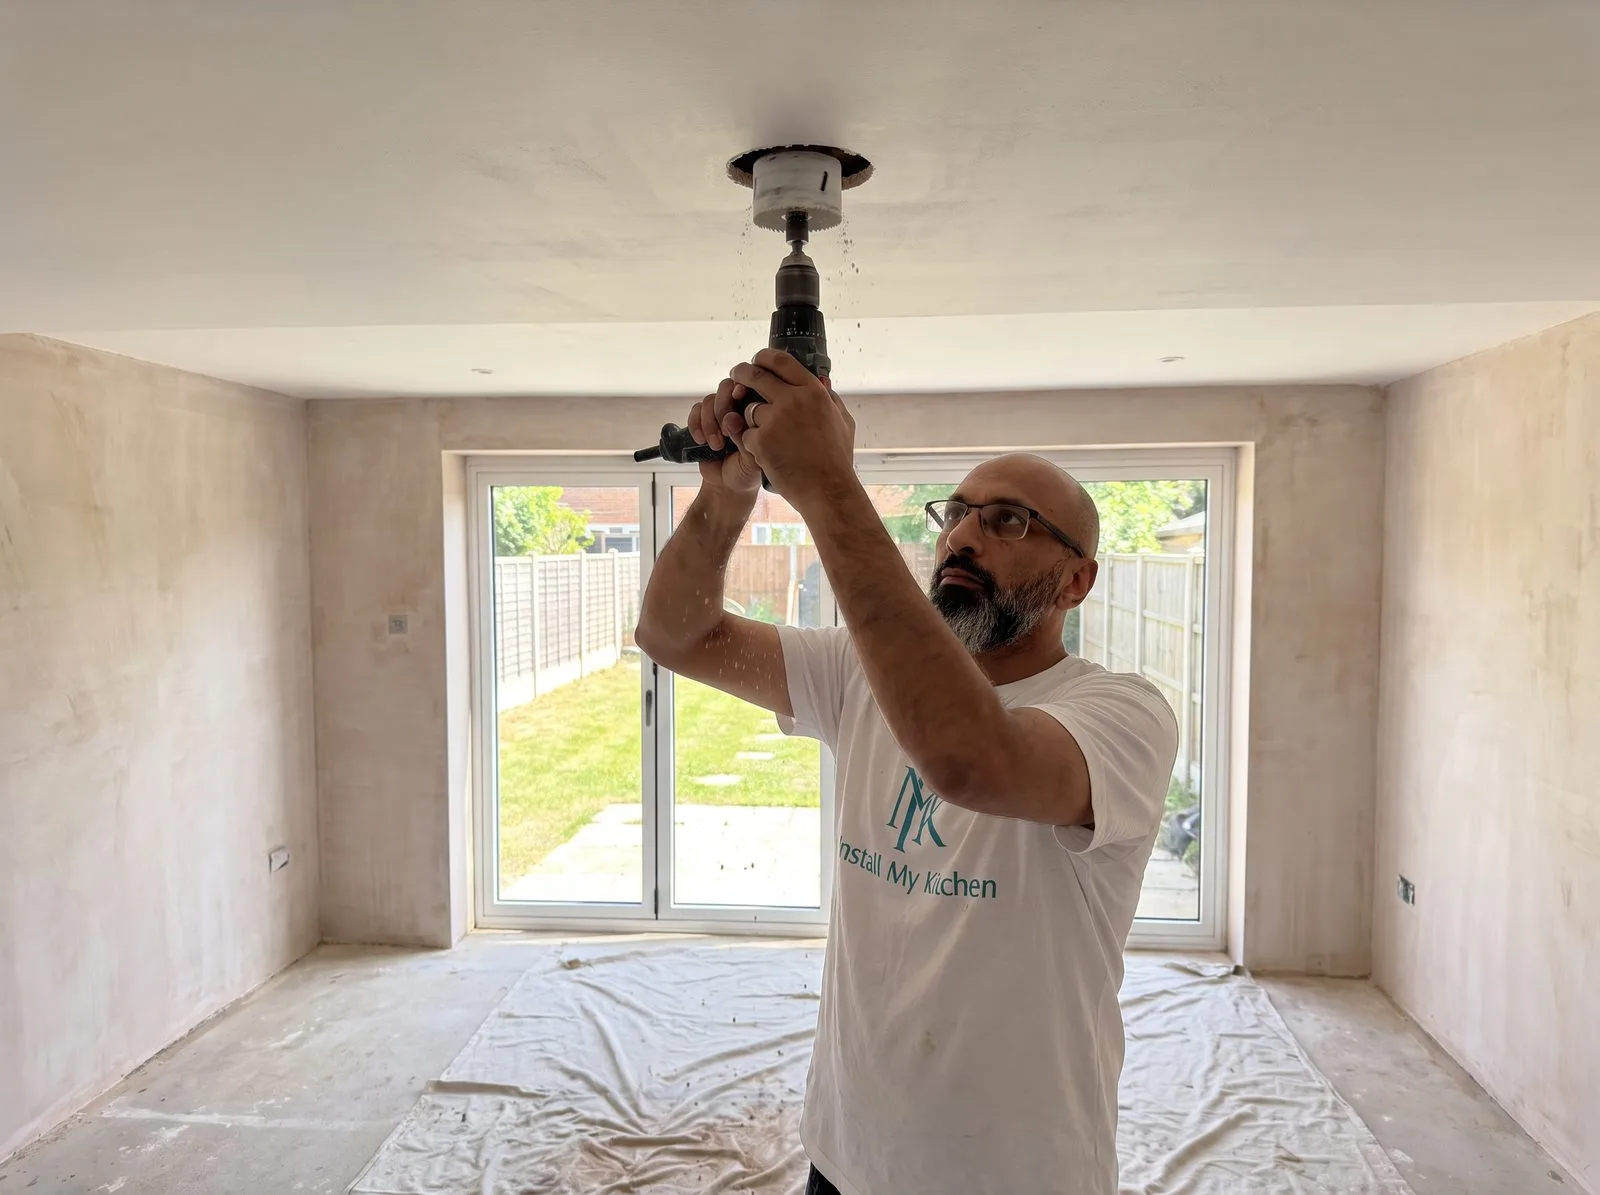
- Cut spotlight holes using a holesaw sized to match the specific fitting's cut-out diameter (check the fitting's own instructions — this varies by model), wired back to the circuit the electrician ran during first fix, and cap the cable safely until the fitting is actually connected.
Painting after cabinets are installed means cutting in awkwardly around units and taping off finished surfaces; painting now means a roller and a straightforward, unobstructed room. Do the spotlight cut-outs before wall units go up too — once a bank of wall cabinets or the larder run is fixed in place, the ceiling directly above it becomes far more awkward to reach safely.
Floor Levelling & Tiling
Large-format tiles — and Carrara-white in particular, because the reflective, uniform surface shows up every dip and lip mercilessly — demand a genuinely flat substrate.
- Check the subfloor with a long spirit level or laser level before doing anything else. Any variation of more than a few millimetres across the run needs addressing with self-levelling compound (fitting a damp-proof membrane first, if the subfloor or its history calls for one) before a single tile goes down. Mix the compound to the manufacturer's stated ratio — too wet and it won't build the required depth, too dry and it won't self-level properly — and pour, working it out towards the edges with a trowel or spreader in one continuous pass per area rather than in stages, since most self-levelling compounds have a limited open time.
- Let the compound cure for the time stated on the bag before tiling — this varies by product and depth applied, so check the specific manufacturer's guidance rather than assuming.
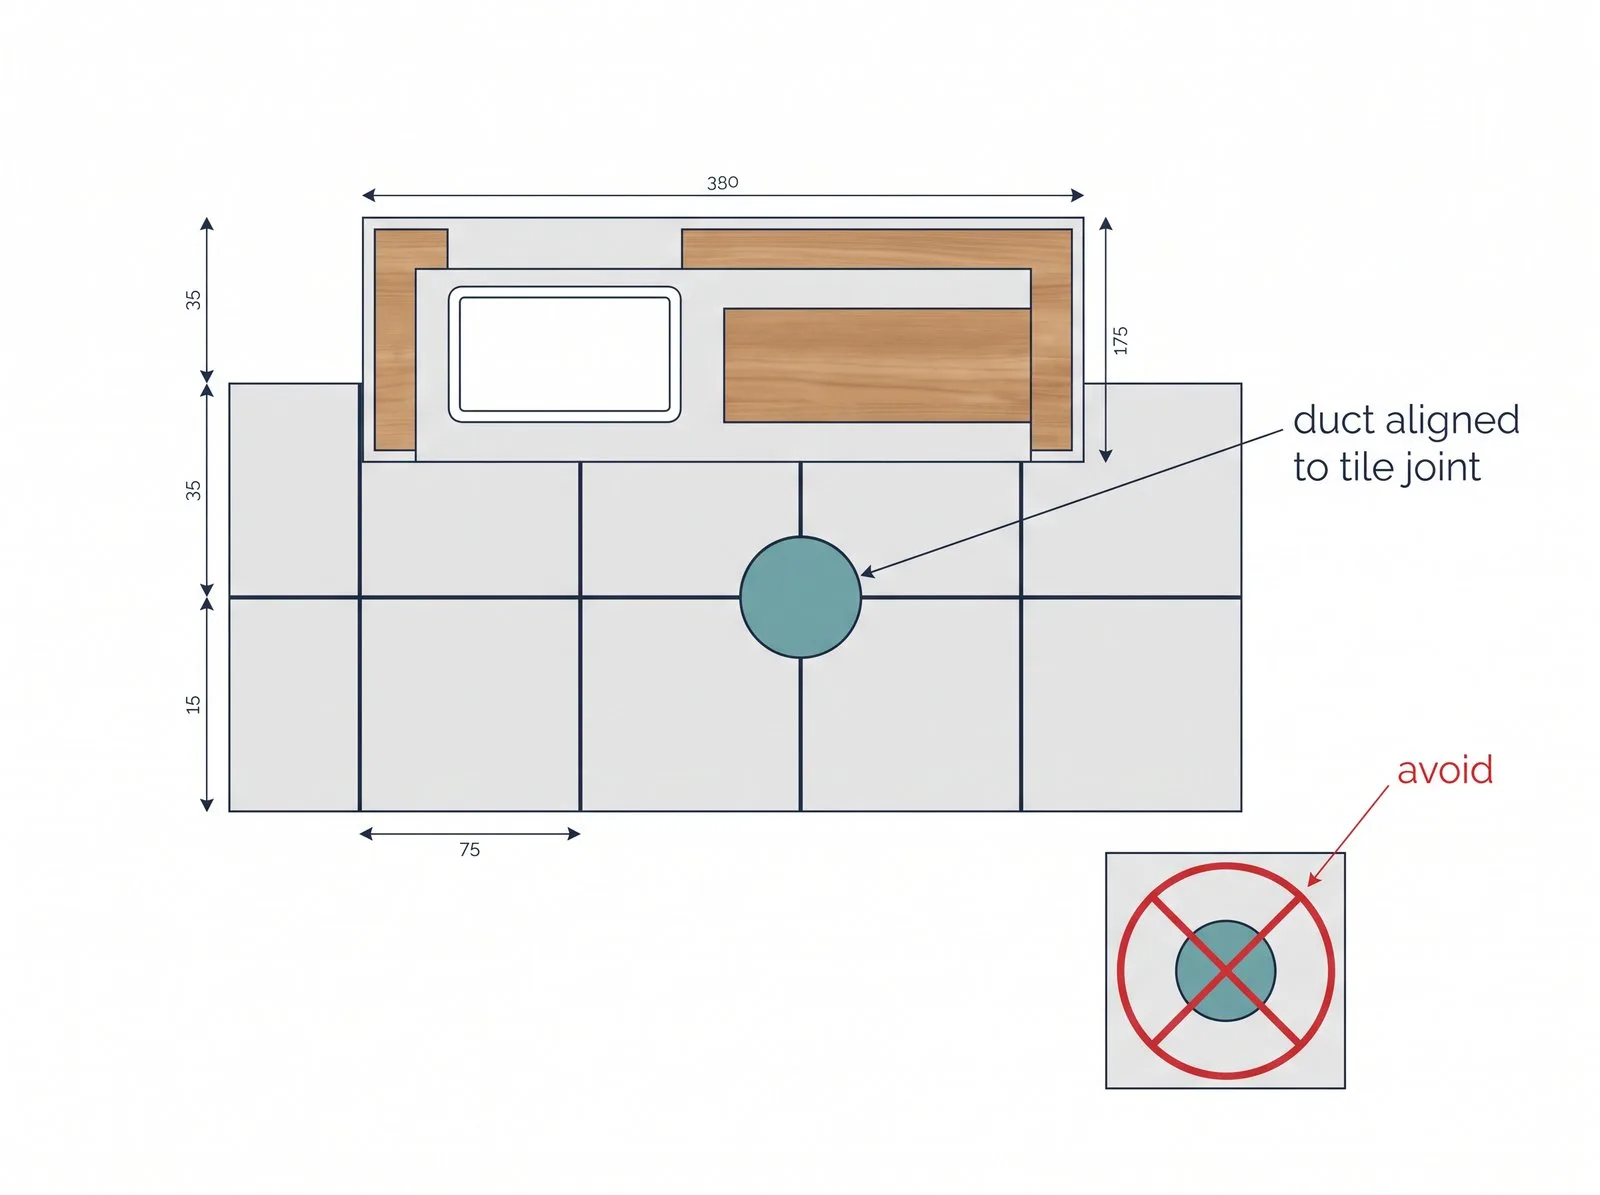
- Dry-lay your first few rows, especially around the island position, before committing any adhesive — on this kitchen, the island's floor duct has to land cleanly within a tile joint or a deliberately planned cut, not awkwardly under the middle of a full tile. Adjust your setting-out line rather than the duct position if the two don't line up.
- Spread tile adhesive with a notched trowel sized to the tile — large-format tiles like this need a larger notch (typically in the 10–12mm range) to build enough adhesive bed and avoid hollow spots (lippage) under the tile once it's down. Back-butter large tiles as well: apply a second, thinner layer of adhesive directly to the back of the tile itself (not just the floor) before laying it, so the two adhesive beds combine into full, even coverage rather than leaving voids where the trowel ridges on the floor don't quite meet the tile.
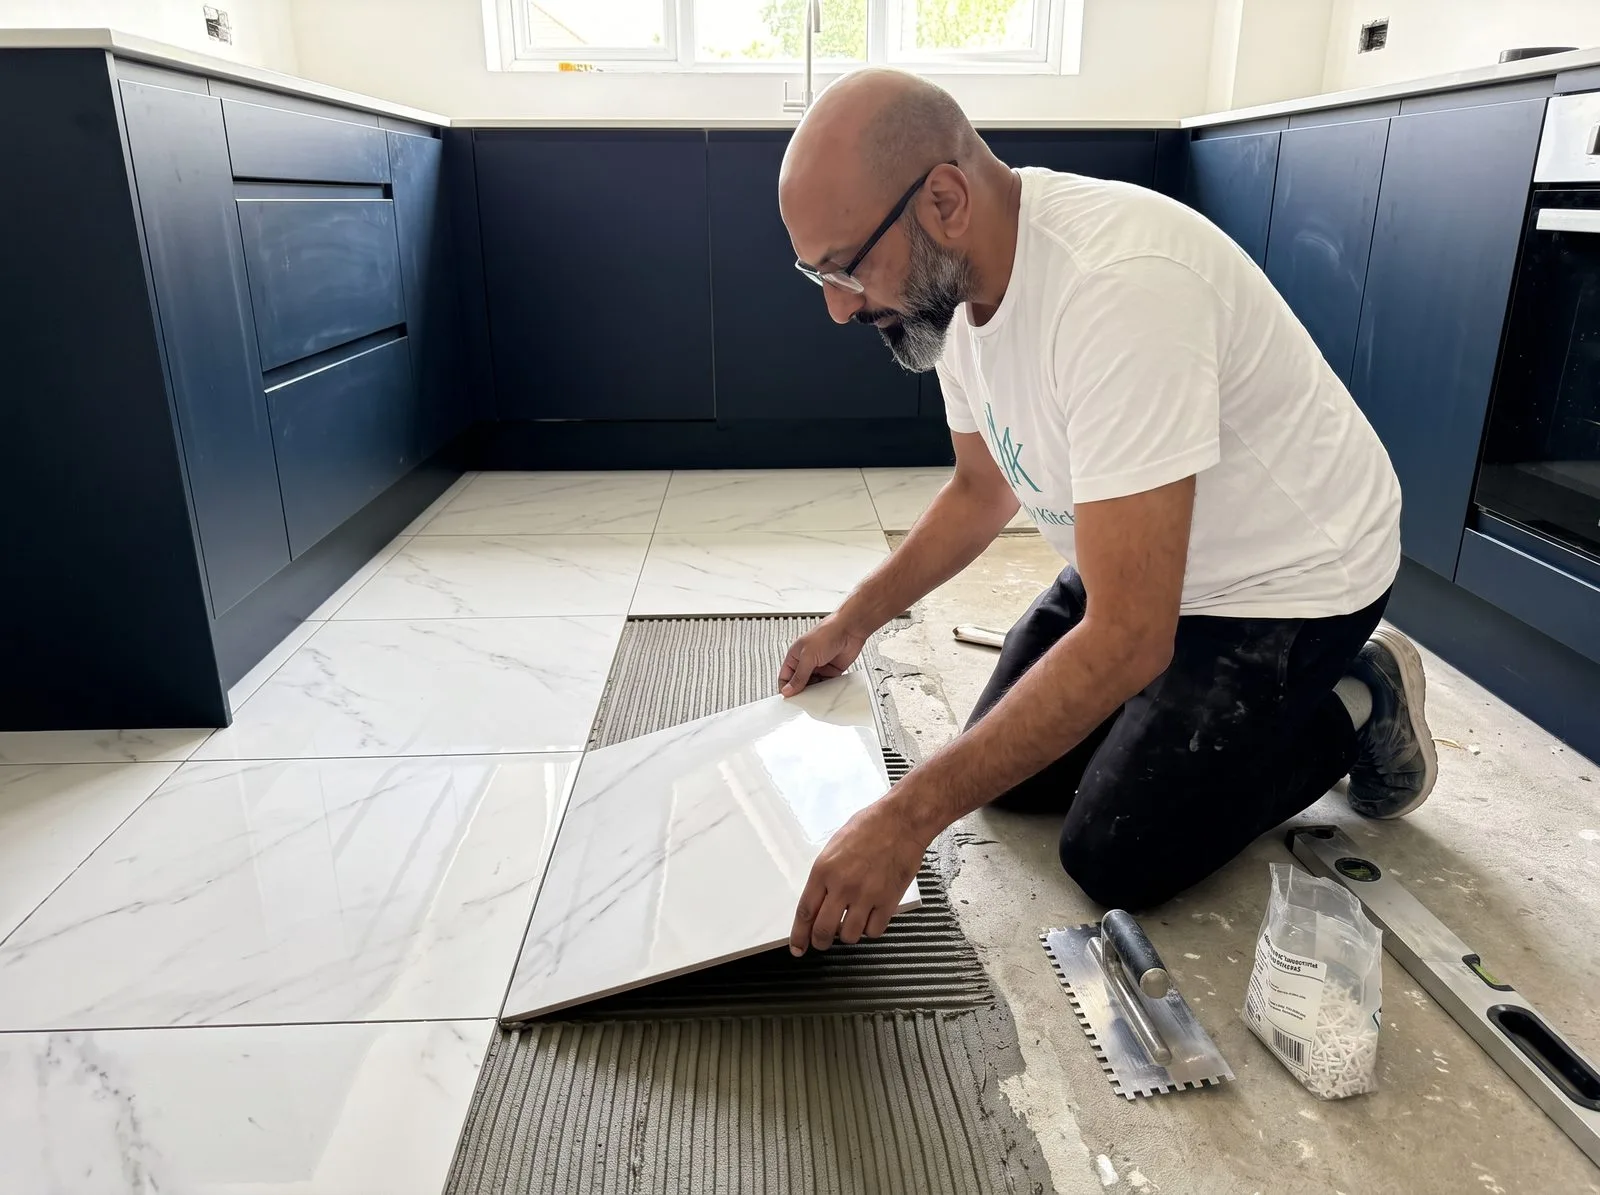
- Lay working outward from your most visible sightline (typically the view from the bifold doors or the main entrance to the kitchen), using spacers to keep joints consistent, so that any necessary small cuts end up against a wall or under a cabinet line, not in the middle of open floor. Check each tile is flat against its neighbours with a straightedge as you go, not after the whole floor is down.
- Let the adhesive cure fully per the manufacturer's instructions before grouting. Apply grout diagonally across the joints with a rubber grout float, packing it fully into each joint, then clean the excess off the tile surface with a damp sponge before it cures — leaving cured grout haze on large-format tiles is far harder to remove afterwards than catching it at the time.
Protect the finished floor immediately with board once it's cured — you've got a lot of cabinet, appliance and worktop movement still to come across this surface.
Tiling a Splashback or Wall Area
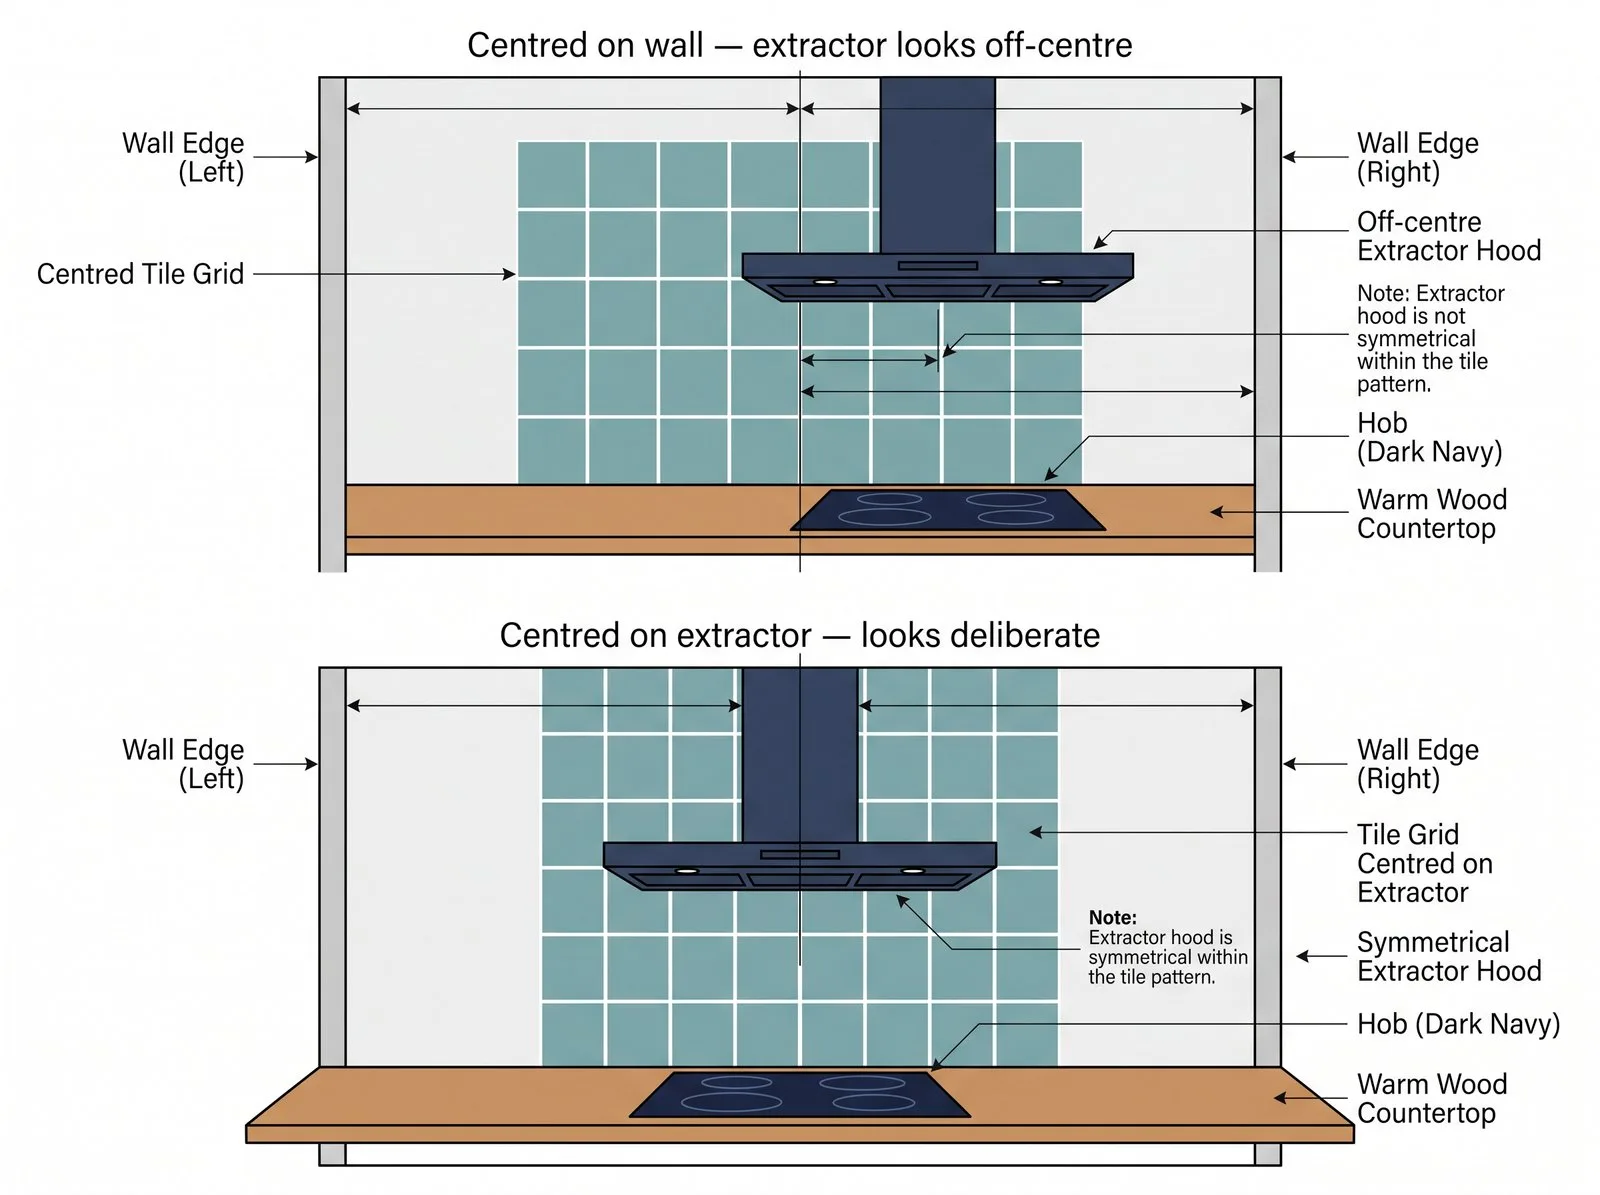
Where a kitchen has a wall-mounted hob and extractor, don't automatically centre your tile layout on the wall itself — centre it on the extractor instead. A wall is rarely perfectly centred behind the hob run once you account for end units, larders and door swings either side, so a layout centred purely on the wall can leave the extractor looking visibly off-centre against the tile pattern behind it, even though the tiling itself is technically correct. Centring on the extractor's own midpoint instead makes the whole splashback read as deliberate, because the extractor — not the wall edges — is what the eye actually focuses on. This kitchen's extractor sits on the island rather than the wall, so it doesn't apply here directly, but it's worth knowing for any wall-mounted hob and hood setup, which is still the majority of kitchens.
Marking Out & Setting the Datum Line
This is the stage that decides whether the rest of the kitchen goes together cleanly or fights you at every step, and it's worth doing properly rather than quickly.
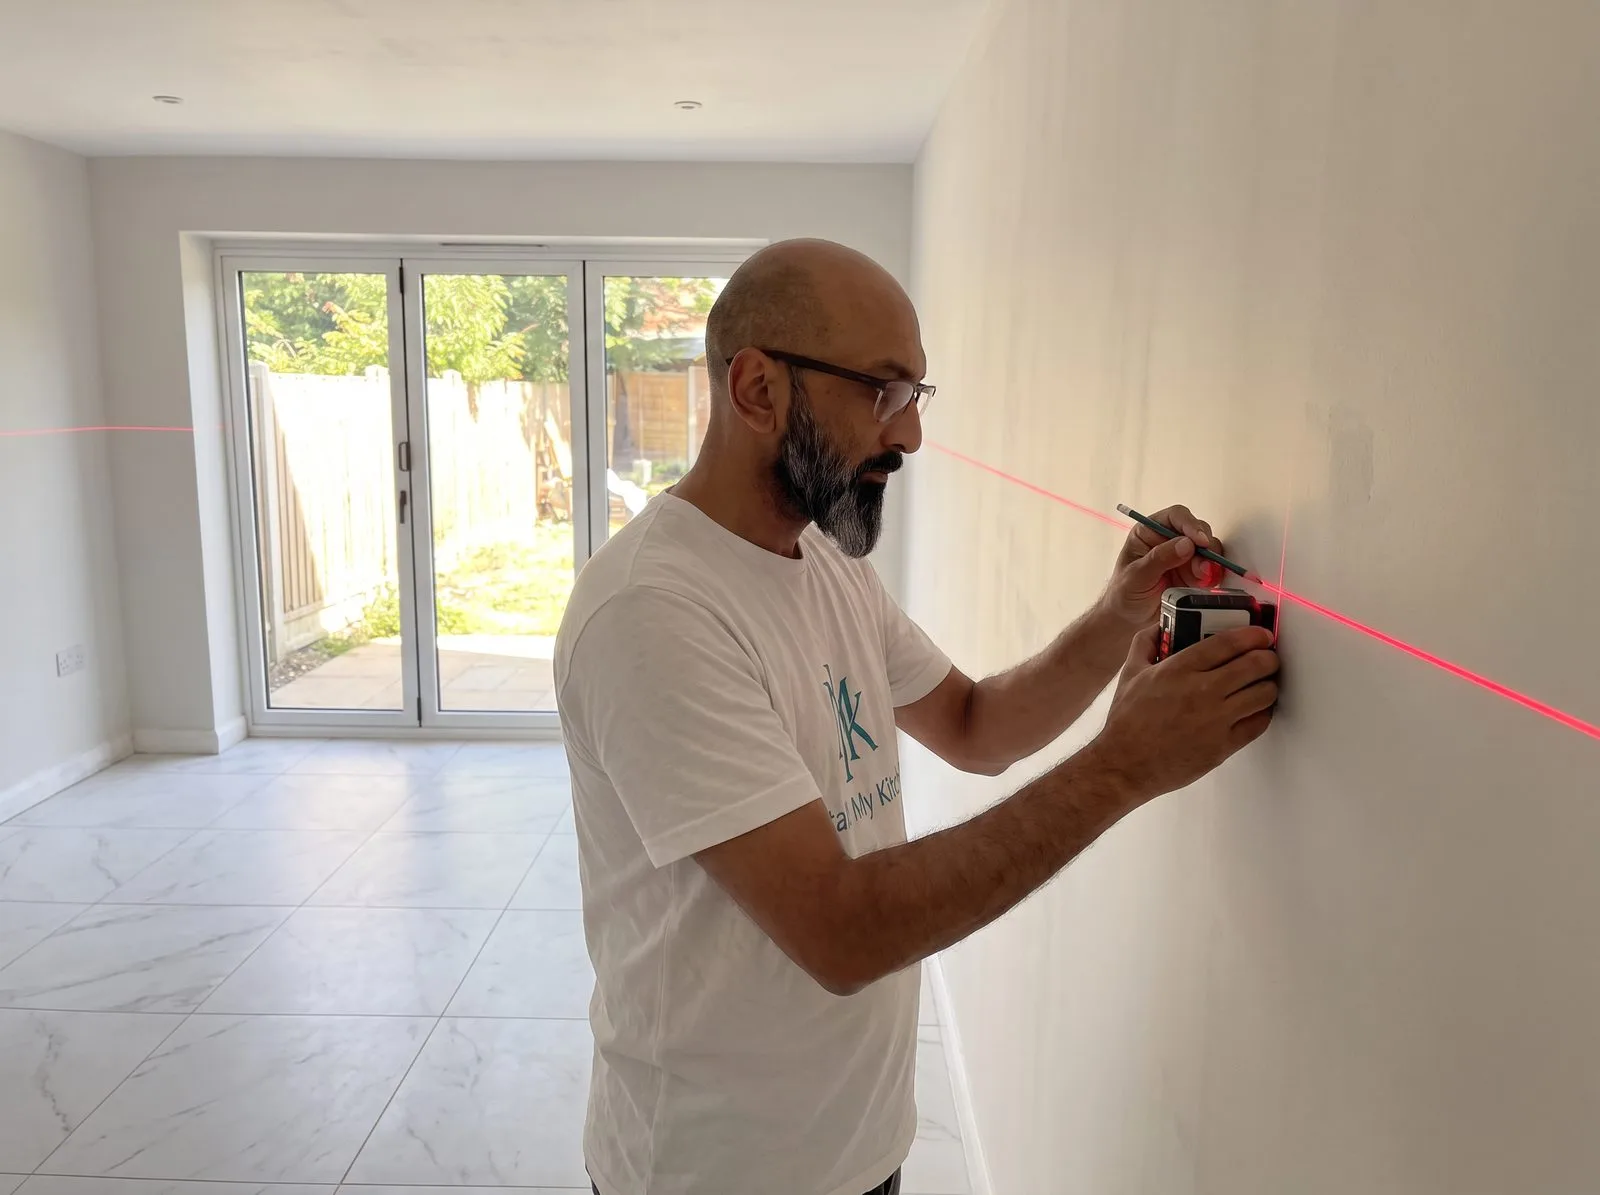
Do this after tiling, not before — you're measuring from the finished floor surface, and if you set your datum from the bare subfloor instead, the tile and adhesive bed you added afterwards (a centimetre or more) throws every measurement out. Find the highest point on the finished kitchen floor, where wall meets floor, using a long spirit level or — far more accurately — a laser level swept around the full perimeter and across the island position. Working from the highest point matters: base units have adjustable legs with roughly 100–150mm of travel, so you can always raise a unit sitting on a low spot, but you can't lower one that's already sitting on the high point without cutting it down.
From that highest point, set your base unit legs to 160mm — this is the leg/plinth height every base unit's bottom edge references. The carcass itself is 720mm tall, so mark a horizontal datum line 880mm above the highest point (160mm leg height plus 720mm carcass height), right around the walls. That 880mm line is the top of your base cabinet carcasses and your worktop-height reference point before the worktop thickness itself is added on top. Every base unit in the room gets levelled to that 880mm line, not to the floor beneath it — this is what makes an uneven floor invisible in the finished kitchen.
160mm is worth setting deliberately rather than defaulting to a plinth height you've used on other jobs: a 150mm plinth doesn't leave enough clearance underneath the worktop for an integrated dishwasher to actually fit its housing properly, and 880mm is the genuine minimum needed to clear it. Treat it as a floor, not a target — don't set the datum any higher than 880mm unless the floor itself genuinely forces it (a significant drop across the run, for example). Confirm the exact figure against your specific dishwasher's height before cutting anything.
Check every corner for square before you commit — a corner that's genuinely 90° behaves completely differently to one that's a few degrees out once you start fitting corner base units and their void panels, and it's far cheaper to know that now than to discover it mid-carcass-run. Use the plan to mark the approximate width of each cabinet onto the wall at this point too, so you can double-check service positions (socket, isolation valve, the extractor duct) land where the plan says they should before you're committed.
Carcass Install — Perimeter
Setting Up for Carcass Day
Before a single cabinet gets fixed to a wall, get the site organised properly — a chaotic install day is where damage, mistakes and lost fixings happen.
- Move everything not currently needed out of the installation area to actually create room to work — there's no working accurately in a room still half-full of boxes.
- Set up an outdoor working area near the kitchen if you can — a back garden is ideal — and put your chop saw there rather than cutting inside the room you're trying to keep clean and dust-free.
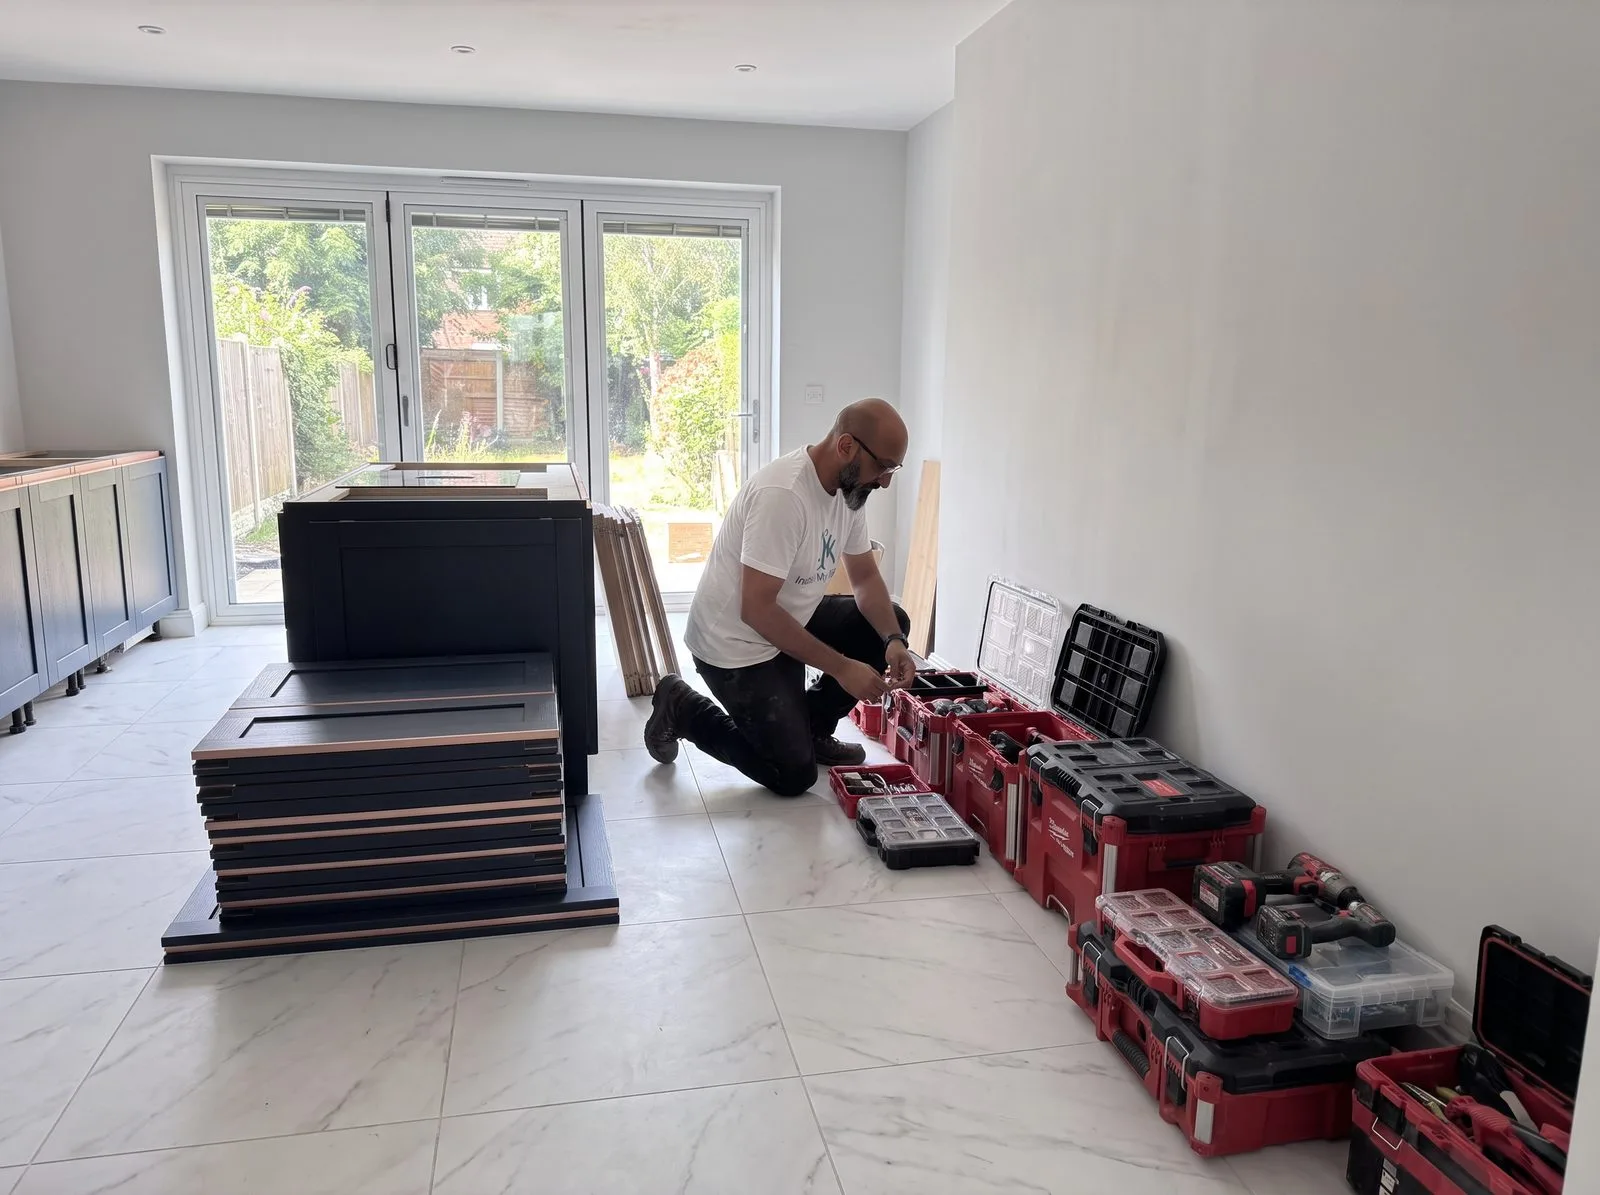
- Line your toolboxes up against a free wall not too far from the installation area, in a consistent, easy-to-access order, with all your fixings kept together in the same place — hunting for a specific box of screws mid-fit wastes real time across a whole day.
- Unpack each cabinet carefully as you get to it (most rigid kitchens, Wren included, arrive pre-assembled) and check it for damage before it goes anywhere near the wall. Photograph anything damaged immediately, but don't stop the day for it — keep working through the rest of the delivery and deal with the paperwork once everything's been checked.
- Fit the leg packs to the bottom of every base and larder cabinet before positioning any of them, working through the cabinets in the sequence they'll actually be installed according to the plan — cabinet numbering on the boxes doesn't necessarily match install order, so work from the plan's layout, not the box labels.
- Pick your starting corner and dry-fit the entire run — every cabinet in that run offered up into position, but not yet fixed — before committing to anything permanently. This is what catches an end filler that's going to come out too wide or too narrow, or a run that doesn't actually add up to the space available, while it's still a five-minute adjustment rather than a problem discovered halfway through fixing. Do this for every run before you start final fixing on any of them.
Once you've confirmed a run dry-fits properly, fit the adjustable legs' final positions — four legs for cabinets up to 600mm wide, six for 800–1000mm cabinets, eight for a full L-shaped corner unit — using whichever of the two pre-drilled leg positions suits the cabinet's depth and the load it'll carry.
Position each cabinet, then level it to your 880mm datum line by adjusting the legs individually rather than packing underneath — packing is a last resort for genuinely awkward floor conditions, not the default method. Once a cabinet is level and correctly positioned relative to its neighbour, brace the two together with a cabinet clamp and join them with a self-tapping screw no longer than 30mm, driven just behind the hinge plate, with a second screw at the rear of the unit for extra strength on anything that'll carry real weight.
Corner Units: The Part Nobody Explains Properly
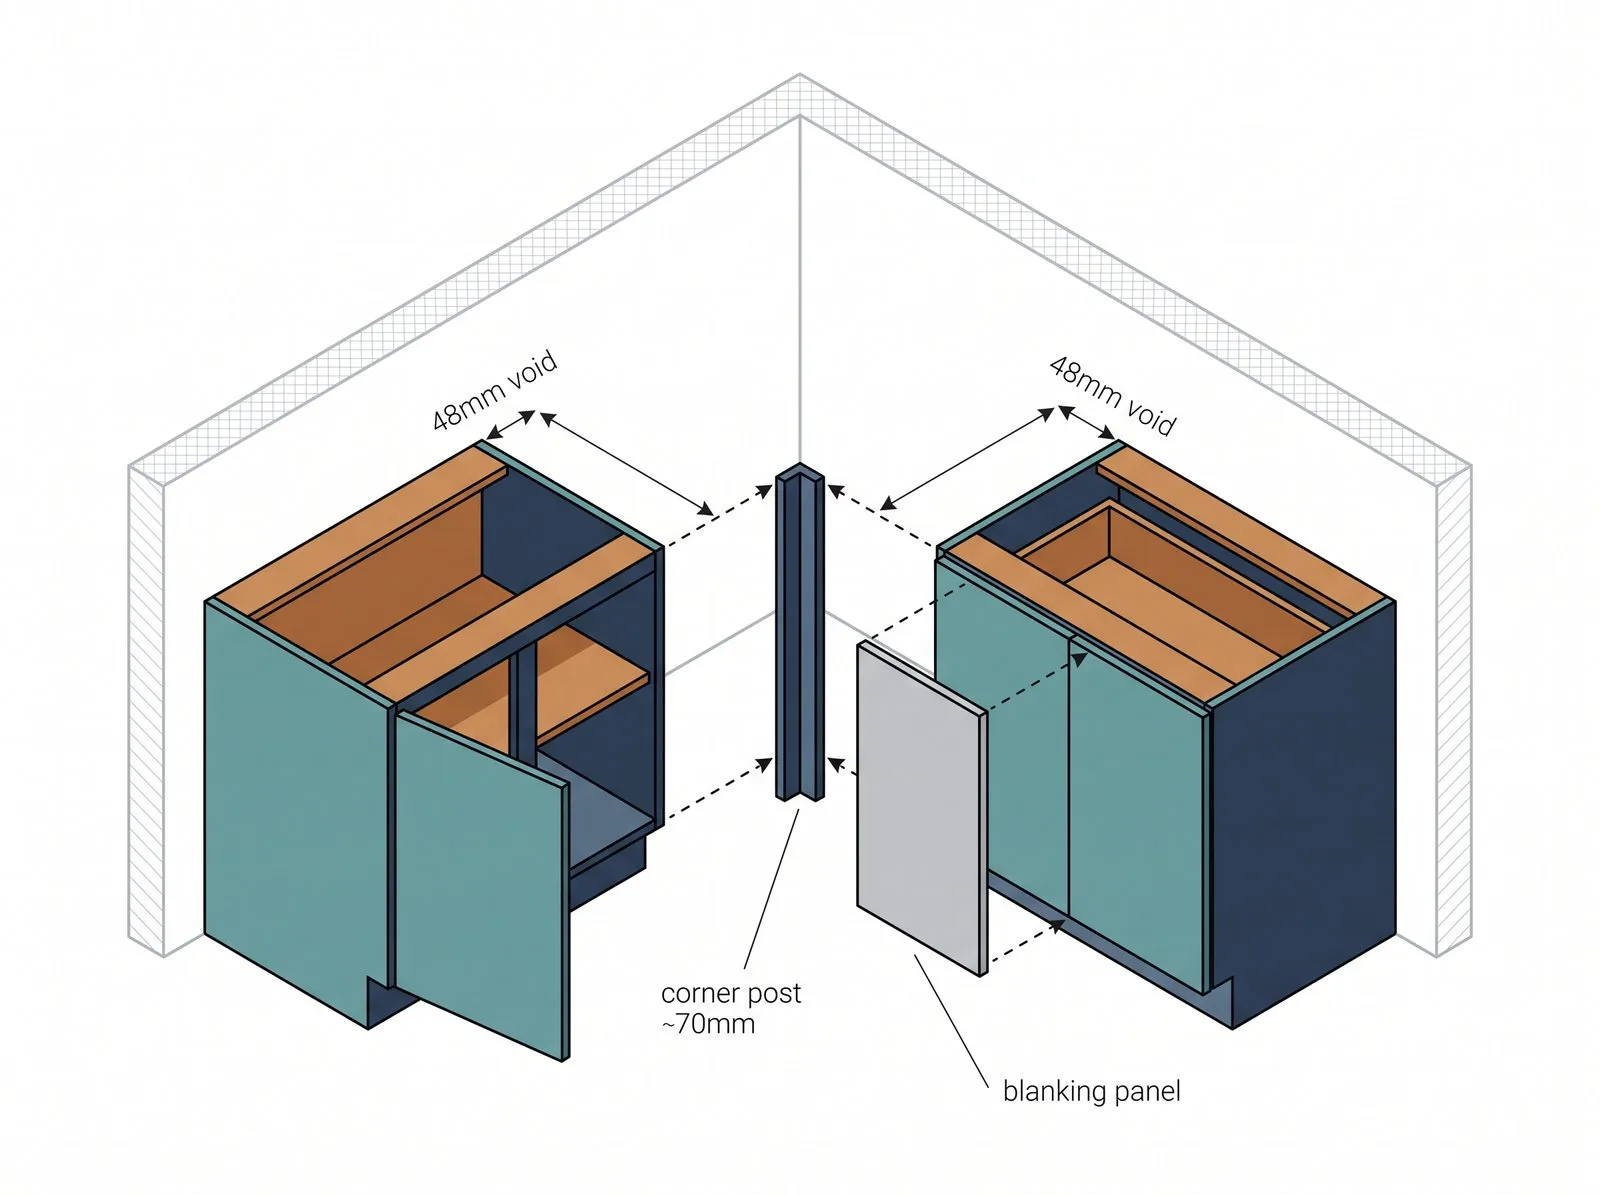
Corner base units need particular care, and this is worth understanding properly rather than guessing at on site. Wren's standard corner base has a depth of 570mm, but the two carcasses that meet at the corner don't actually touch — each is set back from the true corner by a 48mm void, left deliberately open to carry pipework or cabling that needs to turn the corner without a carcass wall in the way. Picture it as two rectangles, one against each wall, each stopping 48mm short of where the walls actually meet.
A corner post — a vertical trim piece, roughly 70mm wide on a standard setup — sits at the front of that void on one of the two carcasses, and its job is twofold: it gives the corner door the correct, square opening to hang from, and it visually closes off the gap at the front of the unit. Behind it, further back where the void isn't visible from the front, a blanking panel closes off the remainder of the internal void — the part that ends up hidden behind the return unit on the adjoining wall once both runs are in place. Fit the blanking panel first — it's screwed edge-on into the top and bottom panels of the main carcass, closing the side of the void the same way an end panel closes the end of a run — then offer the corner post up against the two adjoining units once they're actually in position. The adjoining unit on the return wall simply butts up against the outside face of the corner post once it's cut and fixed, the same way any two straight-run cabinets meet. The post itself gets cut to its exact final size on site, against the real gap, not to a fixed dimension from the plan, because small variations in wall-to-wall square accumulate by the time you reach the corner.
The alternative is a 972mm L-shaped corner unit, which needs no void at all — its side panels fix directly to both walls, and its corner post attaches to the door itself rather than to the carcass. Check which system your plan actually specifies before you start the corner, because the fitting sequence is different for each, and unpicking an already-braced standard-void corner to convert it to an L-shaped approach (or vice versa) costs you real time.
Work the perimeter in both directions from your starting corner: base units round to the window (leaving the marked gaps for the sink run and its wall units above), and the tall larder bank built up on the end wall, checked for vertical plumb as carefully as the base run is checked for level — a tower unit that's out of plumb front-to-back or side-to-side will visibly lean once it's finished, and there's no adjustable-leg equivalent to fix that after the fact.
Fitting Wall Cabinets on Stud Partition Walls
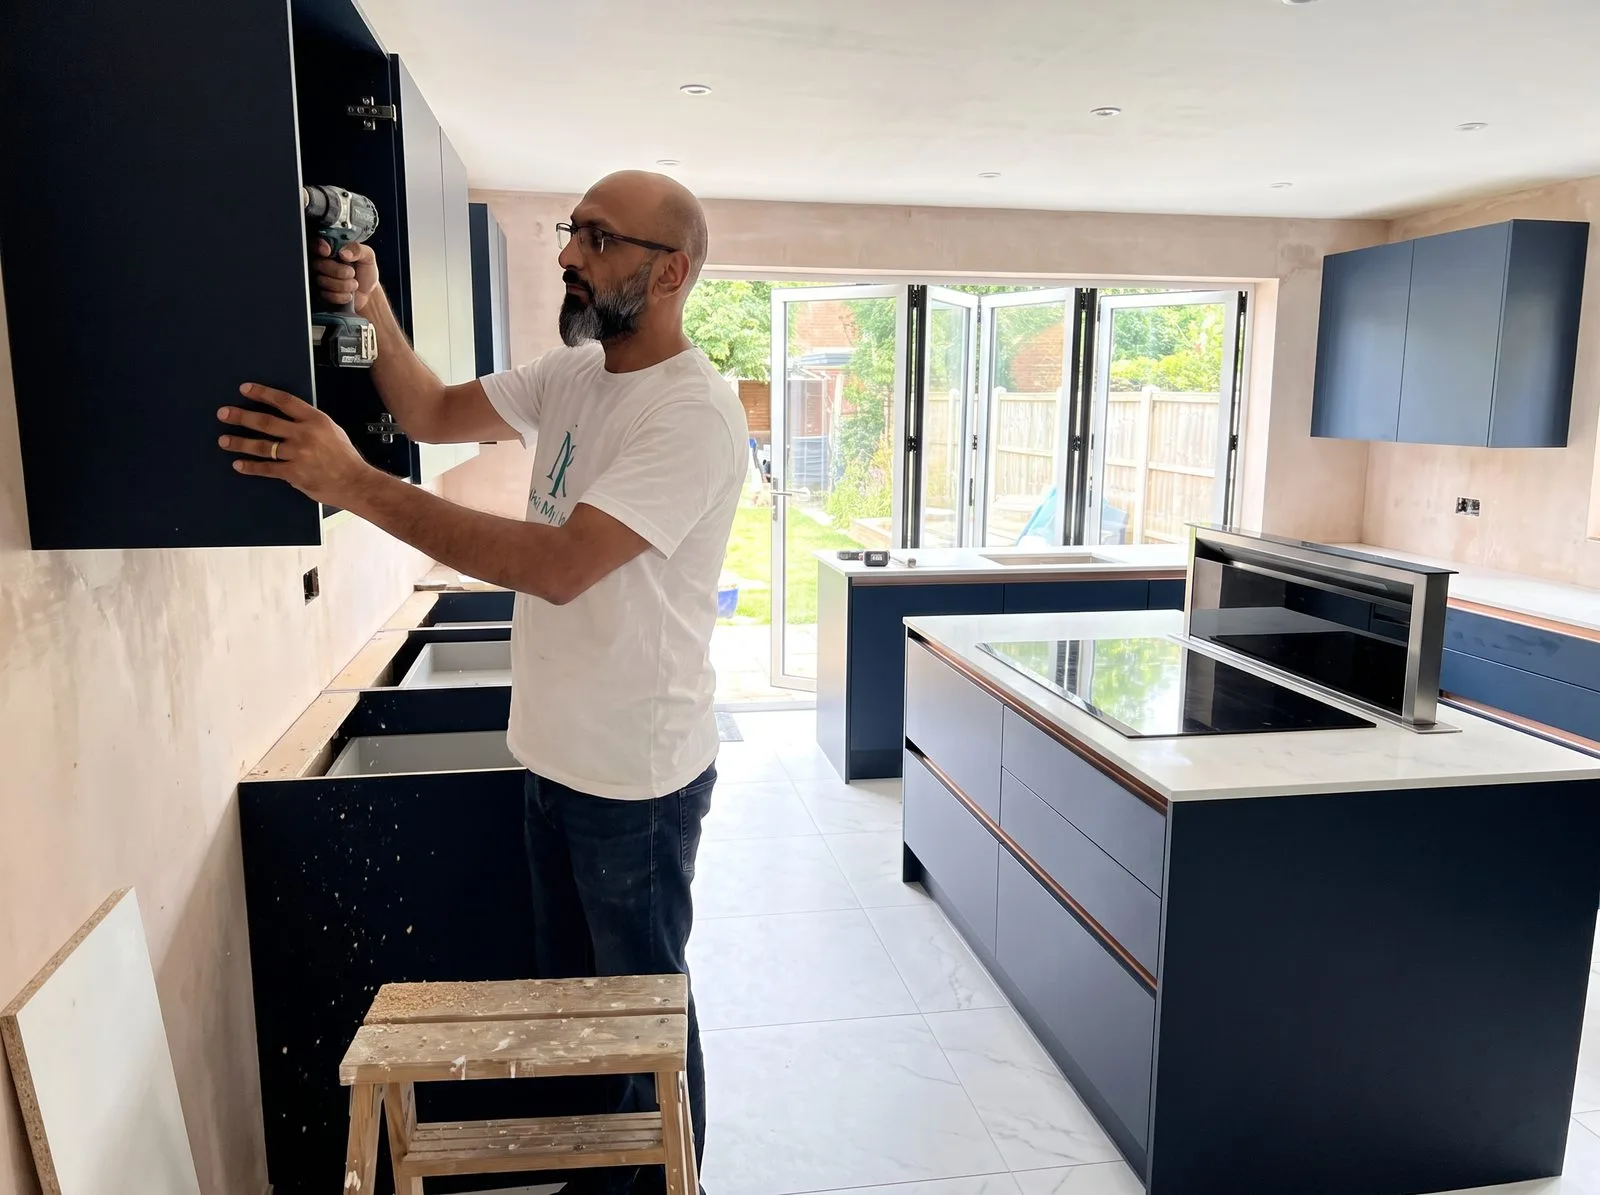
A wall cabinet full of crockery or heavy cookware is a serious load, and a stud partition wall — plasterboard over timber or metal studwork, with nothing solid behind it except the studs themselves — will not safely carry that load from the plasterboard alone. Screwing a hanging plate straight into plasterboard, or relying on a generic wall plug, is not adequate for a kitchen wall cabinet. Where the fixing doesn't land on a stud directly behind the plate, you need to create a solid backing.
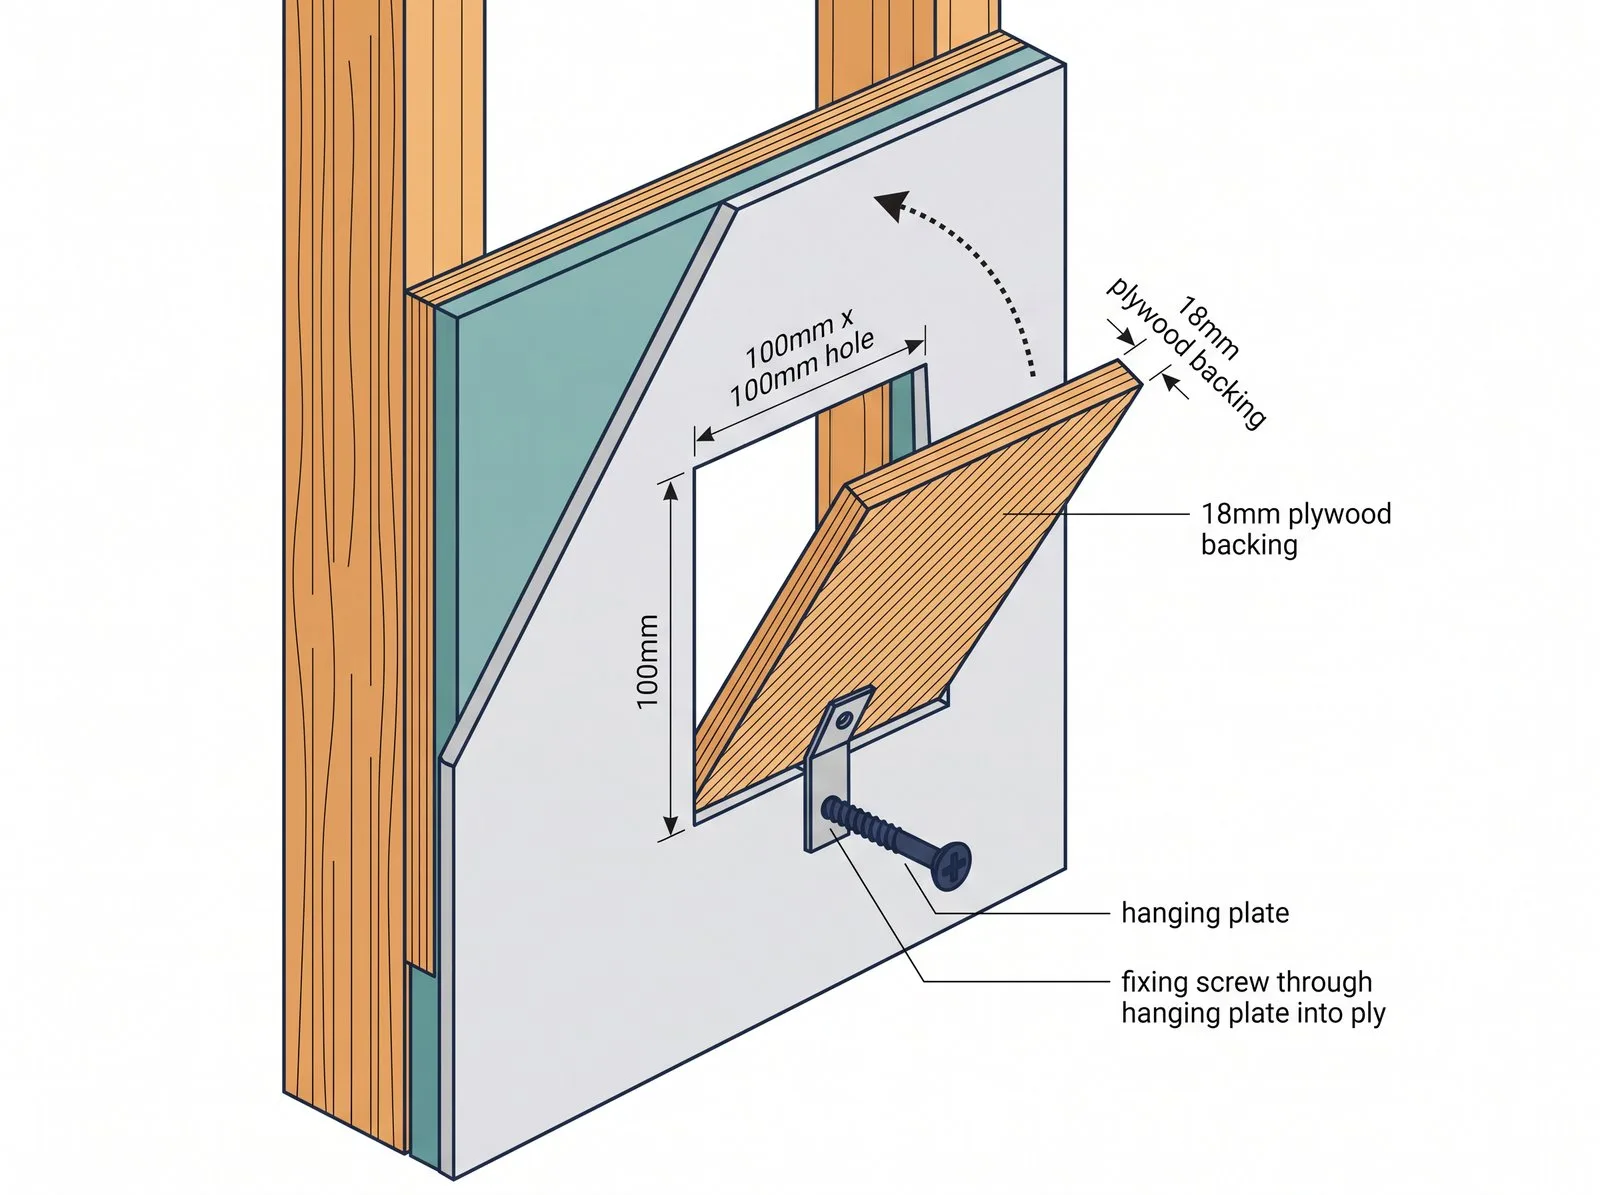
The reliable method: cut a 100mm x 100mm square hole in the plasterboard directly underneath where each wall hanging plate will sit. Cut a piece of 18mm plywood somewhat larger than that hole — big enough that it can't simply fall back through once it's in position, but still small enough to manoeuvre through a 100mm opening on an angle. Feed it into the hole diagonally, corner-first, then rotate and flatten it against the inside face of the plasterboard so it sits flush behind the board, roughly centred behind the hole. Fix the hanging plate through the plasterboard and straight into that 18mm ply using 50mm x5 screws — the screw is now biting into a solid 18mm timber backing rather than just paper-faced gypsum, which is what actually carries the load. Patch the cut-out afterwards as part of your plastering stage.
The alternative — metal spring-toggle or cavity plasterboard plugs — technically works and is faster, but we don't recommend it for kitchen wall cabinets. A plasterboard plug's holding strength comes from the plasterboard itself flexing and gripping around the toggle, and that's a fundamentally weaker fixing than a screw driven into solid ply, particularly under the repeated opening and closing loads a kitchen cabinet door sees over years of use. It's an acceptable fixing for a lightweight bathroom cabinet or a picture; it is not the standard we'd use for a loaded kitchen wall unit.
Fixing to Solid Brick or Block Walls
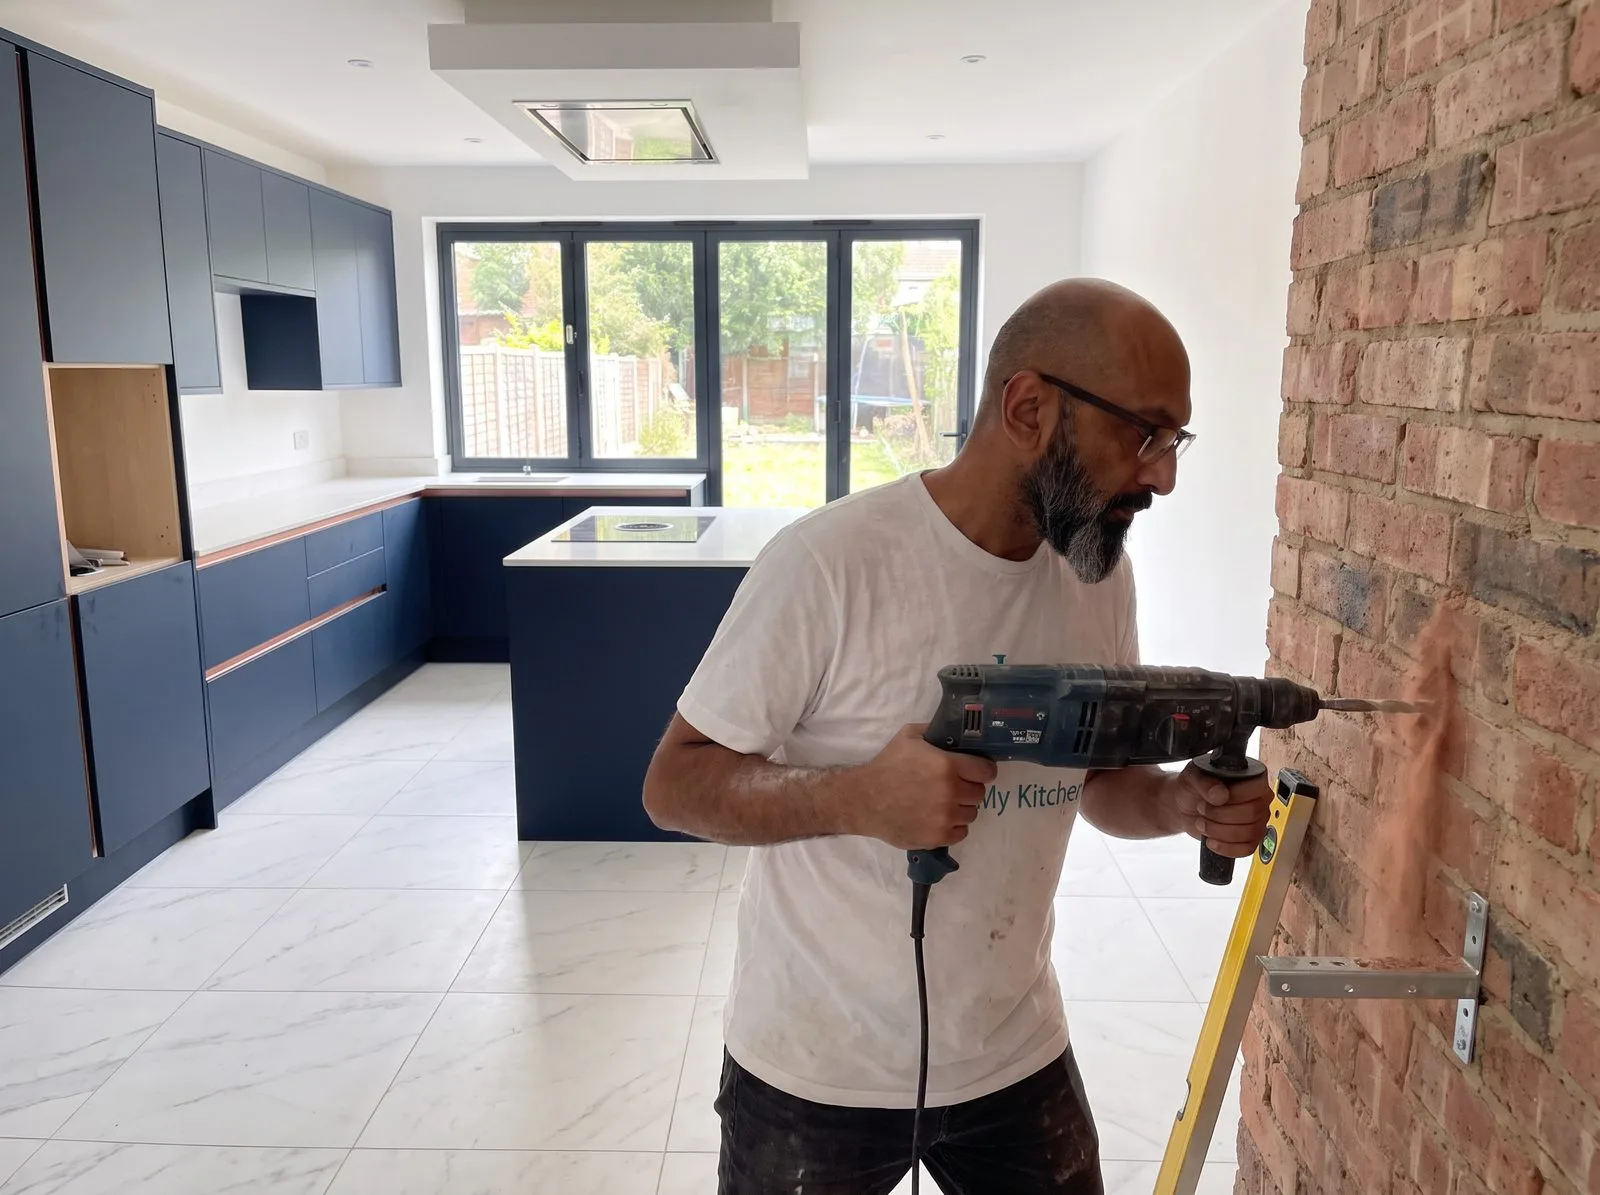
Plenty of UK kitchens sit against solid masonry rather than stud partitions, and the fixing approach is different again. Drill with an SDS drill rather than a standard combi drill — masonry needs a hammer action to drill cleanly, and a standard drill will struggle and can wander off-mark. Use a masonry bit matched to the wall plug size you're fitting (check the plug packaging for the correct drill diameter), drill to a depth slightly deeper than the plug's length so it seats fully rather than bottoming out in a part-drilled hole, then insert the correct wall plug for the wall type and screw the hanging plate or bracket directly into it. Brick and block behind plaster is a genuinely solid fixing on its own — you don't need the plywood-backing method at all here, since you're not relying on thin plasterboard to carry the load.
Scribing End Panels, Plinths & Trim
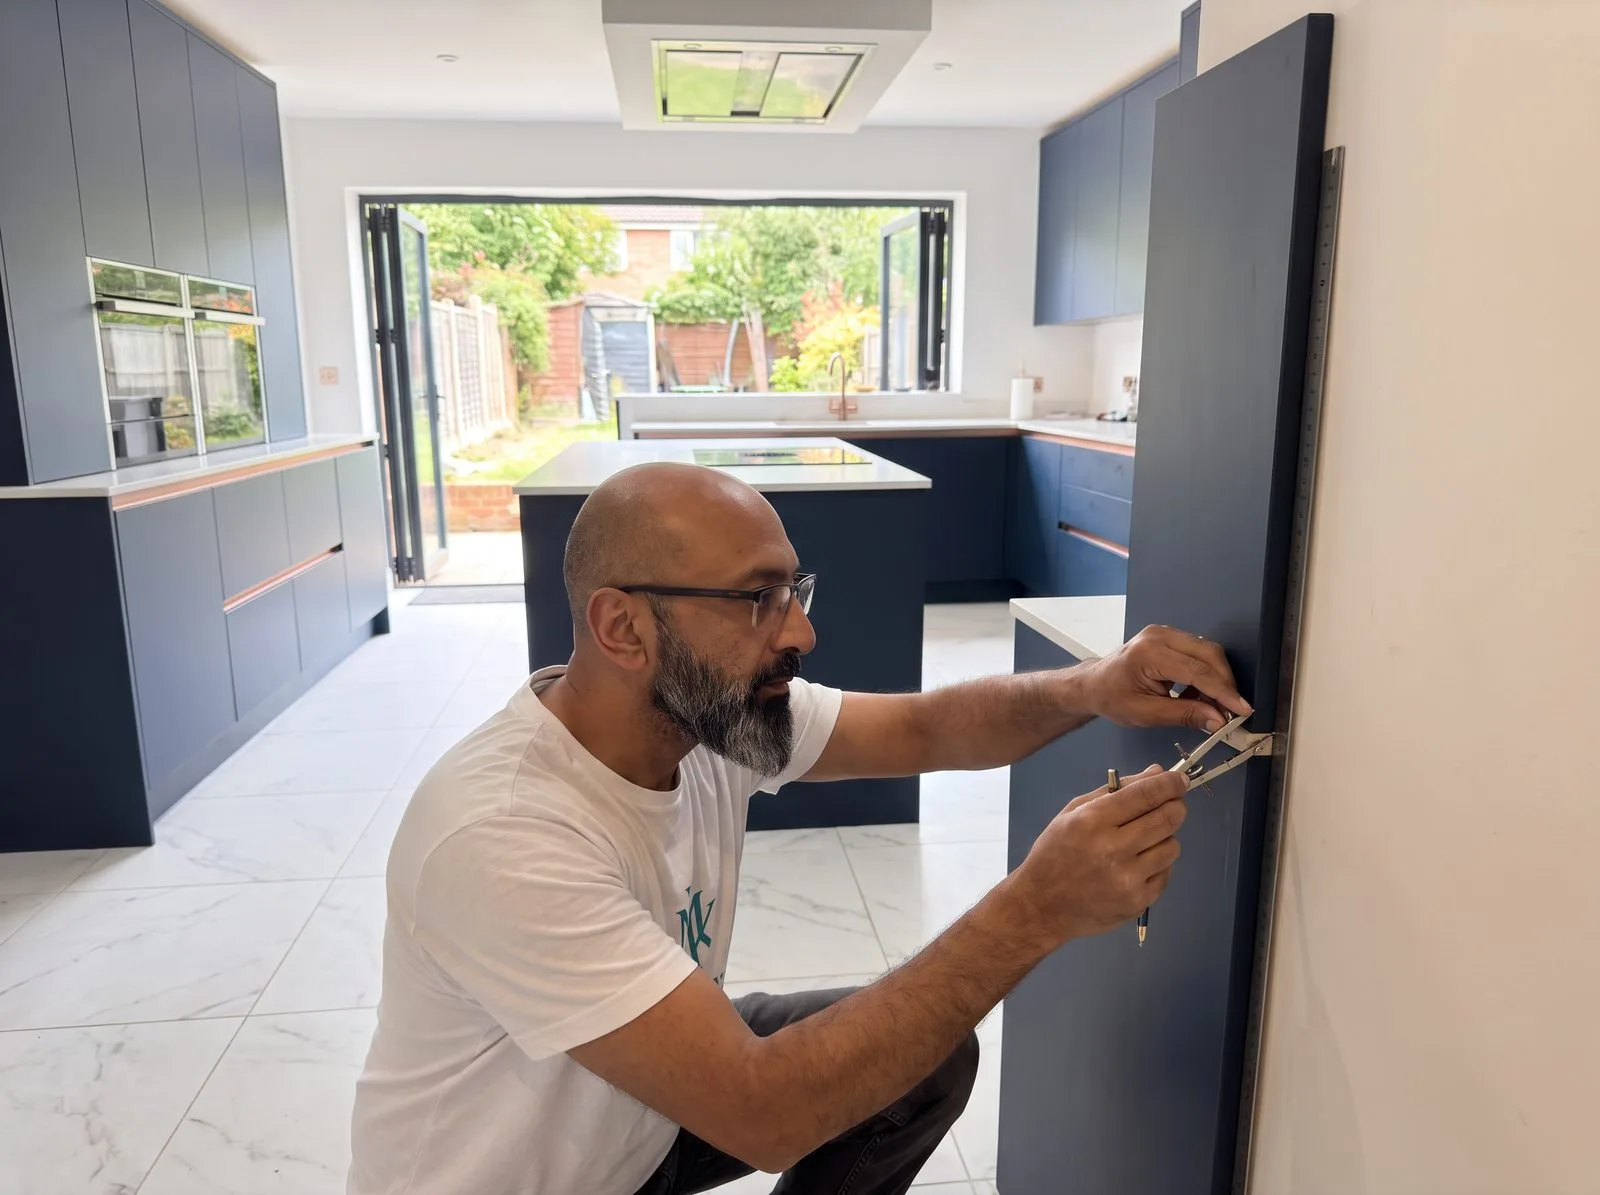
Almost no wall in a real house is perfectly flat or perfectly plumb, and decor end panels, plinths and any cornice or pelmet all need to be scribed to the actual wall or floor they meet, not fitted on the assumption that everything is square.
- Offer the end panel up into position and find the widest gap between the panel edge and the wall along its full height.
- Set a scribing compass to that widest gap measurement, then run the compass down the wall with the point tracking the wall's actual contour and the pencil transferring that contour onto the panel face — protect the panel face with low-tack masking tape first if it's a finished, visible surface.
- Cut along the scribed line with a jigsaw fitted with a clean, downward-cutting blade to avoid chipping the visible face, angling the cut very slightly back on the reverse side (a light back-bevel) so the front edge sits flush against the wall once offered back up.
- Use the same scribing method for plinths meeting an uneven floor, leaving a small gap (a couple of millimetres) above tiled flooring rather than a tight seal, so the plinth isn't sitting in standing moisture — then seal the underside edge with clear silicone before final fitting.
- Space plinth clips evenly along the run — a clip roughly every 600mm, fixed directly behind a cabinet leg where possible, gives a plinth that doesn't flex or rattle underfoot. Where a plinth run turns an external corner (the front of a U-shape returning onto a side wall, for instance), use the plinth corner joint pieces or end caps designed for that profile rather than butting two cut plinth ends together — a proper corner piece keeps the line continuous and hides the end grain, where a raw butt joint at a corner is one of the more obvious tells of a rushed finish.
- For cornice or light pelmet, cut mitred corners with a powered mitre saw rather than by hand for a clean joint, glue the mitre faces with the mitre adhesive from your tool list, tape the joint until it's set, then pilot-drill and screw the finished length up into the wall cabinet.
Island Build
Treat the island as a distinct sub-project rather than an extension of the perimeter run, because it's carrying more than cabinetry: the downdraft extractor and its ducting, the power run for the induction hob, and — on this kitchen — a lower-level L-shaped seating section with its own, contrasting worktop.
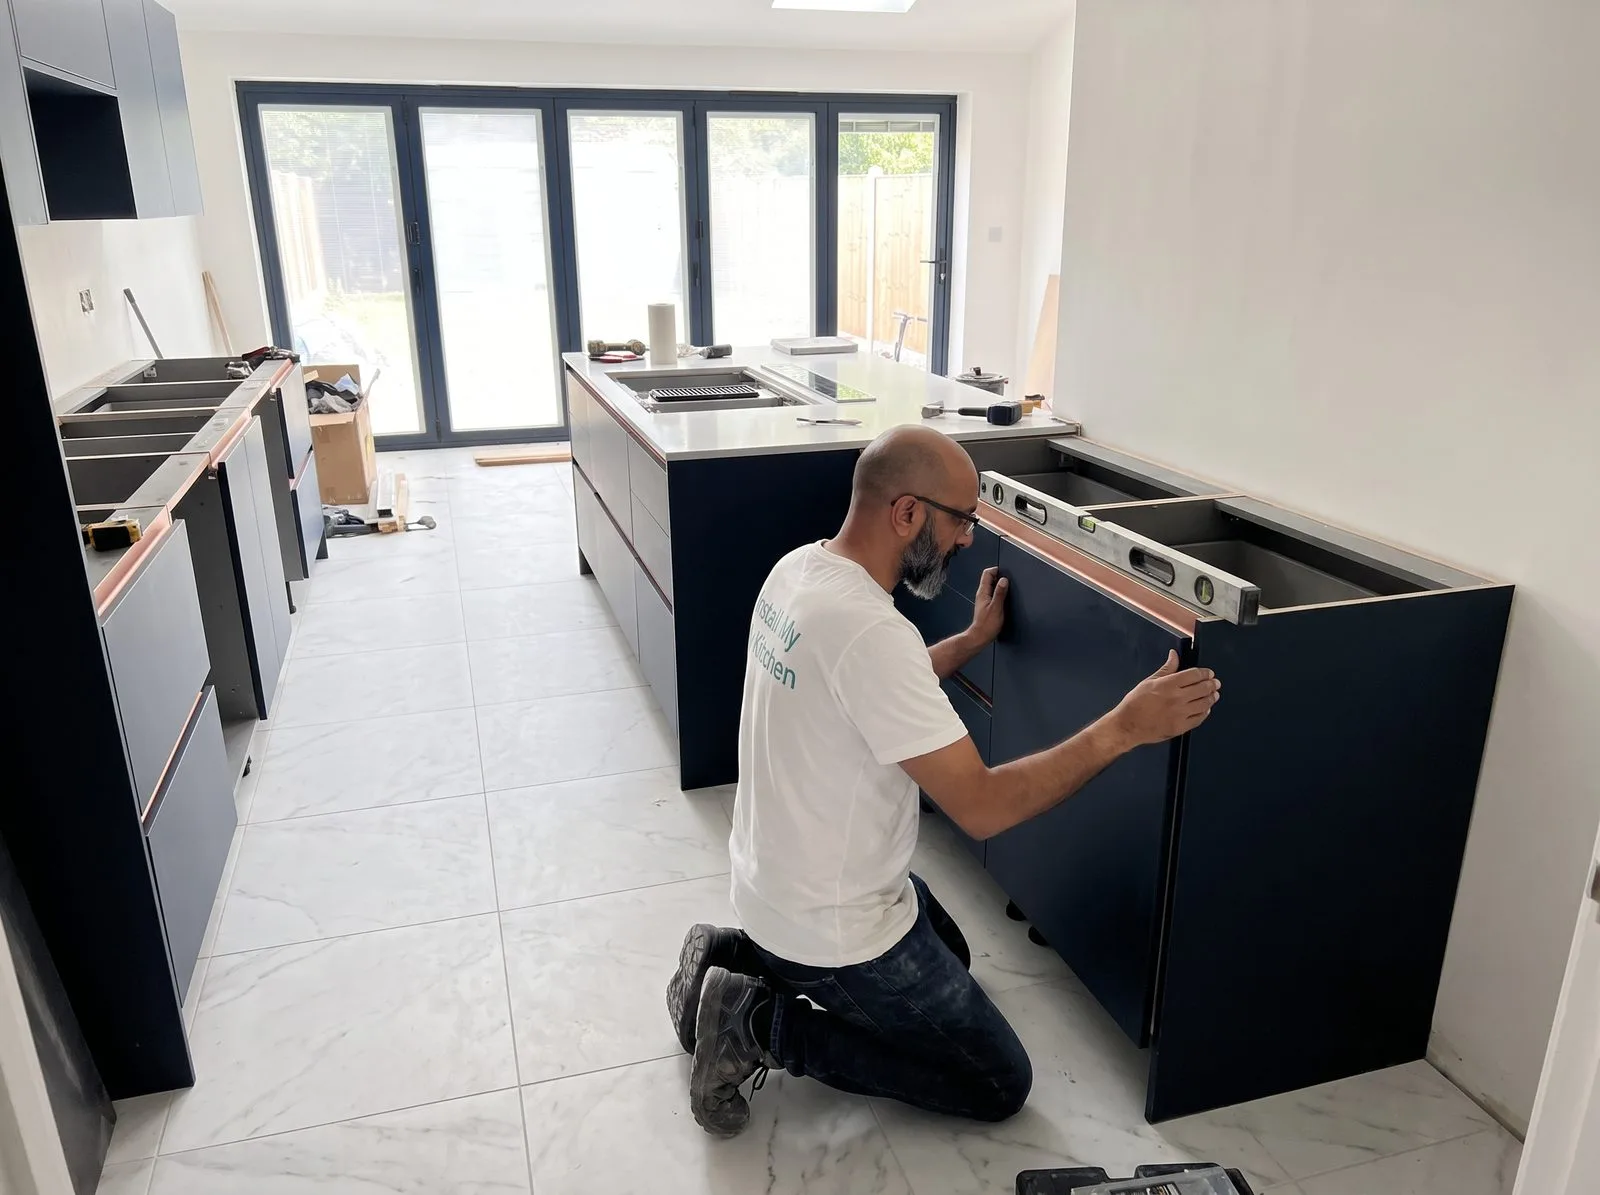
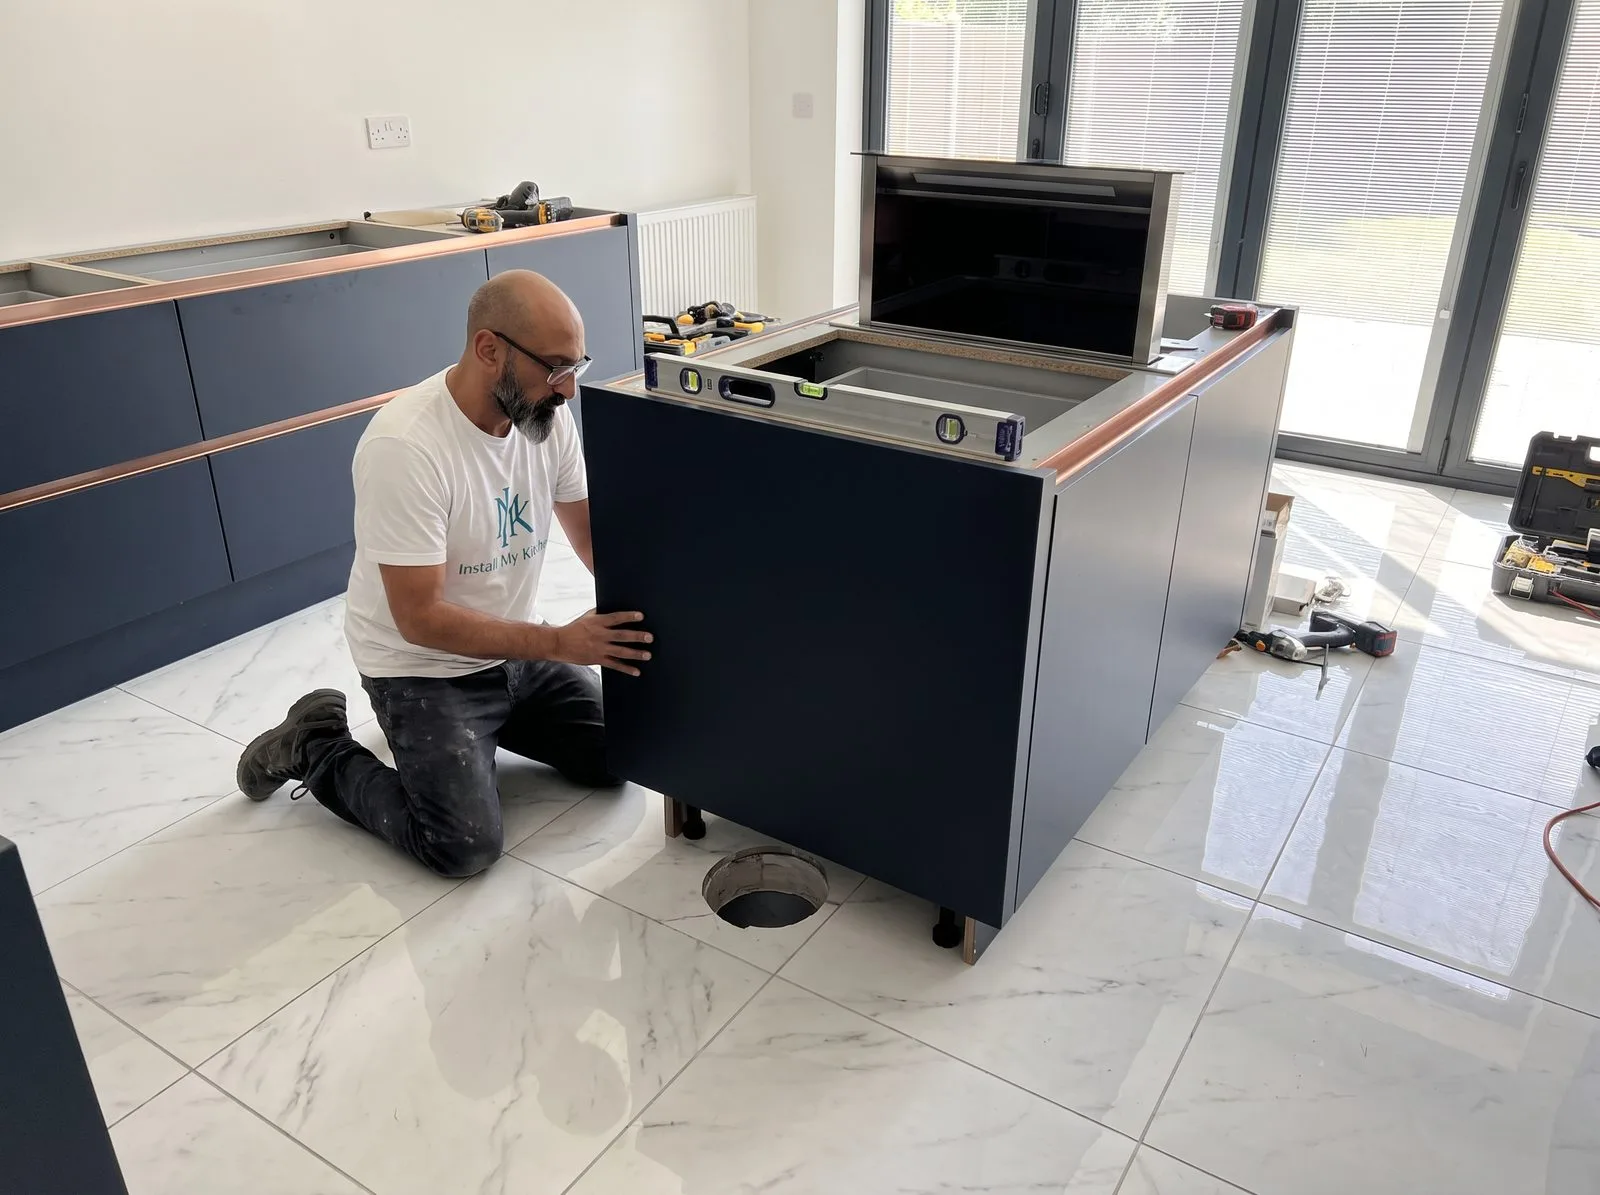
Position the island carcasses directly over the first-fix power and the floor duct, checking the duct lines up exactly with the cut-out position before anything is fixed down permanently. Connect the downdraft extractor's ducting run before the surrounding cabinets close it in — this is much harder to correct once the carcasses either side are fixed in place. Route the hob's power connection up through the same service void, ready for second fix once the worktop is on.
The socket and switch positions on the island also fall under Part P — the electrician signs this off, not the fitter.
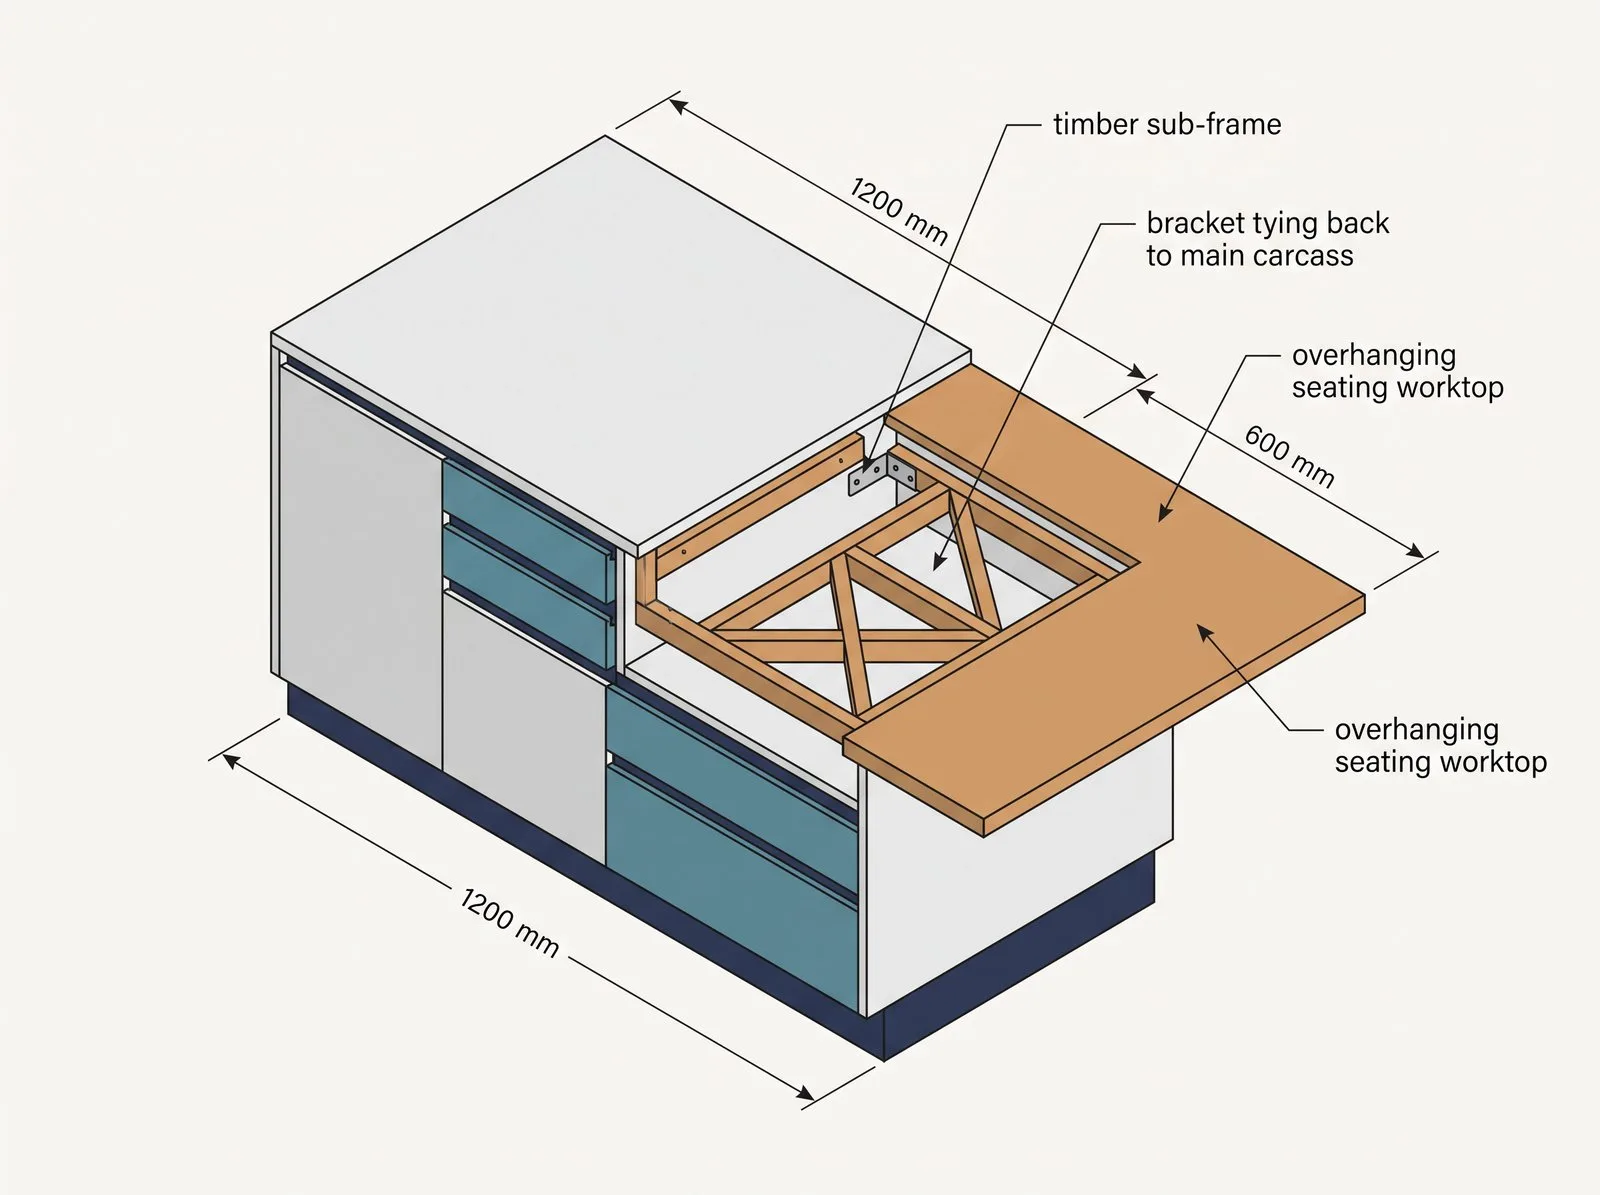
The lower seating section is structurally its own build: since it sits at a different height and carries a different, contrasting worktop, it needs its own support back to the main island carcass rather than relying on the main run alone — a timber sub-frame or noggin structure under the seating worktop, tied back into the main carcass with brackets or screwed battens, not just the overhanging worktop itself bridging the gap unsupported. Check this junction is genuinely rigid before moving on — a seating overhang that flexes is both a finish problem and, with people sitting on it, a safety one.
Appliance Integration
Fridge freezer, oven, microwave, dishwasher, washing machine, hob, extractor and — where there's room for one — a tumble dryer all go into their prepared housings at this stage, but every single one of them has its own quirks, its own connection requirements, and its own way of catching out anyone fitting one for the first time. This is worth treating properly rather than as one generic "fit the appliances" step.
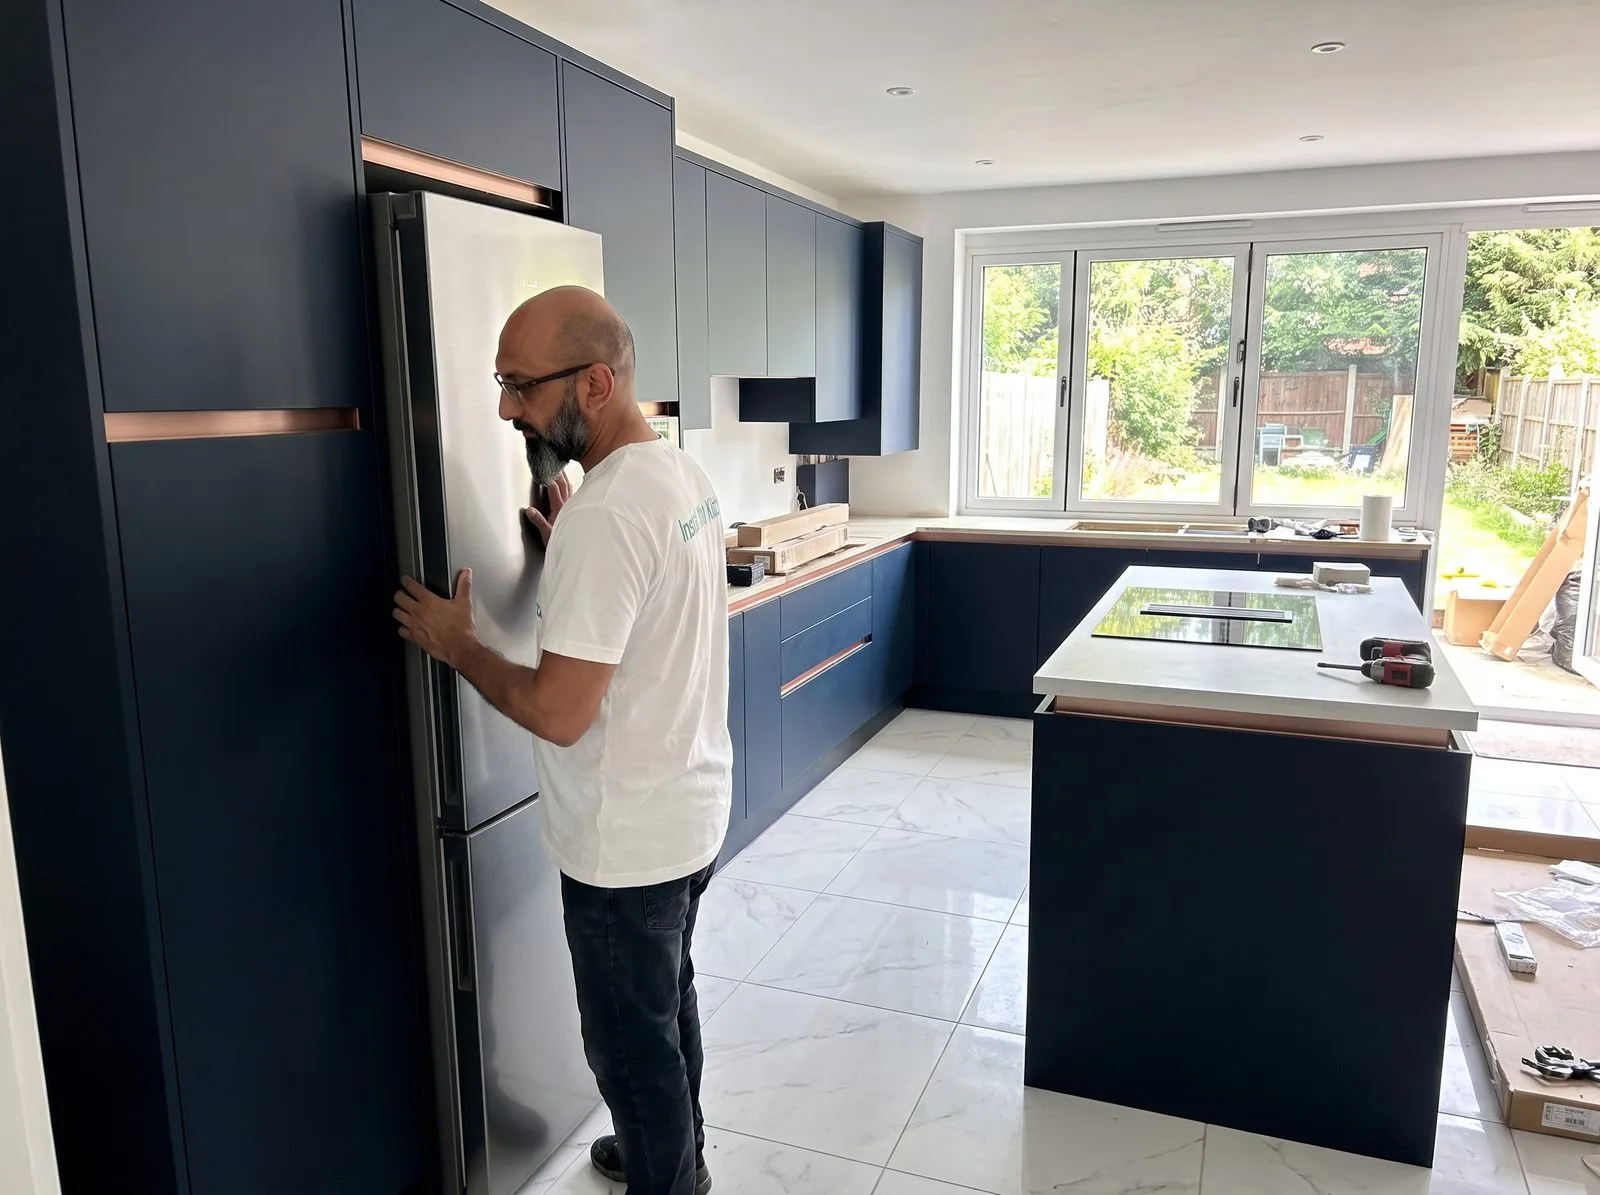
Before you try to fit an integrated fridge freezer or a tall oven housing unit, check for transit support rails. Both typically arrive with temporary support rails fitted inside the cabinet — there to protect the carcass and keep it square in transit and storage. If you don't remove them first, the appliance simply won't fit into the housing, and it's easy to assume the unit is the wrong size when the real problem is a rail that was never meant to still be there on installation day.
Dishwasher
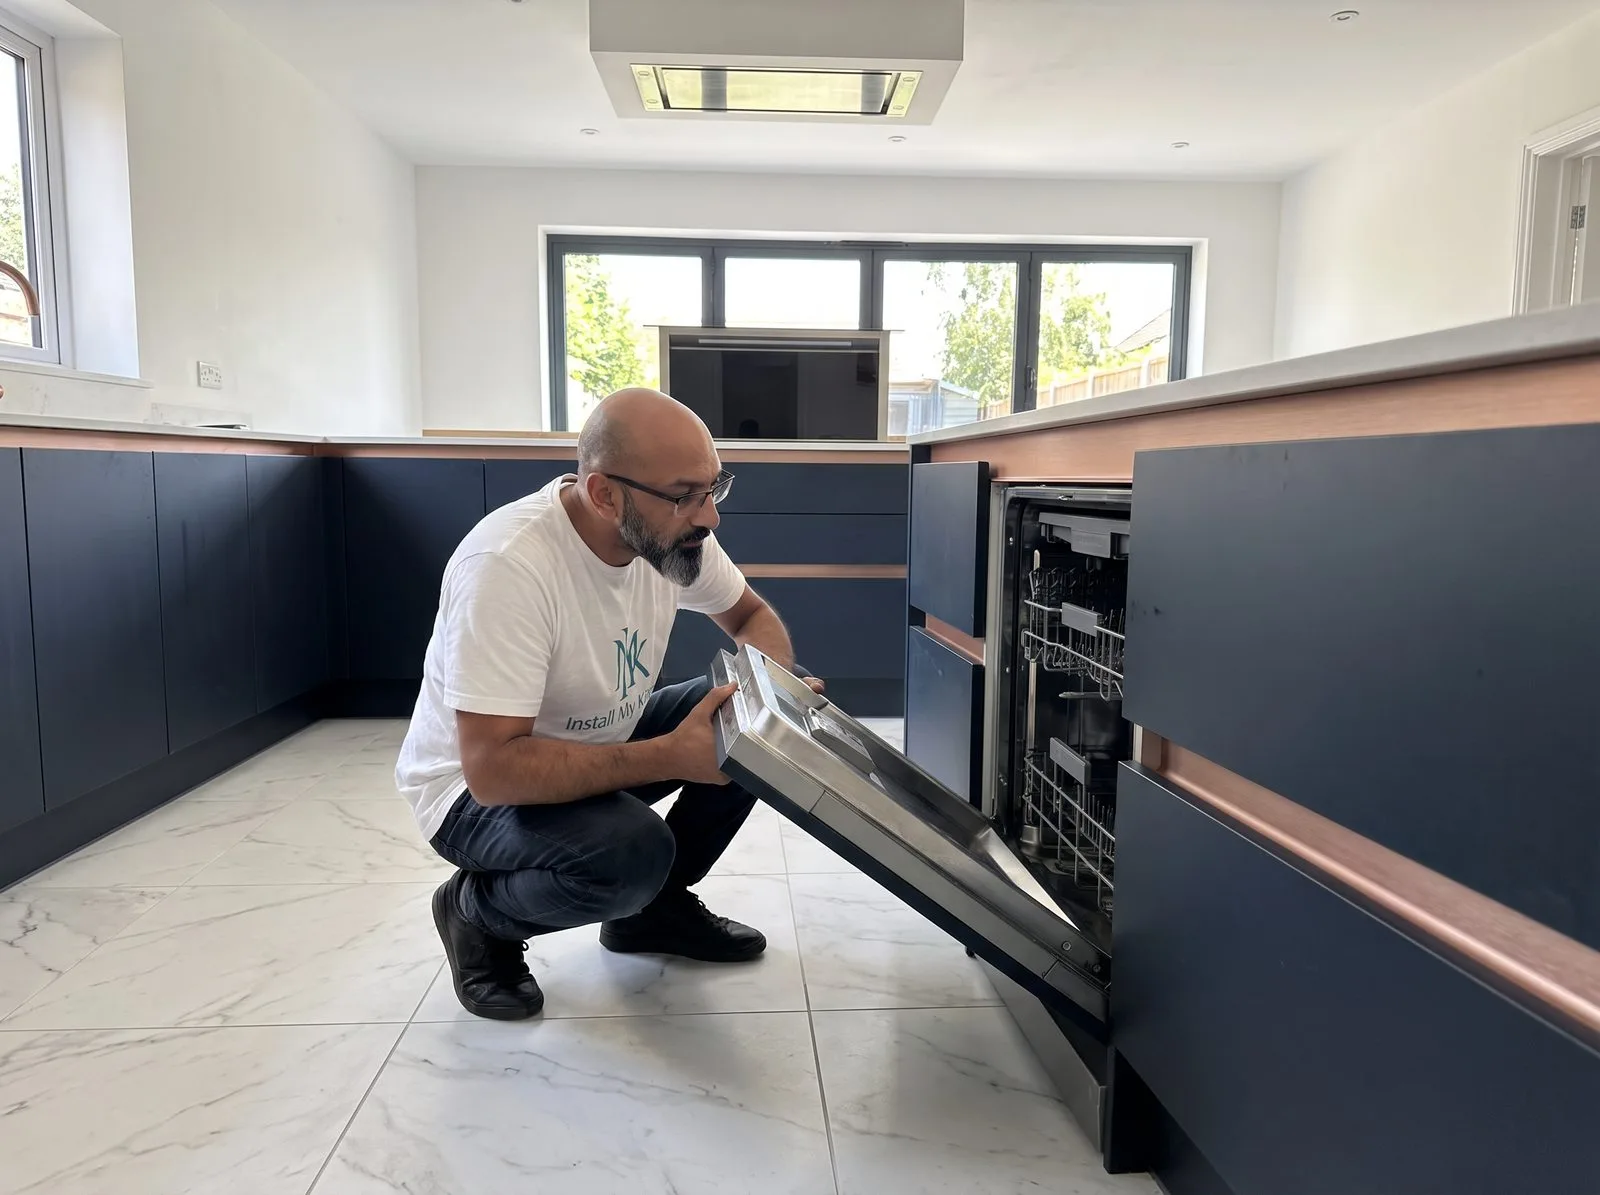
Integrated dishwashers take a full-height door panel matching the kitchen's door style, fixed via an adjustable bracket kit rather than fixed directly — this is what lets you set the panel gap evenly against its neighbours. Water supply is usually cold-fill, though some models accept a hot-fill connection for a modest efficiency gain; waste connects via a spigot into the sink's waste trap or a dedicated standpipe. Fit a non-return valve in the waste hose run if one isn't already built into the appliance's own outlet — without one, water can siphon back into the machine under the wrong drainage conditions. Level the appliance itself precisely before hanging the door panel, since the door's alignment depends entirely on the cabinet sitting true.
Washing Machine
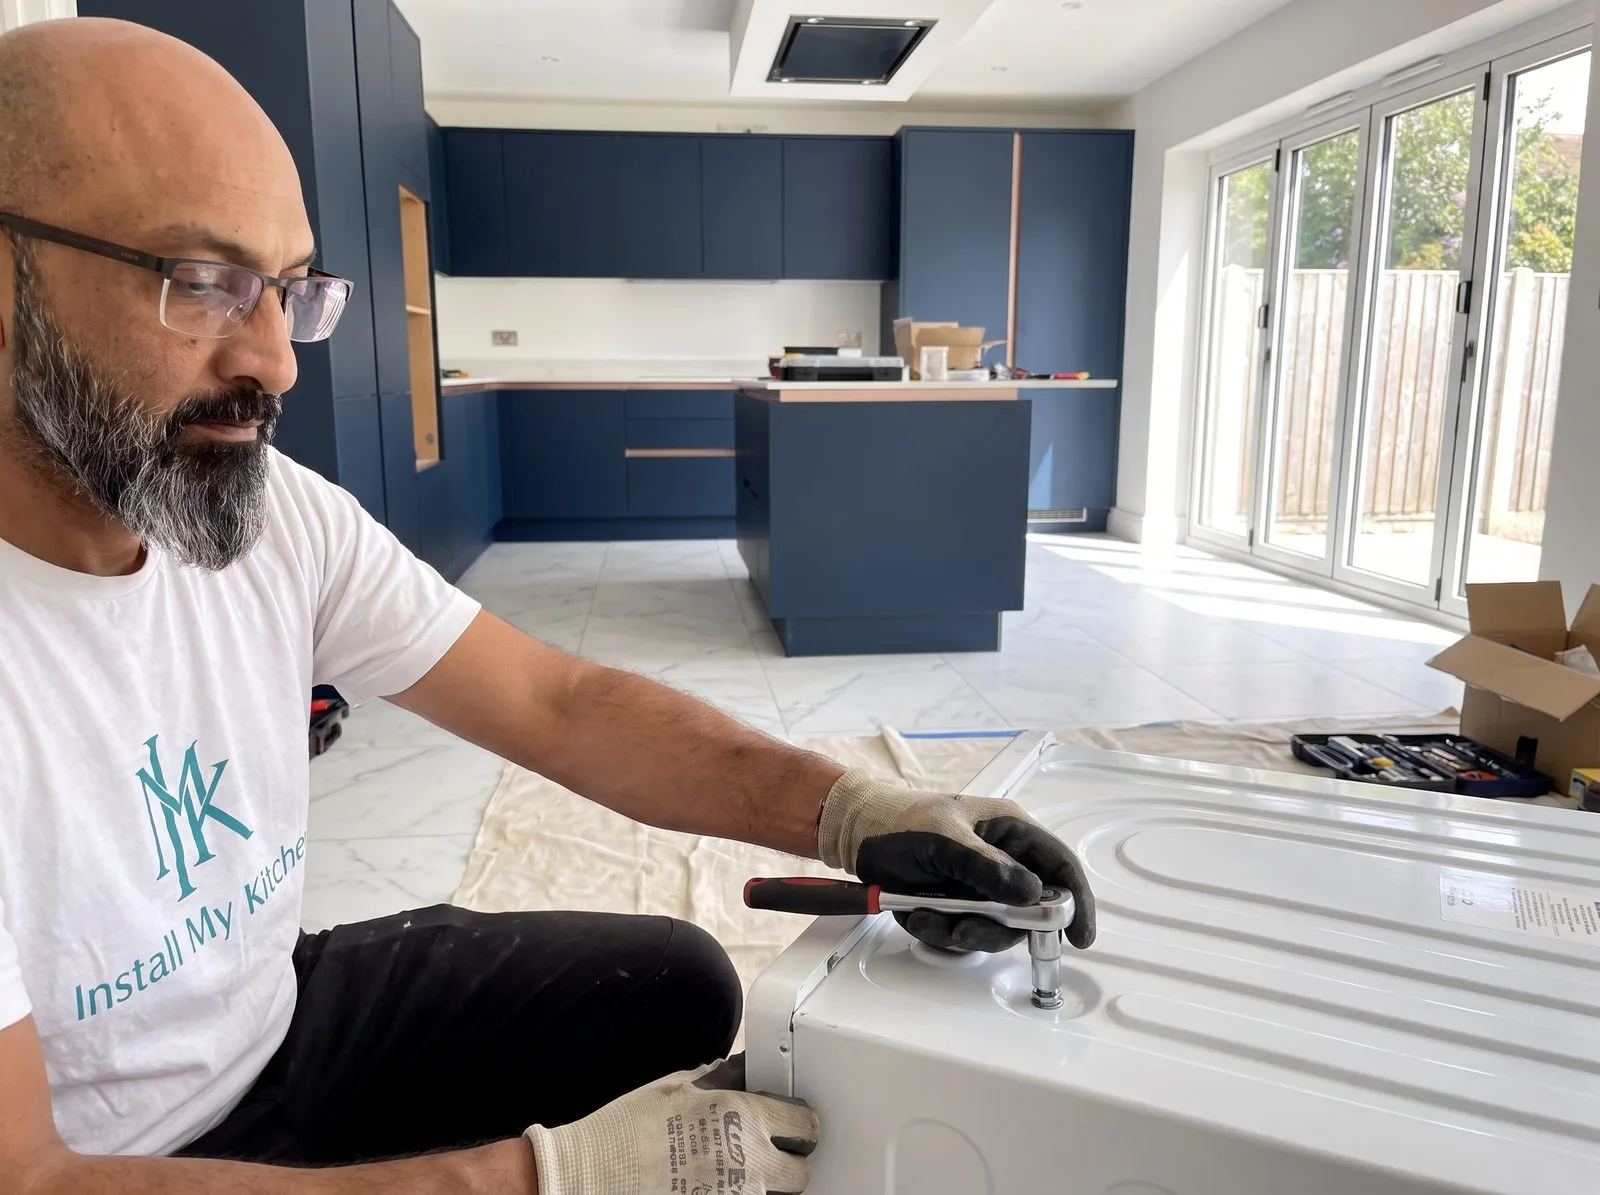
Always remove the transit bolts before installing a washing machine — this is not optional. New machines ship with three or four bolts through the rear panel locking the drum and suspension solid for transport; run the machine with these still in place and it will vibrate violently, bang, and can suffer permanent damage to the drum bearings, on top of voiding the warranty. Remove them (a 10mm socket handles most makes) before it ever goes into its housing, then fit the plastic caps supplied into the resulting holes. Keep the bolts somewhere safe — if the machine is ever moved house, they go back in for transit.
Like the dishwasher, the door panel fixes via an adjustable bracket kit. Water supply is cold-fill, waste runs to a trapped standpipe to stop odours being pulled back up the hose, and the machine's own adjustable feet — not shims — are what you use to get it dead level; an unlevel washing machine is a genuinely common cause of noise and premature wear, quite apart from the door alignment.
Integrated Fridge Freezer
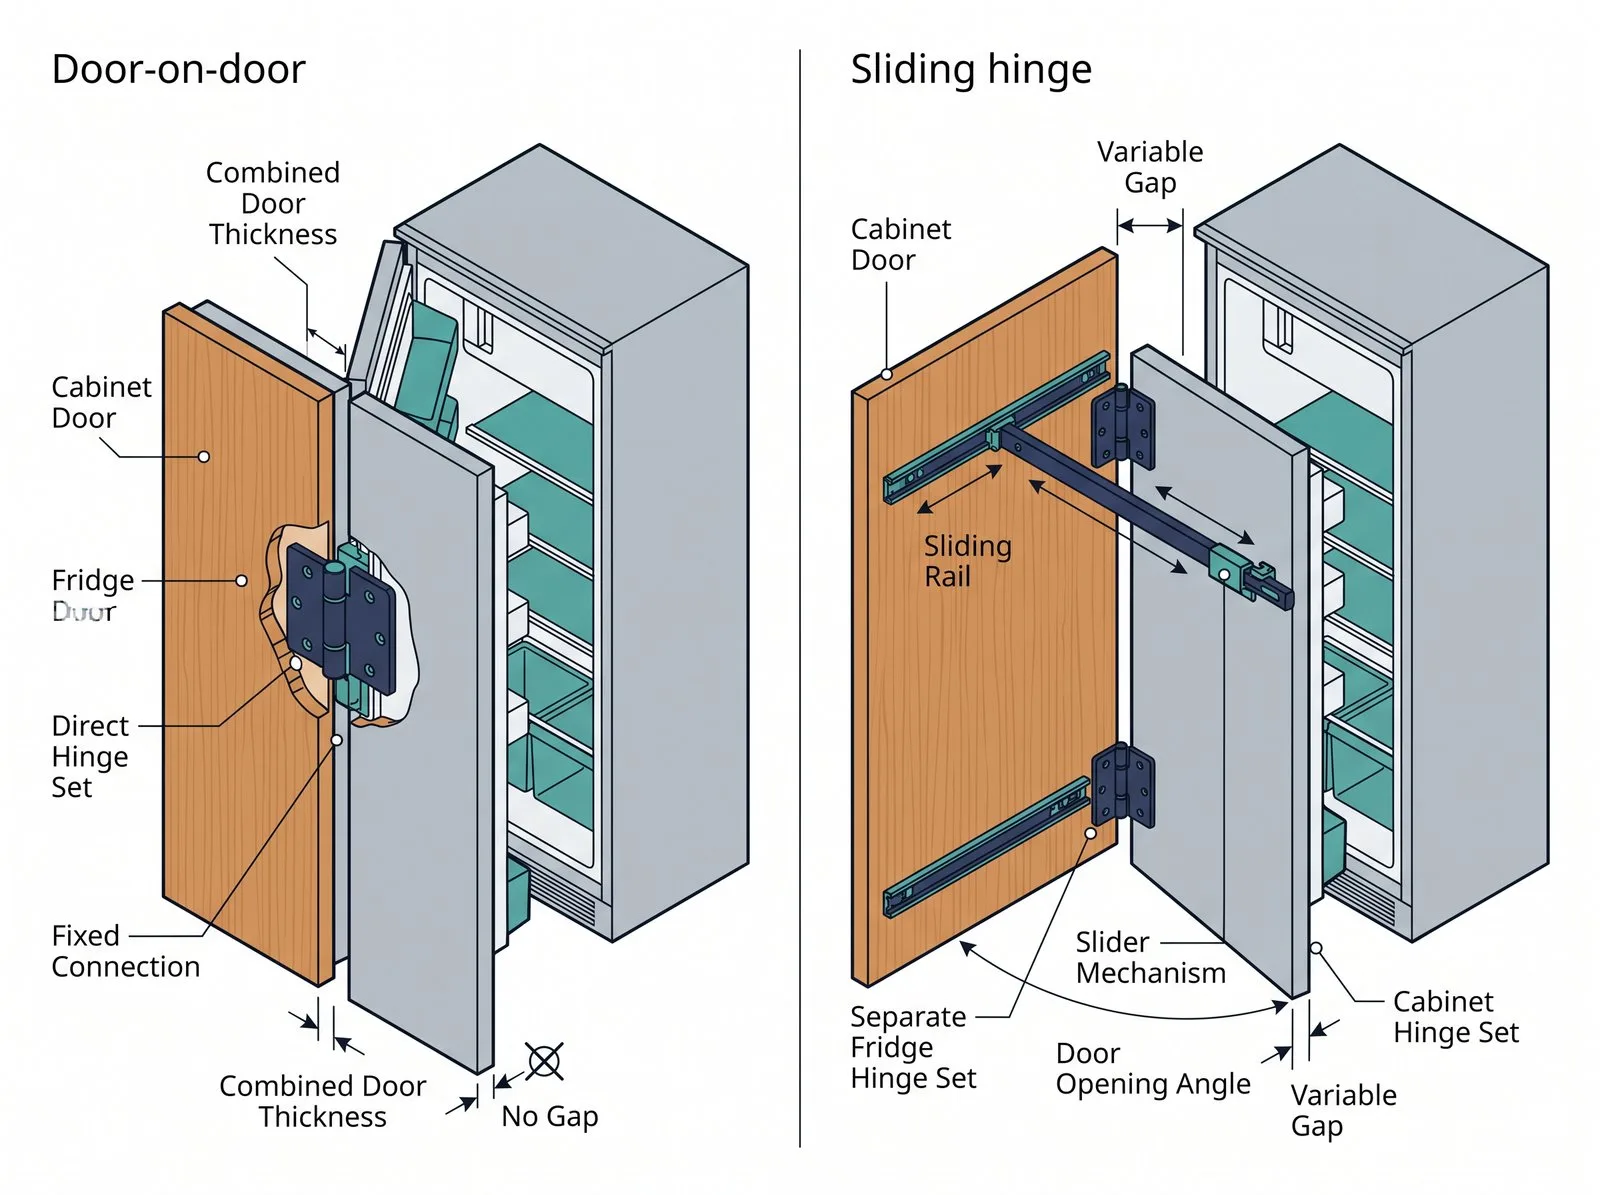
Two distinct hinge systems exist, and the fitting sequence differs between them: a door-on-door system fixes the appliance door directly to the cabinet door through a set of hinges, so the two move as one piece — this is the simpler, more common setup, but leaves very little room for adjustment error. A sliding-hinge system instead runs a rail across the inside of the cabinet door, which the fridge door itself slides along as the cabinet door opens; this uses two separate sets of hinges (one for the furniture door, one for the appliance) and is a genuinely different fitting job, not a variant of the same one. Check which system your specific model uses before you start, and get the appliance level in its housing before touching either.
Ventilation matters more here than on almost any other integrated appliance. A fridge freezer's compressor generates real heat, and a sealed housing with no airflow forces it to work harder, shortening its life and worsening efficiency. The housing needs a genuine ventilation path — typically a grille or gap at both the top and bottom of the cabinet — not just the appliance pushed into a closed box.
Single Oven
Standard built-under single oven housings are sized to the worktop height, giving a cavity of roughly 600mm; most single ovens are 550–580mm deep, which leaves genuine clearance behind the appliance for cabling and airflow — don't build the housing tighter than the manufacturer's stated cavity dimensions to "neaten" it, since that clearance is functional, not cosmetic. Allow at least 35mm of clear space behind the oven, and make sure the cabinet run includes a ventilation gap so heat isn't trapped against the appliance's rear panel. A plug-in oven under roughly 3kW can be connected by the fitter; anything above that, or any model the manufacturer specifies as hardwired, needs the electrician back for second fix.
Double Oven
A full-height double oven needs a tall tower housing — typically an 880–900mm cavity — while a built-under double is shorter, around 700mm, specifically so it still fits beneath the standard worktop line. Whichever you're fitting, the housing shelf carrying the appliance needs to be genuinely solid and dead level: a double oven is heavy, and unlike a single oven there's no forgiving margin if the supporting shelf flexes under the load over time. Double ovens are almost always hardwired rather than plug-in, so build the second-fix electrician visit into your sequence rather than assuming a socket will do.
Integrated Microwave
Establish early which type you actually have, because the housing requirements are completely different. A true built-in microwave is purpose-designed for a specific cavity from the outset, with no additional kit required — it simply fits the dimensions in its own installation instructions. A trim kit, by contrast, is a frame with upper, lower and rear ducting that wraps around a standard countertop or combination microwave to make it look and vent as though it were built in — the ducting is what actually manages the airflow the appliance needs, and it's model-specific, so a trim kit from one microwave won't safely fit another. Confirm which route you're building for before you cut a single housing panel; the two are not interchangeable after the fact.
Induction Hob
A full-size induction hob typically draws somewhere between 3kW and 7.4kW depending on the number of zones and their power settings, and that load needs a dedicated cooker circuit run in 6mm² or 10mm² cable back to a 32A or 40A MCB or RCBO at the consumer unit — not a standard 13A socket, and not shared with anything else. A 45A double-pole isolator switch is required within two metres of the hob, sited so it's accessible but not directly above it. Running this new circuit from the consumer unit is Part P notifiable work. None of these figures are a substitute for the specific hob's own rating plate — confirm the exact circuit requirement against the model actually being fitted before first fix, not from a generic assumption.
Leave a minimum of 300mm clearance between the hob and any tall unit or other combustible surface at the side wherever the layout allows it — this gives comfortable clearance for pan handles as much as anything else. Where the layout genuinely can't accommodate that, some manufacturers permit as little as 50mm to a combustible surface, but only check the specific hob's own installation instructions before relying on that reduced figure; it is not a default to design around.
Gas Hob
Gas hob connection is Gas Safe registered engineer work, full stop — this isn't a stage the kitchen fitter or a general electrician can do. Connection is made either by rigid pipework or, where the manufacturer's instructions specifically permit it, a flexible connector: either a self-sealing plug-in device to BS 669-1 (natural gas) or the correct LPG-rated equivalent, or a pliable corrugated stainless steel tube to BS 7838 or BS EN 15266. Where a corrugated flexible tube is used, the unsupported length between the connection point and the appliance must not exceed 500mm. Not every hob manufacturer permits a flexible connection at all, so check the specific installation instructions rather than assuming, and the Gas Safe engineer will check bonding and earthing of the gas pipework as a normal part of the job.
Extractor
Find the manufacturer's specified duct diameter for your exact hood before buying any ducting — it'll be 100mm, 125mm or 150mm, and 150mm is the modern standard for a hood with real extraction performance. Never reduce the diameter below what's specified to make a tighter run easier; a narrower duct chokes the airflow, makes the extractor dramatically noisier as it fights the restriction, and can void the manufacturer's warranty. Keep the run as short and as straight as possible — every 90° bend adds resistance roughly equivalent to another metre of straight ducting — and fit a non-return (backdraught) valve at the external termination to stop cold air and odours being drawn back in when the extractor isn't running. A recirculating (filter) hood needs no ducting at all, but relies on a carbon filter that requires periodic replacement, and it returns filtered air to the room rather than removing it — a genuinely different proposition from a ducted extractor, not just an installation shortcut.
Check the manufacturer's specified mounting height above the hob too — for most extractors this sits somewhere in the region of 650–750mm above the hob surface, close enough to actually capture steam and cooking fumes but far enough to be safe and practical to use, though the exact figure varies by model and must be confirmed against that specific hood's own instructions rather than assumed.
Tumble Dryer
Three types exist and the choice affects what you need to build for it. A vented dryer needs a hose run to an external wall — simplest and cheapest, but only workable if a duct route actually exists from the appliance's position. A condenser dryer collects moisture in a removable reservoir or drains it away, needing no external venting at all, which is what makes it the practical choice for a dryer built into an island or an internal run with no access to an outside wall. A heat pump dryer is a more efficient variant of the condenser type — also ventless, also usable anywhere on the plumbing and electrics alone. If you're integrating a standard freestanding condenser dryer behind a cabinet front rather than fitting a genuine built-in model, check it actually has adequate clearance and airflow for that installation — a disguised freestanding appliance and a true built-in unit have different ventilation needs, even though a condenser vent kit box exists to help hide a freestanding unit's exhaust if required.
Fitting and Alignment
Whichever appliance you're fitting, the same principle applies: fit it, level it, check its door front sits flush and square with the surrounding cabinet doors, and leave final trimming and alignment for the snagging pass at the very end. Appliances get nudged during worktop fitting and cabinet door hanging, so a perfect alignment now isn't guaranteed to still be perfect two stages later.
Worktops & Calculating the Right Height
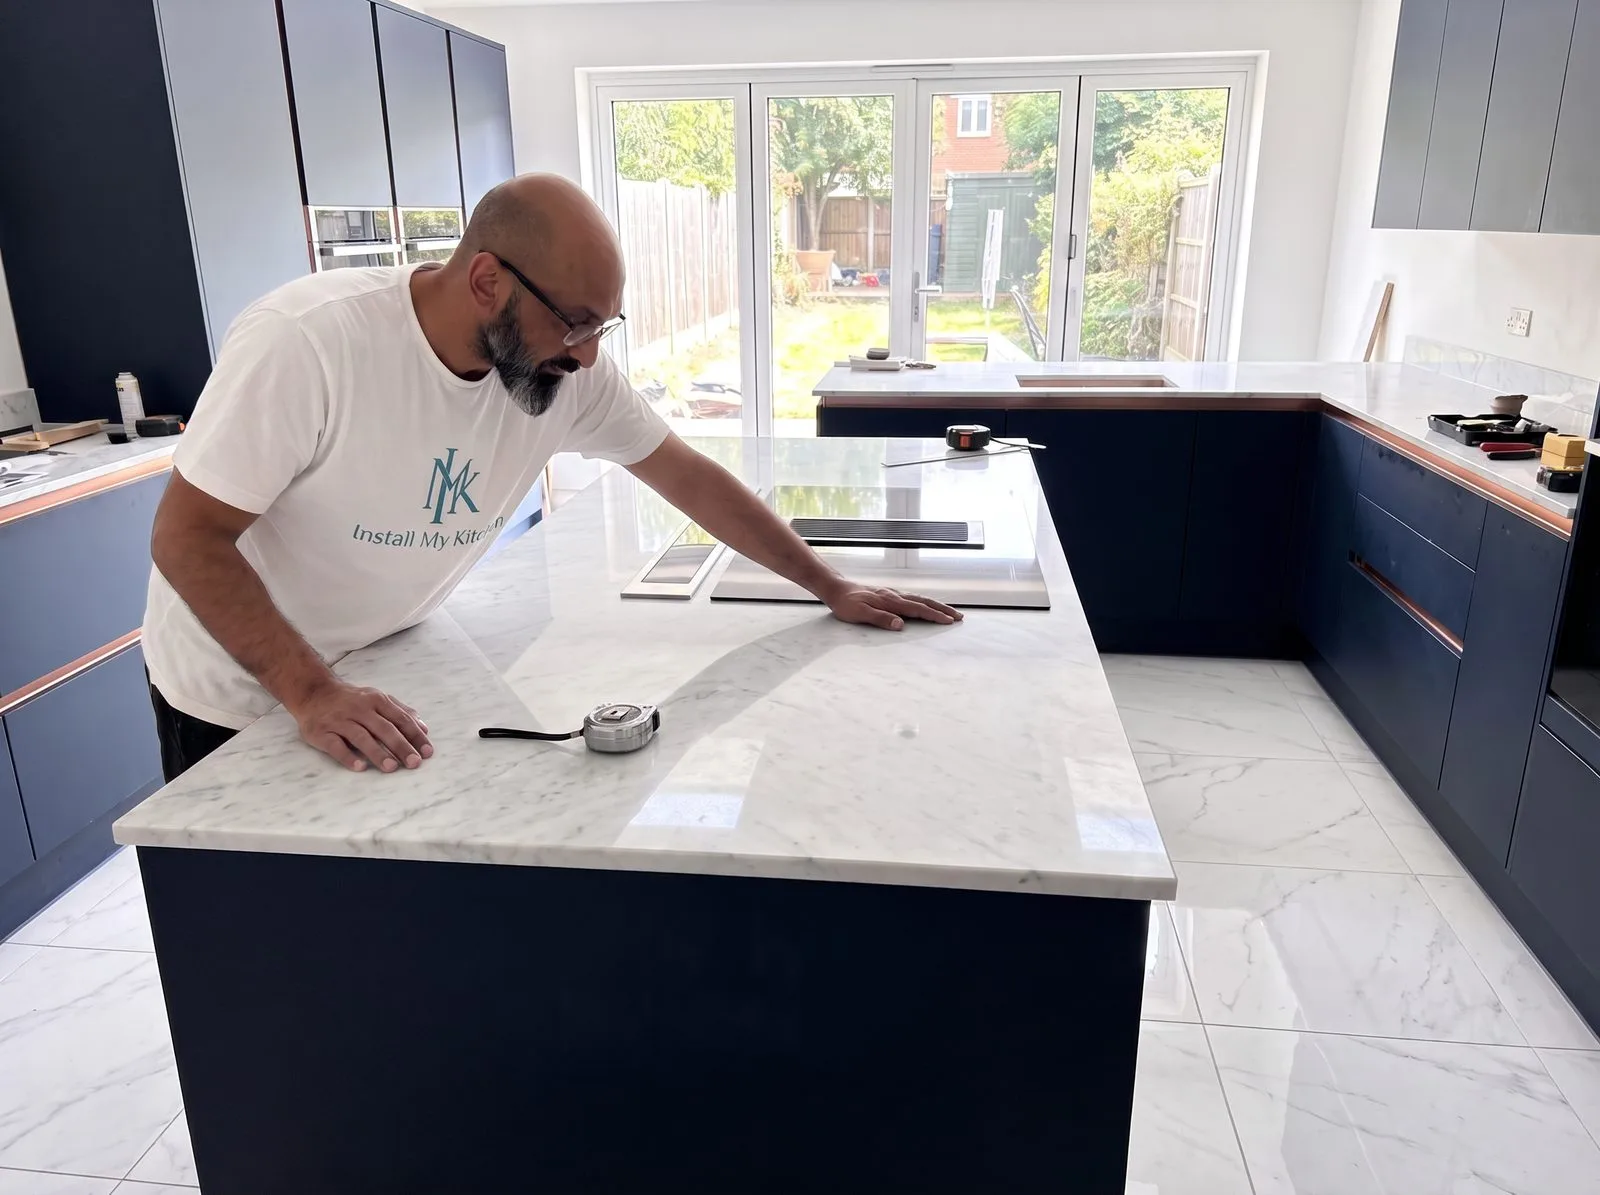
Once every carcass is fixed, level and true, bring the templater in — not before, because a template taken against carcasses that later shift is a worktop that won't fit. On this kitchen there are three separate worktop measurements to take, not one: the main perimeter run, the island's main (hob and prep) surface, and the lower seating section, which is a different height and a genuinely different, contrasting material. We're deliberately not specifying a worktop material here — that's a conversation to have directly with a reputable worktop supplier, who can advise on the right material for your budget, the specific span and cut-outs involved, and how the contrasting seating-area top should be specified alongside the main run so the two are templated and fitted as a coordinated pair, not as two unrelated orders.
The standard 880mm reference line is a sound default, but it isn't universal, and a kitchen used daily by one household benefits from being set to the people actually using it. The trade method for this is the elbow rule: stand upright in bare feet, relax your shoulders, bend your forearm to a right angle, and measure from the floor to the underside of your elbow. Subtract roughly 100mm from that figure, and you have a worktop height that sits comfortably below elbow height for genuinely comfortable everyday use — for most adults this lands close to, but not always exactly at, the standard 880–900mm figure. Where a household is notably tall, short, or includes a primary cook whose comfort matters more than the standard figure, adjust the leg heights earlier in the carcass stage to suit rather than defaulting blindly.
Confirm the sink and tap position against the plan's centreline mark at template stage, not from the original drawing — the templater is measuring the room as it actually exists, and this is your last chance to catch a discrepancy before a stone or solid worktop is cut.
Jointing Worktops (Laminate & Solid Timber)
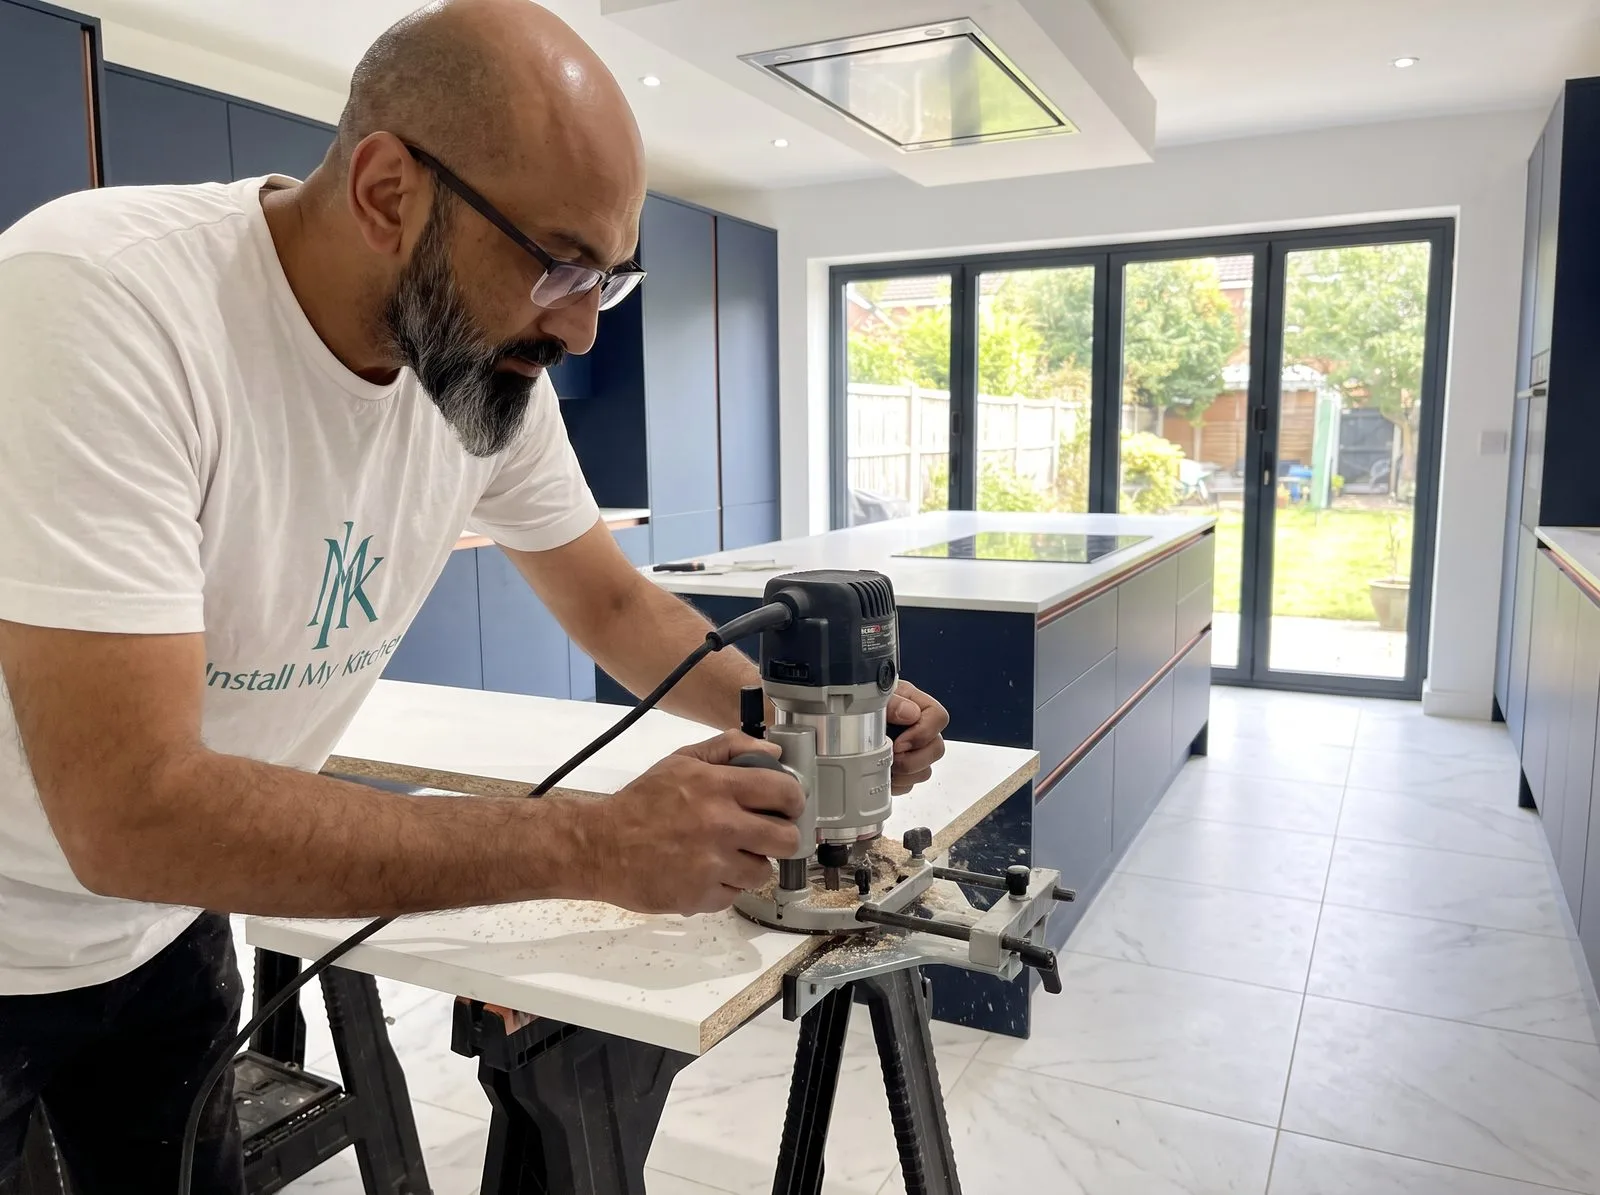
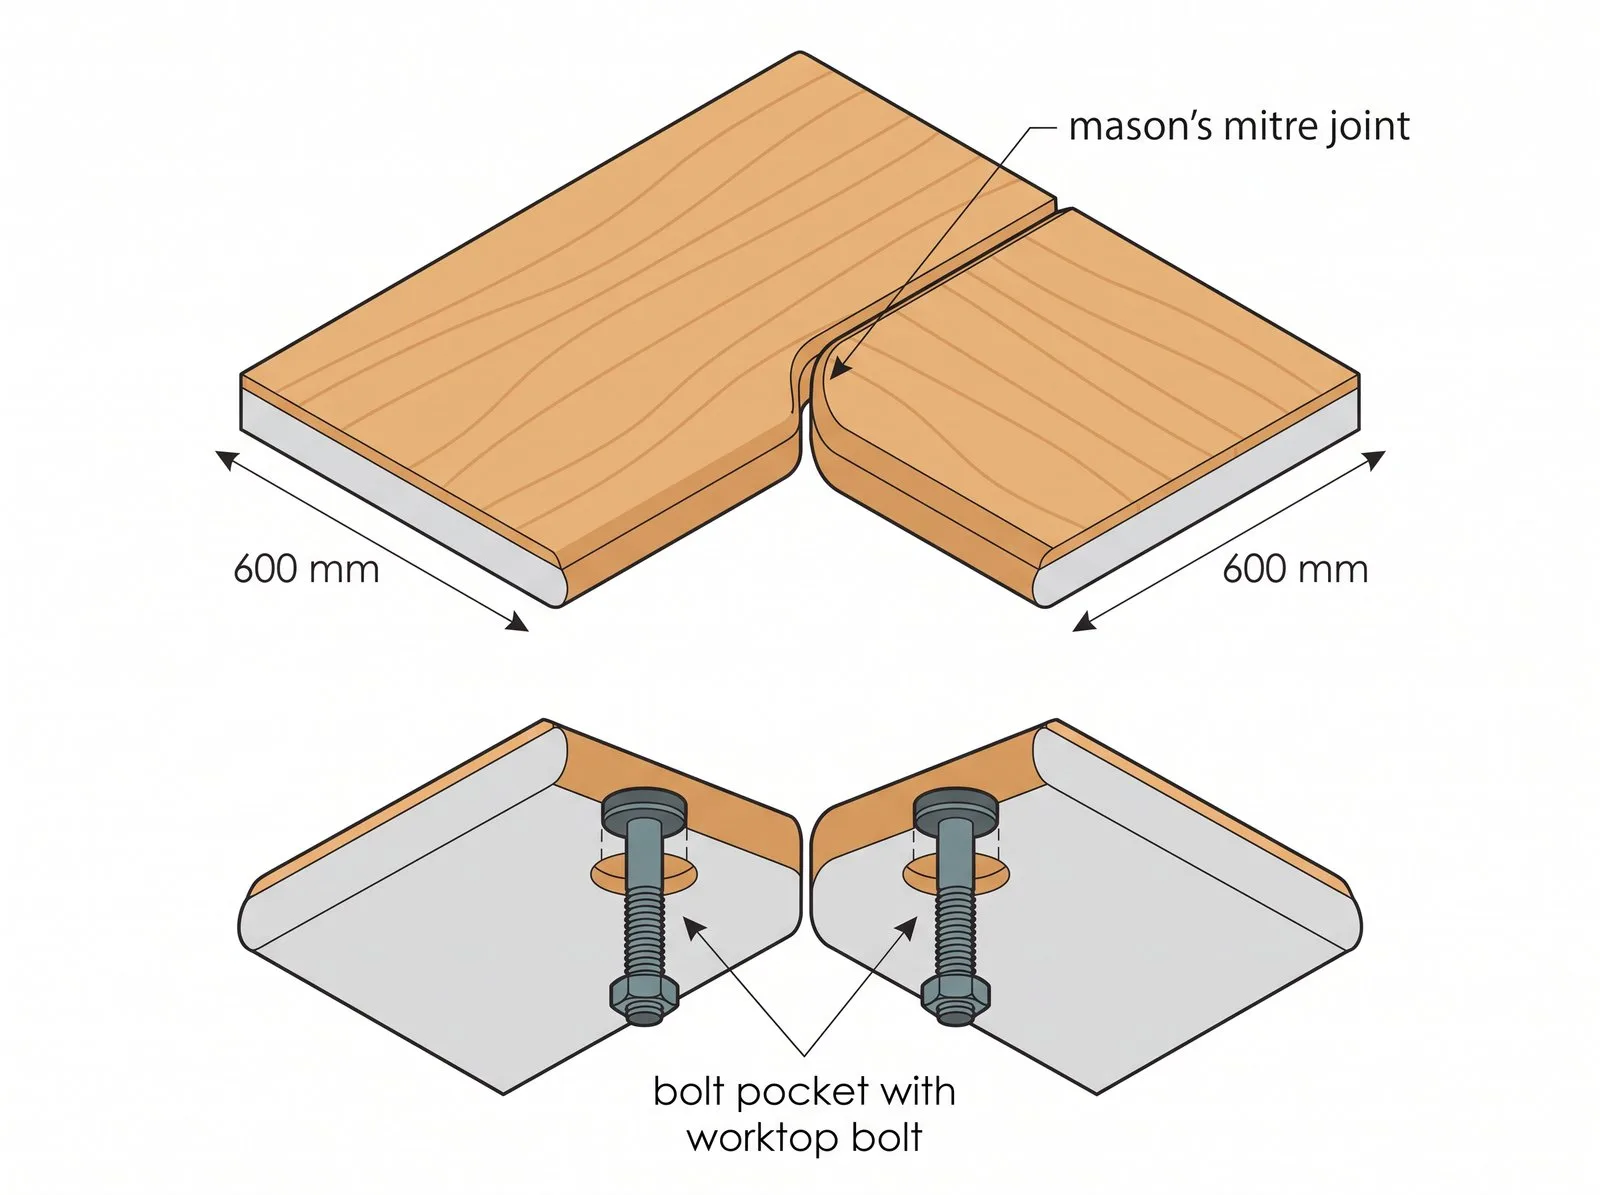
Stone and solid-surface worktops are jointed by the fabricator as part of their own process, but laminate and solid timber worktops — including, potentially, the run joining this kitchen's main worktop around a corner — are jointed on site. The standard method for a laminate corner joint is a mason's mitre, cut with a router and a dedicated worktop jointing jig rather than freehand.
- Set the two worktop sections into the jointing jig according to whether you're cutting the female (concave) or male (convex) half of the joint — the jig has separate, clearly marked locations for each.
- Fit a router with a half-inch (12.7mm shank) straight cutter and the jig's specified guide bush, and rout in progressive passes rather than trying to cut full depth in one pass — taking the full depth in one go risks tear-out and an inaccurate profile. Feed the router in the direction the jig and cutter rotation call for (check the jig's own instructions) rather than whichever direction feels natural — feeding against the correct direction lets the cutter grab and pull the router across the work uncontrolled, which ruins the cut and is a genuine safety risk with a tool this powerful. If you haven't used a router under a jig like this before, practise the exact sequence on an offcut before touching the actual worktop.
- Cut the worktop bolt pockets on the underside using the jig's bolt-hole guide, sized to suit standard worktop jointing bolts (typically around 150mm bolts, with a recess depth suited to the worktop thickness — deeper for a 40mm top than a 30mm one).
- Dry-fit the two halves before committing to adhesive — check for light gaps along the full joint line, and refine the cut if you find any.
- Clean both joint faces with a solvent wipe to remove dust and cutting residue, then apply a colour-matched worktop jointing sealant along the top edge of the joint face — this is what makes the finished joint watertight, not just tight-fitting.
- Bring the two halves together and tighten the worktop bolts evenly, a little at a time on each bolt in turn rather than fully tightening one before moving to the next, until a thin bead of sealant squeezes out along the full seam.
- Wipe off the excess sealant immediately with the solvent and a clean, lint-free cloth — once it's cured, removing it cleanly from a laminate or lacquered surface is far harder.
Once the worktops are fitted, seal every joint properly (especially around the sink cut-out, which sees the most water exposure of any joint in the kitchen) and fit upstands before appliances go back against the wall.
Handleless Doors & the Recessed Rail
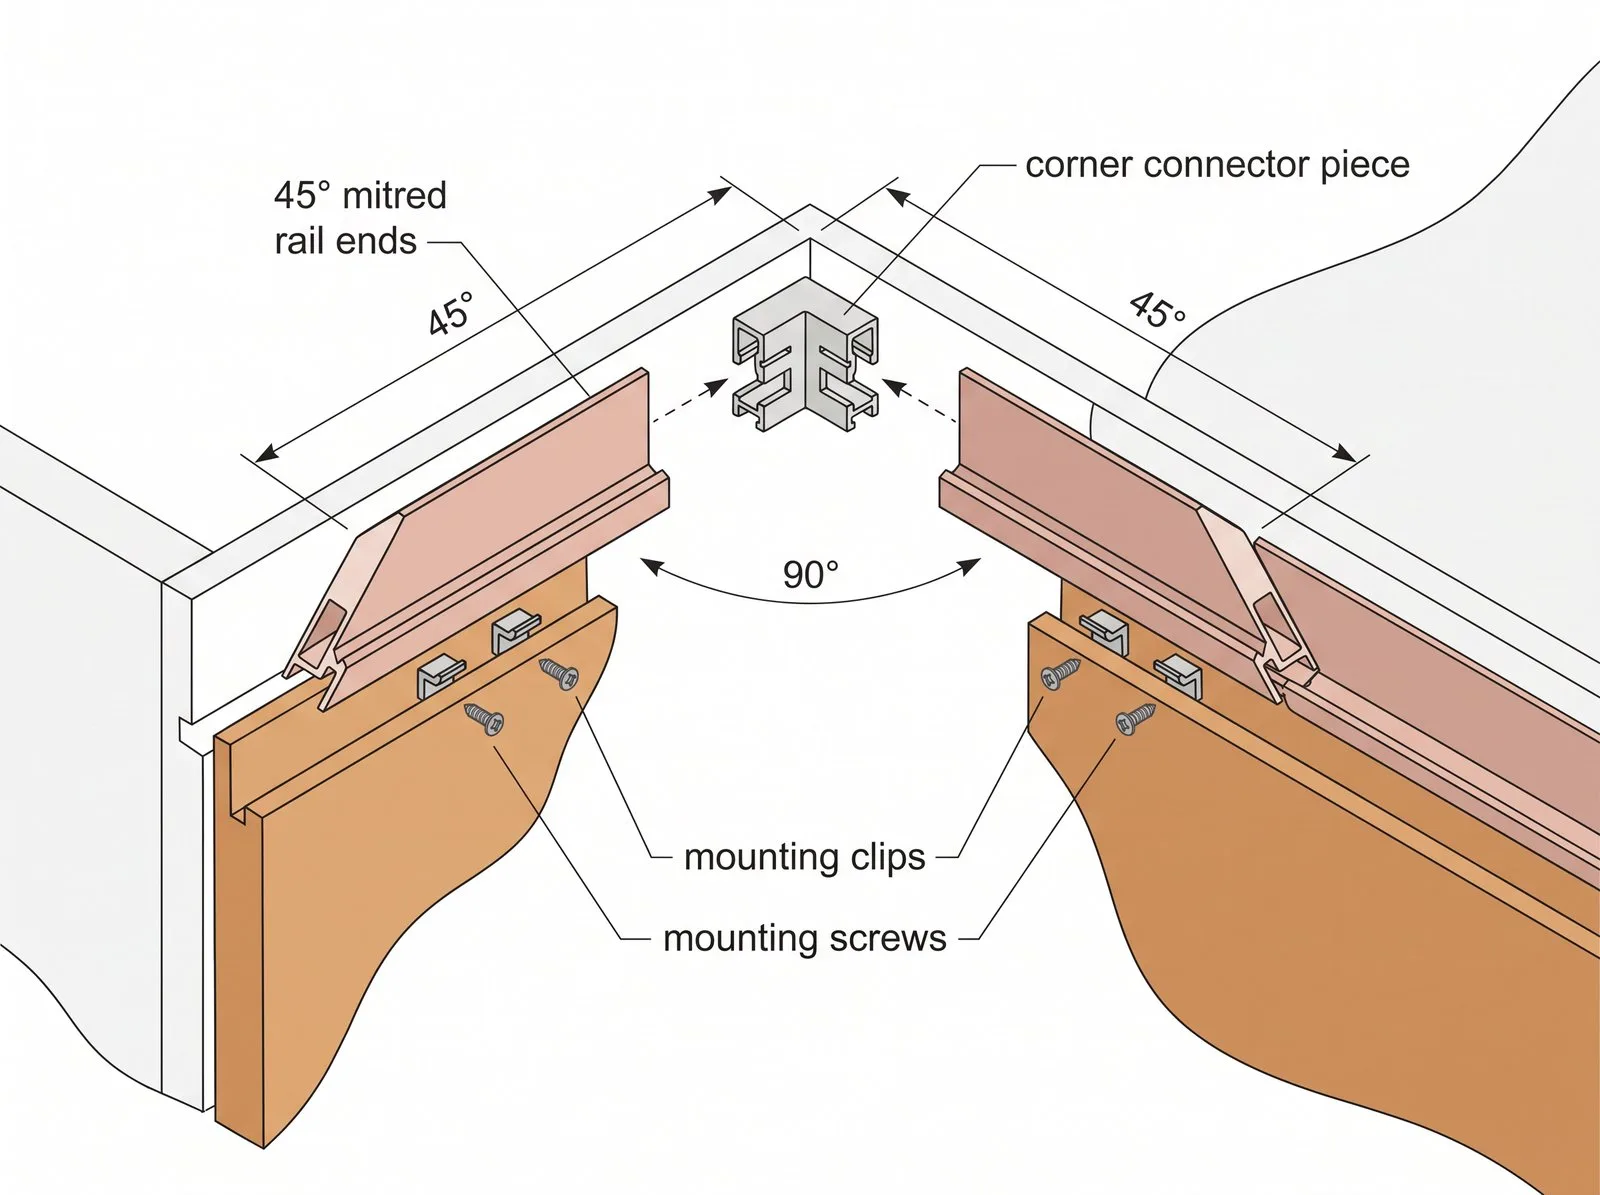
A true handleless kitchen using a recessed rail system — rose gold, in this case — is fitted in a different order to a standard handled kitchen, and getting that order wrong is expensive to fix. The rail goes on first, before a single door is hung, because every door in that run registers its position off the rail. A rail that's fractionally out of true doesn't just look wrong itself — every door hung against it inherits the same error, compounding down the run.
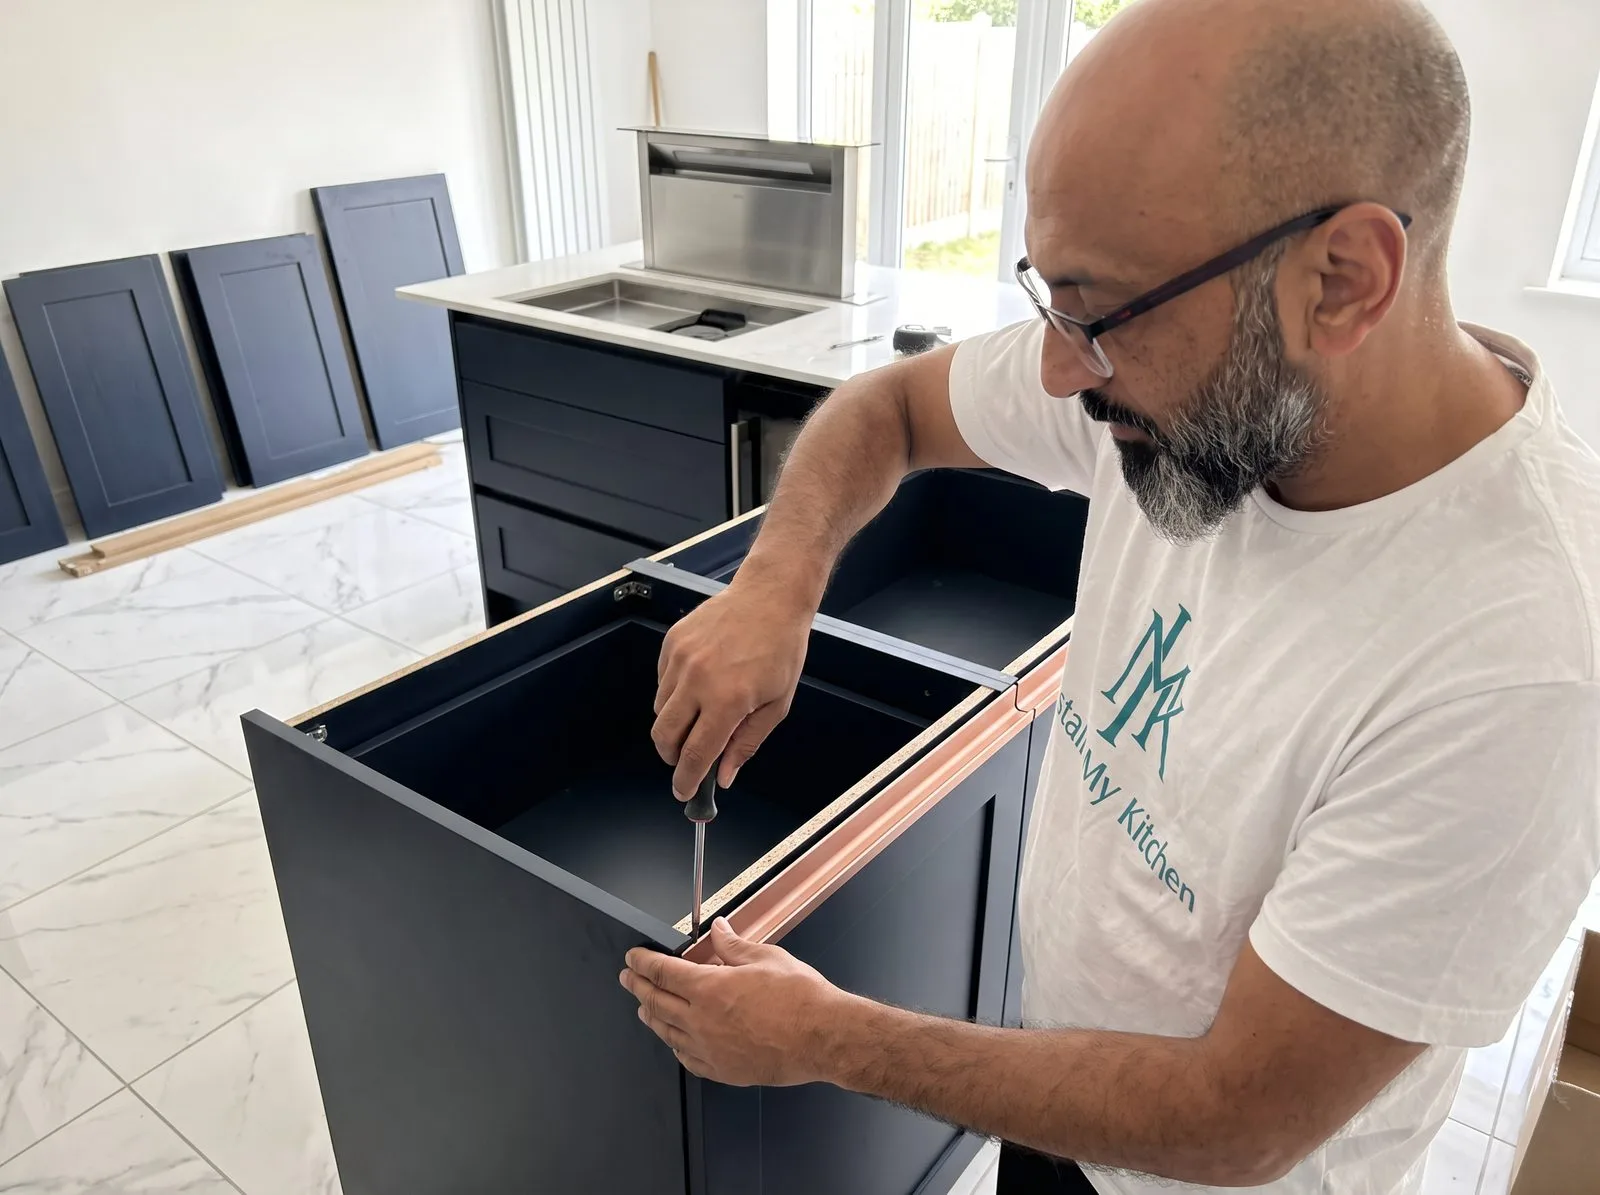
Cut straight rail lengths to size with a fine-tooth blade suited to aluminium (a hacksaw with an appropriate blade, or a chop saw fitted with an aluminium-cutting blade rather than a wood blade), and deburr every cut end afterwards — a burred aluminium edge will telegraph through as a rough spot the full length of the rail and can snag on the door channel. Internal and external corners are not mitred and glued the way cornice is: rail systems like this use manufacturer-supplied corner joiner pieces, shaped to interlock with the rail profile, so the corner is a proper factory-matched joint rather than a site-cut mitre — check the specific system's own instructions for which joiner piece goes where, since this varies between manufacturers.
Fit and align the rail section by section, checking it's dead straight and at a consistent height along its full length before fixing it permanently — small errors are easy to correct now and very difficult to correct once eight or ten doors are hung against a rail that turns out to be slightly off. Only once the rail for a given run is confirmed straight should doors go on.
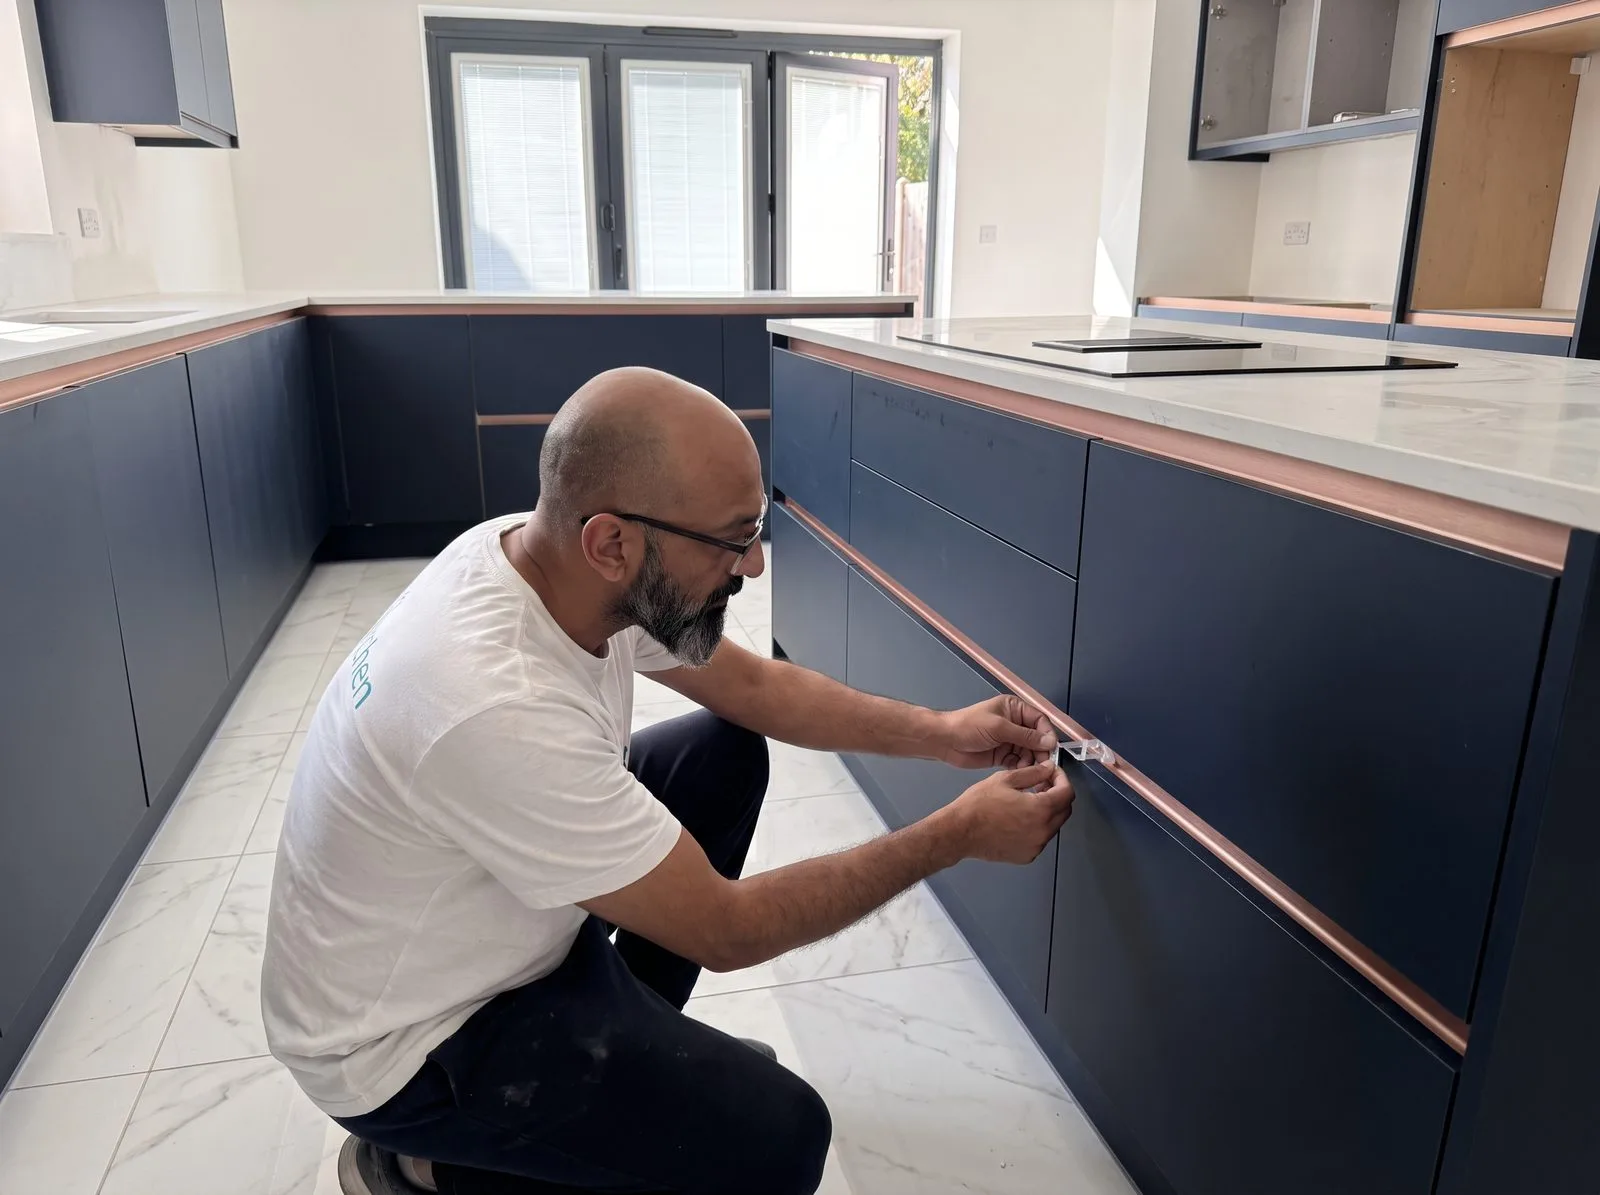
Hang doors working from one end of each run to the other, setting gaps evenly as you go rather than hanging every door first and adjusting gaps afterwards — consistent 2–3mm gaps between doors, checked with a set of spacers rather than by eye, are what make a handleless kitchen look genuinely considered rather than approximately even. This is also the point to check every drawer front sits flush with its neighbouring door fronts, since a handleless system has nothing — no handle, no visible fixing — to distract the eye from even a small misalignment.
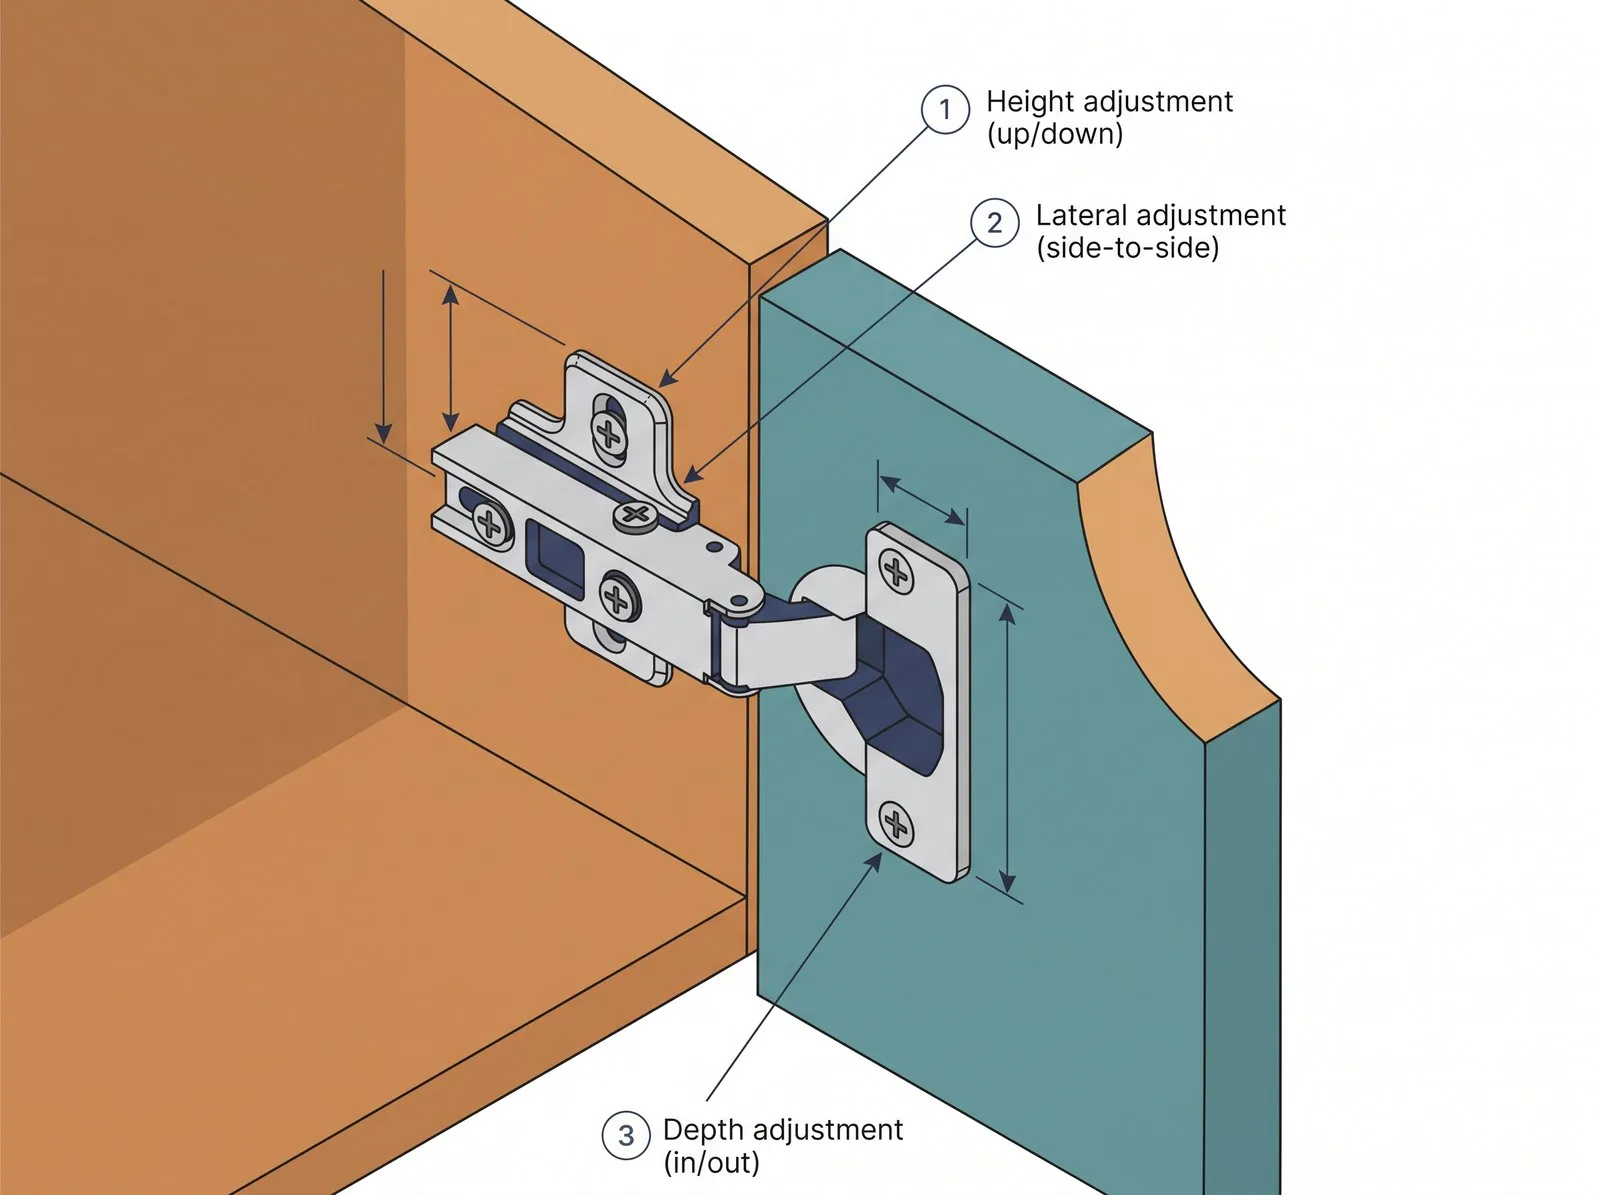
How Hinge & Drawer Front Adjustment Actually Works
Modern concealed cabinet hinges and drawer front fixings all adjust in three directions, and knowing which screw does what turns "the gaps aren't quite even" from a guessing game into a five-minute fix.
- Hinge height (up/down): loosen the screws fixing the hinge's mounting plate to the carcass, slide the door up or down to the position you need, then re-tighten.
- Hinge side-to-side: a screw on the hinge arm itself moves the door left or right relative to the carcass — turning it one way pulls the door in, the other way pushes it out, in small increments.
- Hinge depth (in/out from the carcass face): a separate screw, usually at the rear of the hinge, moves the whole door closer to or further from the cabinet face — this is what you adjust if a door sits proud or recessed compared to its neighbours rather than just off to one side.
- Drawer fronts use their own adjusters, typically hidden behind small cover caps on the inside of the drawer box: one adjuster tilts the front, one shifts it side to side, and one moves it up or down — the exact mechanism varies slightly by manufacturer (Blum and Hettich systems are the two most common), so check which system your drawers use before assuming the adjustment points.
Work to a single consistent target gap across the whole kitchen — commonly around 3mm — and check it with spacers rather than eye alone, since even a well-trained eye struggles to judge a half-millimetre difference in isolation, but it's obvious once two doors are sitting side by side.
Glass Cabinets & Lighting
Glass-fronted cabinets with internal lighting get wired and tested at this stage, checking the light genuinely illuminates the shelving evenly rather than creating hot spots or shadowed corners — reposition the fitting now if it doesn't, since a glass door makes any lighting fault immediately visible in a way a solid door never would.
Run the continuous LED strip under the back wall units as a single, unbroken line rather than a series of shorter sections — the joins between separate LED runs are exactly what create the visible “puck light” hotspots this kind of continuous lighting is meant to avoid. Leave island pendants until last, once the ceiling above them is fully painted and finished — hanging a pendant early just means working around it, and risking marking it, for every stage that follows.

Finishing, Snagging & Final Shots
Run a genuine snagging checklist before calling the job finished, not a casual walk-through. Work along the kitchen in a fixed order — one end of the base run to the other, then wall units, then tall units, then appliances, then the finishing details — rather than jumping around, since a systematic pass is what actually catches everything.
- Every door and drawer gap is even along its full run, checked with spacers, not just by eye.
- Every drawer opens and closes smoothly, returns fully under its own soft-close if fitted, and doesn't catch or feel stiff.
- Every appliance door front sits flush with its neighbouring cabinet doors.
- Every hinge and drawer adjuster has actually been tightened after final adjustment — a door that was correctly aligned but left on loose adjustment screws will drift out of position within days.
- Worktop joints are sealed, and the sink cut-out in particular shows no gaps or bubbles in the seal.
- Every socket, switch and spotlight actually works — test each one individually rather than assuming a working light means the whole circuit is fine.
- The extractor and hob both function correctly on their dedicated circuits, and the isolator switches are accessible and correctly labelled if more than one exists in the kitchen.
- Every wall cabinet is genuinely fixed at all its fixing points, not just hanging on the wall plate — give each one a firm push test.
- Plinths sit flush to the floor and to each other with no visible gaps, and don't flex or rattle underfoot.
- Silicone beads (worktop-to-wall, around the sink, around the hob if relevant) are neat, fully adhered, and free of gaps or air bubbles.
For anything you find, note down the specific location and the exact nature of the problem — "third base unit door from the left on the window wall, bottom corner sits proud" is something you can actually act on; "some doors look a bit off" isn't. A proper snag list, worked through methodically and then re-checked after a week or two of normal daily use (doors and drawers behave differently under real, repeated use than they do on a calm walkthrough the day they were fitted), is what separates a kitchen that looks finished from one that actually is.
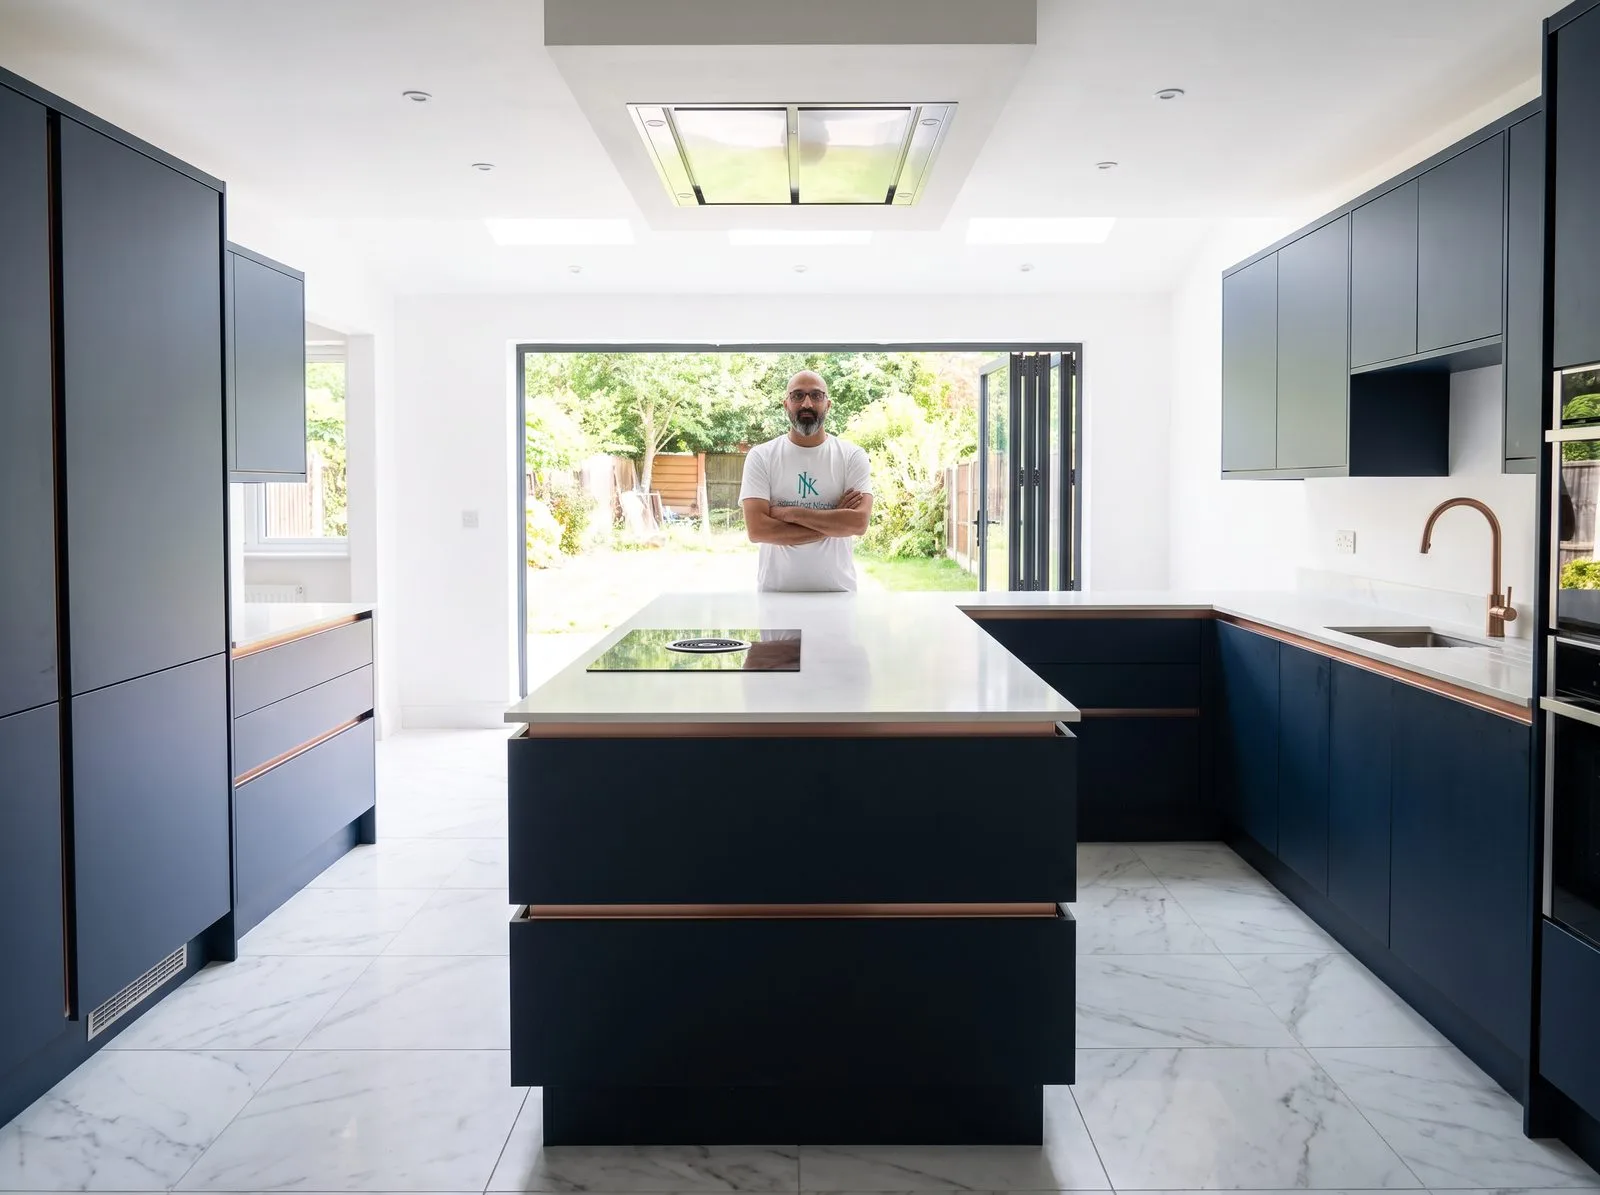
Seal around the worktop-to-wall junction and any other exposed joints, then do a full clean-down — sawdust and adhesive residue in the corners of a “finished” kitchen undermine the whole result. Only then take the styled final shots: bifold doors open, natural light flooding in, the kitchen photographed as it's actually meant to be lived in, not as a construction site with the tools tidied away.
A Real Note on DIY vs Professional Installation
After 25 years of doing this, the single habit that prevents more expensive mistakes than any tool or technique is simple: always double-check that everything lines up before you cut or drill anything. Check it, then check it again, then check it a third time. Dry-fit components before committing to a cut or a fixing wherever you possibly can — it costs you a few minutes and it catches the errors that a single confident measurement won't.
If you're genuinely unsure about any stage in this guide — the marking-out, a corner unit, the electrics — the honest answer is to get a professional survey done, or have an installer come out and mark the room up for you even if you're planning to fit the rest yourself. That's a normal, sensible thing to do, not an admission of defeat.
And if you don't already own most of the tools listed at the top of this guide, that's a genuine signal that a professional installation is the better call — not because the techniques here are complicated, but because the margin for error on a kitchen is small and expensive to get wrong. If you do go down that route, vet whoever you hire properly. A lot of people will tell you they can fit a kitchen. Not all of them actually can, and the ones who can't rarely find out until you're the one living with the result.
Related Pages
- Book a survey £195 pre-installation survey, credited back on booking.
- Working with Wren, Howdens & Magnet What to expect using an independent fitter with a major retailer kitchen.
- Kitchen worktop guide Materials, costs and the templating process explained.
- Kitchen appliance installation guide What needs an electrician, a plumber, or the fitter.
- The kitchen installation survey What a surveyor checks before any work begins.
- All kitchen installation questions Straight answers to common kitchen fitting questions.
Rather Have a Professional Handle It?
Book a pre-installation survey from £195 — credited back in full when you proceed. Covering Coventry, Warwickshire and Berkshire.